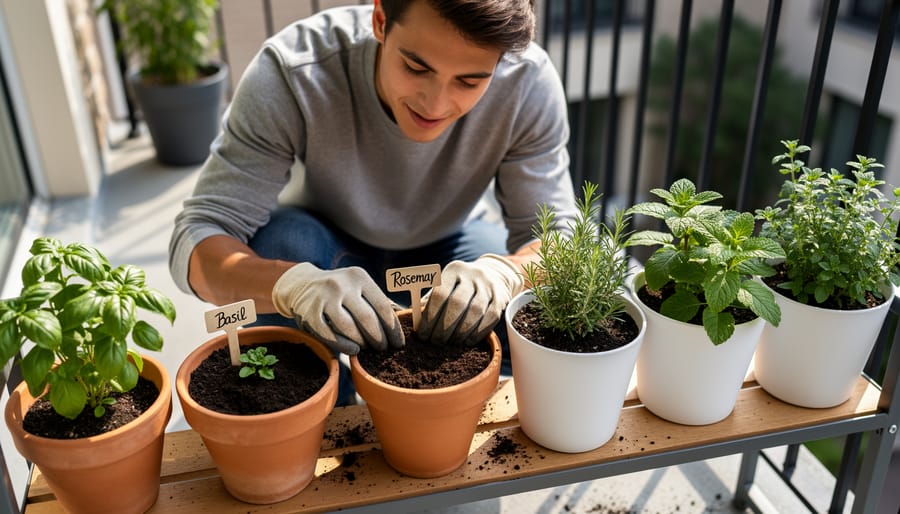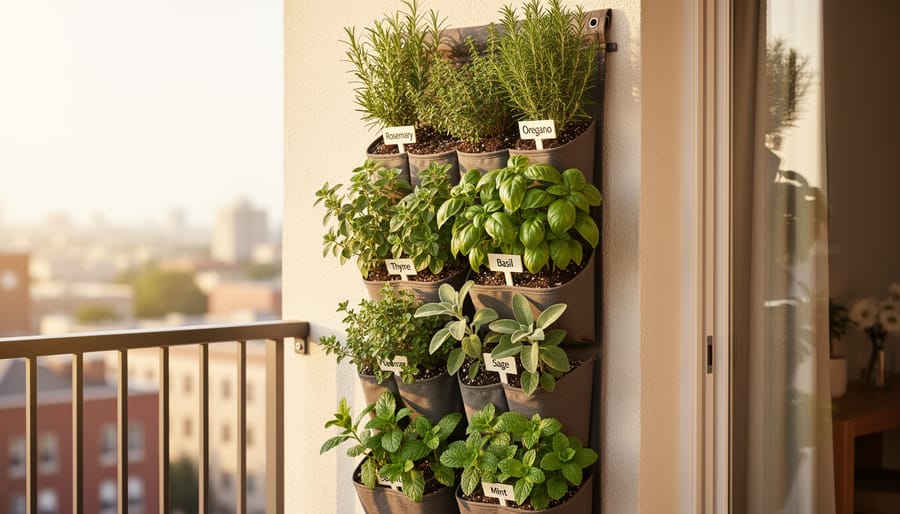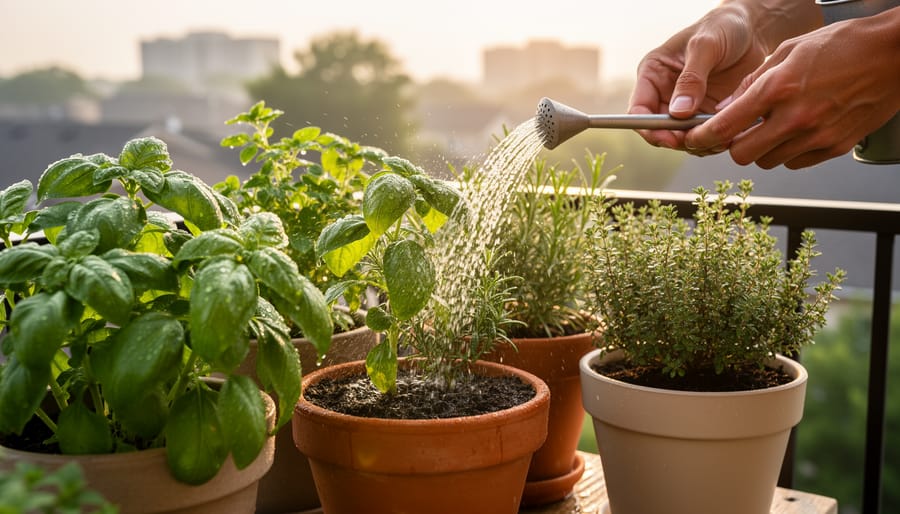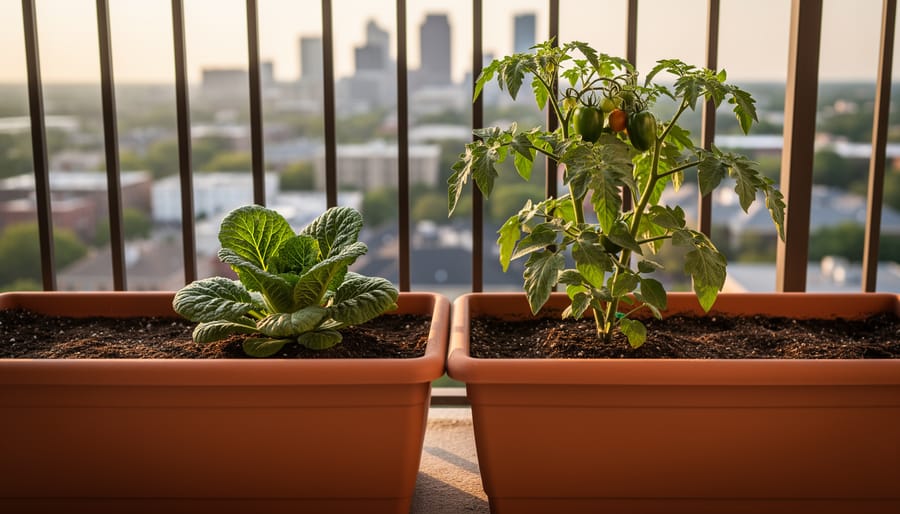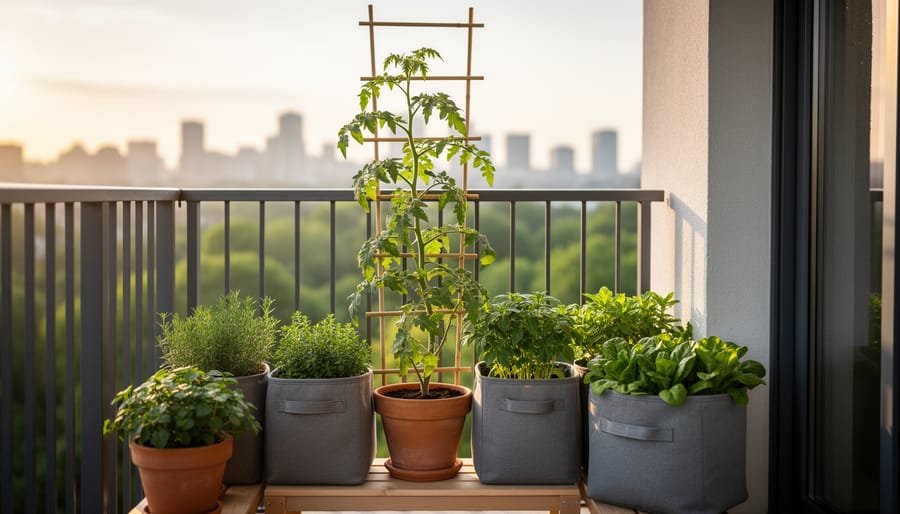
Header Image - Gardens Austin Designers

thomas

7 Garden Trends from 2020 That Still Work Beautifully in Small Spaces

7 Garden Trends from 2020 That Still Work Beautifully in Small Spaces

Looking back at 2020’s gardening revolution six years later, seven of that year’s biggest trends have proven themselves not just pandemic pastimes but lasting innovations that still work beautifully for Austin’s urban gardeners. The year lockdowns began sparked an explosion of creative home growing solutions, from vertical tower gardens that transformed tiny patios into productive food sources to beginner-friendly herb spirals that made the most of limited square footage. What started as necessity became a movement that reshaped how we think about growing food in cities.

These trends endure because they solved real problems. Container gardening systems that maximize yields in minimal space? Still essential for apartment balconies and small yards. Indoor grow lights that let you cultivate greens year-round, even during our brutal Texas summers? More popular than ever. The innovations of 2020 weren’t gimmicks but practical responses to the challenge of growing food and beauty in tight quarters, and they align perfectly with your Austin gardening zone realities.

This guide highlights the seven most valuable trends from that pivotal year, explaining why each one still deserves space in your urban garden setup and how to implement them without special skills or a big budget. You’ll discover which 2020 breakthroughs remain game-changing for small-space growers today.

Key Takeaway: Start small with container edible gardens, native drought-tolerant plants, or a simple indoor herb wall, these three trends require minimal investment and deliver quick wins for Austin beginners. Even adopting one trend transforms your space into a productive, sustainable garden.

Why These 2020 Trends Still Matter

When 2020 forced everyone to slow down and look closer at their immediate surroundings, gardens became more than decorative, they turned into productive, purposeful spaces that fit real life. The trends that emerged weren’t gimmicks. They answered practical needs: growing food when grocery runs felt uncertain, creating green calm in apartment living rooms, and making the most of every square foot when outdoor space was precious. These solutions stuck because they work, especially in cities like Austin where summer heat, water restrictions, and limited space have always shaped what thrives.

Tip: Austin’s hot summers and compact yards make these space-saving, drought-conscious approaches essential rather than optional, what worked nationwide in 2020 is basically tailor-made for our climate.

The trends featured here passed three tests: they fit genuinely small spaces (balconies, patios, windowsills), they lean toward sustainability rather than constant inputs, and they’re approachable for beginners. You won’t find complicated hydroponic setups or rare plant collections requiring expert care. Instead, these are the accessible, resilient ideas that changed how urban gardeners think about their space, and they’re still delivering results six years later.

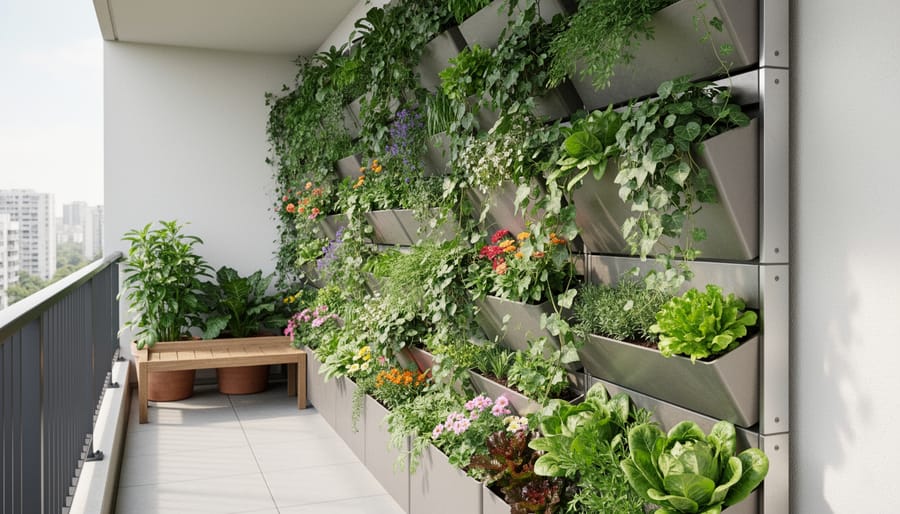
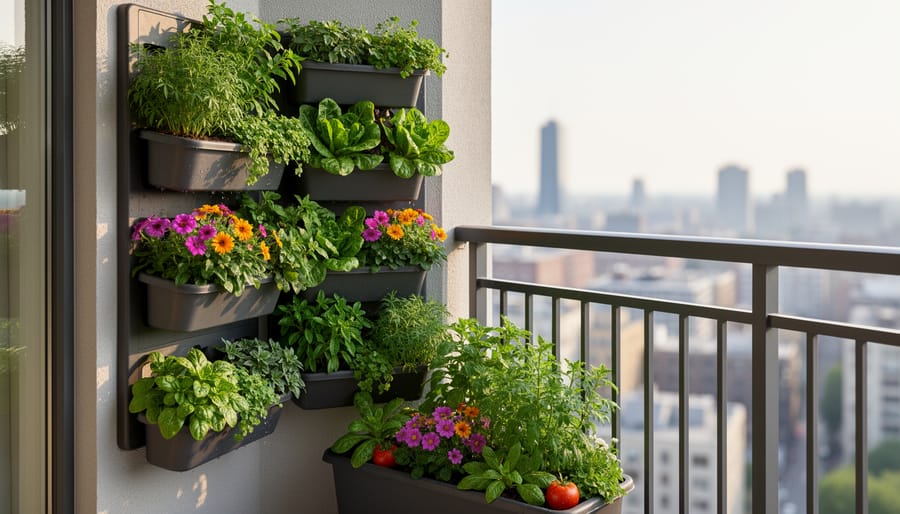
Wide view of a small urban garden featuring vertical planters, containers, and flowering plants.
A unified small-space view shows how several 2020-inspired ideas can work together in one city garden.

1. Vertical Gardens: Grow Up, Not Out

Climbing plants growing on a trellis with wall-mounted planters on a small balcony.
A space-saving vertical setup shows how climbing plants can thrive on a small patio or balcony.

Vertical gardening took off in 2020 when city dwellers realized they could multiply their growing space without needing a backyard. For Austin gardeners working with compact patios and narrow balconies, this approach remains one of the smartest ways to create lush, productive gardens in tight quarters.

The concept is straightforward: train plants to climb supports or mount containers on walls, freeing up precious floor space. Wall-mounted planters work beautifully for herbs and small greens, simply attach sturdy brackets to exterior walls and hang lightweight containers. Trellises transform a bare fence into a living wall when you pair them with climbing vegetables like cherry tomatoes, beans, or cucumbers. Pocket gardens made from fabric or felt offer another space-saving option, letting you tuck strawberries, lettuce, or trailing flowers into vertical pockets that stay cooler than traditional pots.

When you choose plants for Austin‘s vertical gardens, heat tolerance matters. Pole beans handle the summer sun reliably, while passion vines provide shade and fruit. Sweet potato vines cascade beautifully without demanding constant water. For shadier spots, pothos and philodendron thrive with minimal fuss.

Position vertical structures where they’ll get morning sun but afternoon shade during peak summer months. This protects plants from the brutal western exposure while still providing enough light for healthy growth. Start with one wall or trellis rather than tackling your entire space at once, you’ll learn what works before expanding your vertical garden.

2. Edible Container Gardens for Fresh Produce

Container-grown vegetables in terracotta and fabric pots on a small porch.
Fresh produce grown in containers transforms a small porch into a productive mini garden.

The surge of interest in growing your own food during 2020 wasn’t just a passing fad, it revealed how productive a small porch or balcony can be. Container vegetable gardens let Austin gardeners enjoy fresh tomatoes, peppers, and herbs without needing yard space, and they’re forgiving enough for beginners.

Start with containers at least 12 inches deep for most vegetables. Five-gallon buckets work beautifully and cost next to nothing, but any pot with drainage holes will do. Bigger is better, tomatoes and peppers thrive in 15-18 inch pots, while lettuce and herbs do fine in shallower 8-inch containers. Skip garden soil; it compacts in pots. Use a quality potting mix instead, which drains well and stays fluffy.

For Austin’s heat, choose vegetables that tolerate hot summers. Cherry tomatoes like ‘Sungold’ produce reliably through May and June before temperatures peak. Jalapeños and serranos handle scorching afternoons without complaint. Basil loves the heat and grows like a weed in full sun. In fall and winter, switch to lettuce, kale, and Swiss chard, which prefer cooler weather and give you fresh greens when grocery store prices spike.

Place containers where they’ll get six hours of sun for fruiting plants, though leafy greens tolerate partial shade during brutal August afternoons. Water daily once temperatures climb, containers dry out faster than ground soil, especially on west-facing balconies. A simple setup of three or four pots can keep your kitchen stocked with fresh produce year-round.

3. Native and Drought-Tolerant Plants

Drought-tolerant native flowers and grasses growing in a small mulched urban garden bed.
Native, drought-tolerant plants bring color and structure while using less water in small urban spaces.

When drought restrictions hit Austin in 2020, gardeners quickly realized the value of plants that thrive with minimal water. This shift toward native and drought-tolerant species wasn’t just practical, it created gardens that actually work with Texas weather instead of fighting it.

Native plants like Turk’s cap, gregg’s mistflower, and flame acanthus need far less attention than thirsty exotics. They’ve adapted to Austin’s clay soil and scorching summers over thousands of years. Once established, most require watering only during extreme dry spells. That’s a huge advantage when you’re managing containers on a balcony or rooftop where every gallon counts.

For small spaces, try cenizo (Texas sage) in large pots, its silvery foliage and purple blooms appear after rain without any extra effort. Black-eyed Susans and blanket flowers deliver continuous color in tight spots while attracting pollinators. These plants know Austin’s rhythms the way you might understand indoor veggie timing or the right zone for herbs.

The low-maintenance benefits extend beyond water savings. Native plants resist local pests naturally and don’t need fertilizer once they’re settled in. You’ll spend less time troubleshooting problems and more time enjoying the garden. Start with three or four native species this season and watch how they outperform everything else when August heat arrives.

4. Pollinator-Friendly Gardens

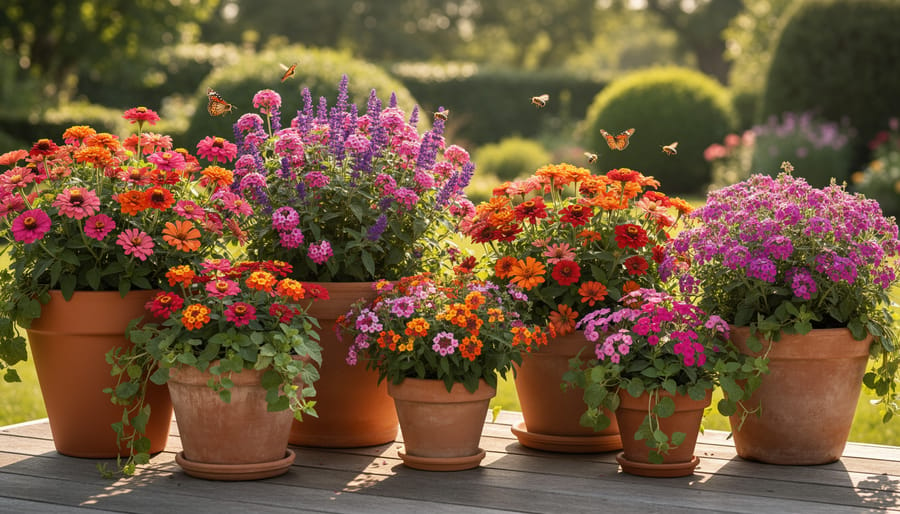
A honeybee on a flowering plant in a small garden bed.
Pollinator-friendly plantings invite beneficial insects right into compact gardens.

The 2020 pandemic brought backyard wildlife watching into sharp focus as people spent more time at home, sparking a movement toward pollinator-friendly gardening that’s proven essential for Austin’s ecosystem. You don’t need acres to make a difference, a single balcony filled with the right blooms can sustain dozens of pollinators.

Start with native Texas plants that bloom at different times. Gregg’s mistflower attracts butterflies from late summer through fall, while autumn sage offers tubular flowers that hummingbirds adore. Texas lantana handles brutal heat and feeds both bees and butterflies all season. Plant these in clusters rather than singles, pollinators spot grouped colors more easily and feed more efficiently.

Container gardens work beautifully for pollinator support. A half-whiskey barrel can hold three or four different flowering plants, creating a mini buffet on your patio. Avoid pesticides entirely; even organic options can harm beneficial insects. If aphids appear, spray them off with water or let ladybugs handle the job.

Add a shallow dish of water with pebbles or marbles for landing spots, pollinators need hydration, especially during Texas summers. Change the water every few days to prevent mosquito breeding.

The payoff goes beyond helping nature. Pollinator gardens require less fussing than traditional ornamentals, and watching a hummingbird hover at your salvias beats scrolling through screens any day. These gardens practically run themselves once established, making them perfect for busy urban gardeners who want maximum beauty with minimal effort.

5. Indoor Herb Gardens and Houseplant Jungles

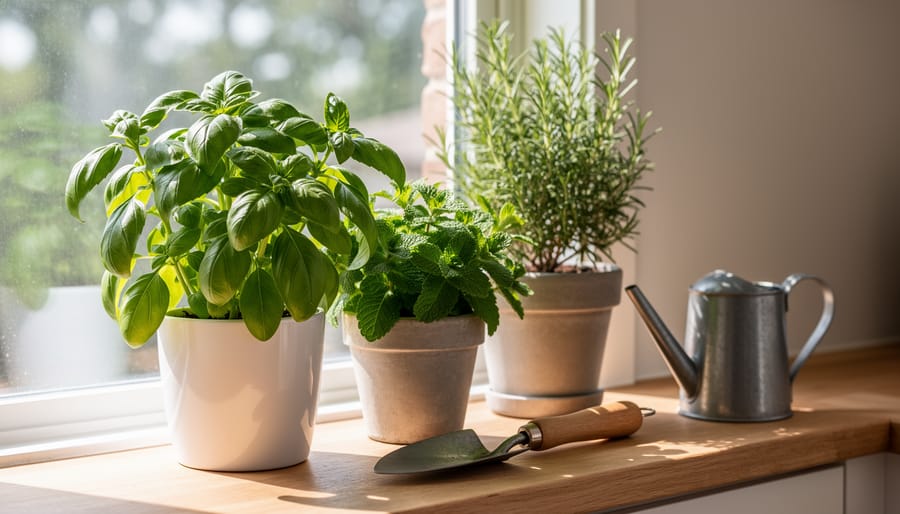
Indoor herbs and houseplants arranged on a sunny windowsill.
An indoor herb corner turns everyday light into fresh flavor, even in apartment-sized spaces.

When lockdowns forced everyone indoors in 2020, living spaces transformed into thriving indoor gardens filled with fresh herbs and lush houseplants. What started as a way to stay connected to nature became a revelation: you don’t need outdoor space to grow your own food or create a green sanctuary. Austin’s abundant sunshine through apartment windows makes indoor herb gardening especially successful year-round.

Start your indoor herb garden by choosing a south or west-facing window that gets at least six hours of sunlight daily. If natural light is limited, a simple grow light from any hardware store fills the gap, position it six to twelve inches above your plants and run it for twelve to fourteen hours daily. Pick containers with drainage holes (repurposed jars or cans work fine if you drill a hole in the bottom) and fill them with quality potting mix, not garden soil.

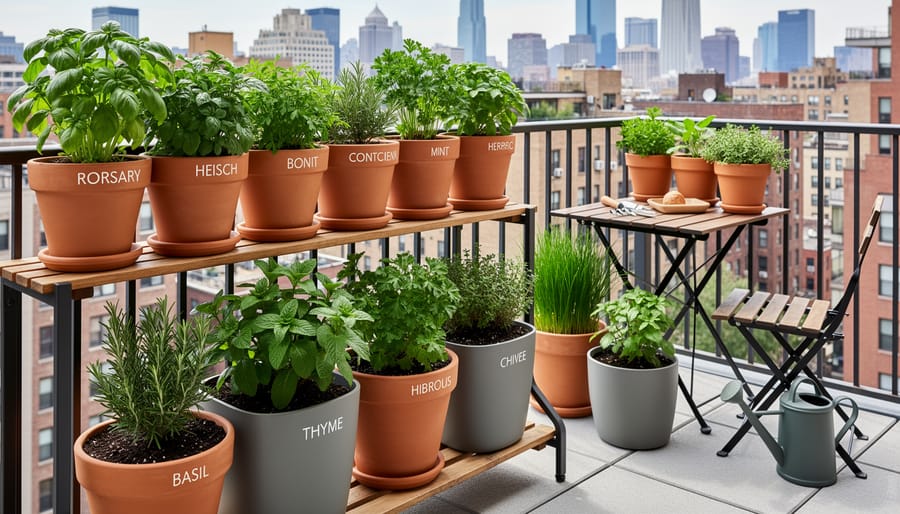
For beginners, these herbs practically grow themselves:

  • Basil: loves warmth, needs consistent moisture, pinch off flower buds to encourage leaf growth
  • Mint: incredibly forgiving, contains its spread in pots, water when the top inch feels dry
  • Parsley: tolerates lower light than most herbs, slow to start but prolific once established
  • Chives: requires minimal care, grows back quickly after cutting, handles occasional neglect
  • Thyme: prefers drier conditions between waterings, perfect for forgetful gardeners

Water your herbs when the top inch of soil feels dry to the touch, Austin’s indoor heat means you’ll likely water twice weekly in summer, less in winter. Overwatering kills more indoor herbs than underwatering, so resist the urge to keep soil constantly wet. Rotate pots weekly so all sides receive equal light, and harvest regularly by snipping stems just above a leaf node to encourage bushier growth. Within weeks, you’ll have fresh herbs for every meal and a windowsill that looks and smells amazing.

6. Composting at Home

Covered compact compost bin with dark compost on a patio.
A small, contained compost system makes it easy to recycle kitchen scraps into garden-ready soil.

The pandemic gardening surge in 2020 made composting mainstream, as people realized they could turn kitchen scraps into valuable soil while spending more time at home. For Austin gardeners with limited outdoor space, compact composting systems offer a practical way to reduce waste and create nutrient-rich amendments for containers and vertical planters.

You don’t need a backyard to compost successfully. Countertop bins with charcoal filters handle fruit and vegetable scraps without odors, making them apartment-friendly. If you have a small balcony or patio, a tumbler composter (about the size of a large beach ball) processes materials faster than traditional bins and keeps things tidy. Worm composting bins fit under kitchen sinks and produce exceptional fertilizer through vermicomposting, though Austin’s summer heat means you’ll need to keep them indoors where it’s cooler.

Stick to fruit and vegetable scraps, coffee grounds, eggshells, and shredded paper. Skip meat, dairy, and oils, which attract pests and slow decomposition. In Austin’s heat, outdoor composters work quickly, often producing usable compost in six to eight weeks during summer.

The finished product transforms container gardens. Mix compost into potting soil at a ratio of one part compost to three parts soil, or use it as a top dressing around plants in vertical planters. For established containers, scratch a thin layer into the top inch of soil every few months. Your tomatoes, herbs, and flowering plants will respond with stronger growth and better drought tolerance, essential qualities for weathering Austin’s intense summers.

7. DIY Garden Projects and Upcycling

Hands planting seedlings into an upcycled wooden planter box.
Upcycled planters and simple DIY projects can look great while stretching your gardening budget.

The 2020 lockdowns sparked a wave of creative DIY garden projects as people transformed everyday items into planters and garden features. This hands-on approach hasn’t just stuck around, it’s become a cornerstone of sustainable urban gardening in Austin.

Old wooden crates, vintage colanders, and plastic bottles all found new life as containers. The key is choosing materials that can handle Austin’s intense summer heat without warping or releasing toxins. Terracotta pots decorated with outdoor paint, concrete hypertufa planters made in mixing bowls, and cedar wood boxes all perform beautifully in Texas sun.

Start with simple projects. Drill drainage holes in tin cans or mason jars for herb gardens. Convert a broken ladder into a tiered plant stand for your patio. Stack cinder blocks to create modular planter walls that also provide wind protection for delicate seedlings.

For vertical gardens, repurpose gutters into wall-mounted lettuce planters or hang old shoe organizers as strawberry pockets. These projects cost a fraction of store-bought systems while giving you custom sizing for your space.

The real beauty of upcycling goes beyond aesthetics and budget savings. You’re keeping materials out of landfills while creating a garden that reflects your personality. In Austin’s heat, focus on containers with thick walls that insulate roots from temperature swings. Paint lighter colors on darker materials to reflect heat, and always ensure proper drainage to prevent root rot during our occasional heavy rains.

Common Questions About 2020 Garden Trends

Starting these trends in Austin doesn’t have to be complicated or overwhelming. Here are the questions beginners ask most often, with straightforward answers to get you growing.

How much water do these trends actually require in Austin’s heat?

Native plants and drought-tolerant options need minimal watering once established, usually just during extreme dry spells. Container gardens and vertical setups require more frequent watering in summer, often daily, but using mulch and self-watering containers significantly reduces water needs.

Which trend is easiest for complete beginners?

Start with an indoor herb garden or a single pollinator-friendly native plant in a container. Both offer quick wins with minimal maintenance while you build confidence and learn what works in your specific space.

Can I combine multiple trends in a small balcony?

Absolutely, most Austin gardeners mix several approaches. A vertical trellis with cherry tomatoes, a few native plants in containers, and a compact compost bin work beautifully together in just a few square feet.

What if I rent and can’t make permanent changes?

All seven trends work perfectly for renters. Use freestanding vertical structures, movable containers, and countertop composters that you can take with you when you move.

The beauty of these 2020 trends is their flexibility. You don’t need a yard, big budget, or green thumb to make them work, just pick what fits your space and start small.

You don’t need to tackle all seven trends at once. Pick the one or two that match your available space, time, and interests. Maybe you’ll start a few container tomatoes on your balcony this fall, or dedicate a sunny windowsill to basil and cilantro. Perhaps you’ll swap out thirsty annuals for native Texas sage and black-eyed Susans. Each small choice builds momentum.

What made these 2020 innovations stick around is simple: they work. Vertical systems maximize your square footage, native plants thrive without constant attention, and growing your own food tastes better than anything from the store. These aren’t passing fads but practical responses to real constraints Austin gardeners face, limited space, intense heat, water costs, and busy schedules.

The best garden is the one you’ll actually tend. Start where you are, use what you have, and let your confidence grow along with your plants. You’ll be surprised how much life a few strategic containers or a well-chosen trellis can bring to your patio, balcony, or front step.

8 Creative Potting Station Ideas to Transform Your Garden Workspace

by thomas 0 Comments
8 Creative Potting Station Ideas to Transform Your Garden Workspace

A potting station transforms gardening from a messy floor operation into an organized, ergonomic workspace where you can transplant seedlings, mix soil, and prep containers without wrecking your back or your patio. Whether you’re working with a narrow apartment balcony or a full backyard corner, the right setup keeps supplies within arm’s reach and saves you from hunting for trowels every time you need to pot up tomatoes.

The best potting stations balance three priorities: work surface height (typically 36 inches to avoid hunching), smart storage for soil and tools, and weather resistance if you’re keeping it outdoors year-round in Austin’s heat and humidity. You don’t need a custom-built unit. Some of the most functional stations come from repurposed furniture, wall-mounted fold-down tables, or simple shelving units fitted with hooks and bins.

Urban gardeners especially benefit from dual-purpose designs. A potting bench that doubles as a display shelf for houseplants or integrates vertical growing space below the work surface makes every square foot count. The ideas ahead cover temporary setups you can break down when guests arrive, budget DIY builds using reclaimed materials, and more permanent structures that anchor your gardening routine. Each option offers practical solutions for keeping soil contained, tools organized, and your planting process efficient.

Key Takeaway: Place stations in morning-sun locations to avoid Austin’s harsh afternoon heat, weatherproof all wood surfaces, keep frequently-used tools at eye level, and store bagged soil in sealed containers to prevent moisture absorption during humid months.

What Makes a Great Potting Station

Before diving into specific potting station ideas, it helps to understand what separates a truly functional workspace from a cluttered corner that frustrates more than it helps. The eight ideas featured here were selected based on criteria that matter most to urban gardeners working within real-world constraints.

Each station idea addresses specific challenges Austin gardeners face: limited square footage on balconies and patios, intense summer heat that degrades certain materials, and the need to move between indoor seedlings and outdoor vertical gardens. The best potting stations don’t just look organized, they make your gardening tasks genuinely easier.

Here’s what went into choosing these ideas:

  • Space efficiency: works in compact urban settings without sacrificing functionality
  • Weather resistance: stands up to Austin’s heat, UV exposure, and occasional heavy rain
  • Storage capacity: keeps soil, pots, and tools accessible but contained
  • Ease of setup: achievable without advanced carpentry skills or permanent modifications
  • Austin-climate suitability: accommodates year-round gardening and outdoor living

Some ideas prioritize portability for renters, while others offer permanent solutions for homeowners with dedicated outdoor space. You’ll find options across different budgets and skill levels, from repurposed furniture to purpose-built workbenches. The common thread is that each one transforms chaotic potting tasks into streamlined, enjoyable work.

1. Fold-Down Wall-Mounted Station for Tiny Balconies

Fold-down wall-mounted potting bench open on a small urban balcony
A space-saving wall-mounted potting station keeps tools ready while staying out of the way on a tiny balcony.

When you’re gardening on a compact Austin balcony where every square foot counts, a fold-down wall-mounted station solves your workspace problem without eating up precious floor space. This clever setup attaches directly to your balcony wall and hinges down to create a sturdy work surface only when you need it.

The basic design uses a simple plywood board (around 24 by 18 inches works well for most balconies) mounted with heavy-duty folding shelf brackets. When you’re done potting, the whole surface folds flat against the wall, completely out of the way. Add a few small shelves above the fold-down surface to keep seed packets and plant labels organized, and install hooks along the sides for hanging trowels, pruning shears, and watering tools.

For materials, choose weather-resistant plywood or cedar that can handle Austin’s intense summer heat and occasional rain. A coat of outdoor sealant extends its life significantly. Mount everything to wall studs or use heavy-duty masonry anchors if you’re attaching to concrete balcony walls, since the station needs to support the weight of soil bags and pots during use.

This setup transforms a blank wall into functional gardening space, making it perfect for renters who need a temporary solution that won’t damage their lease agreement.

2. Repurposed Dresser Potting Bench

Repurposed wooden dresser used as a potting bench with open drawers and gardening tools
An old dresser becomes a functional potting station with drawers for tools and soil, plus a sturdy top for everyday planting.

Transform that old wooden dresser gathering dust in your garage into a charming potting bench with surprising functionality. The dresser’s sturdy top becomes your prep surface, sand it down and seal it with weatherproof finish to handle soil and water. Those drawers that once held clothes now organize seed packets, hand tools, twine, and bags of potting mix, keeping everything sorted and within arm’s reach.

The real magic happens when you remove the dresser’s mirror backing (if it has one) and mount pegboard in its place. Suddenly you’ve got vertical storage for trowels, pruning shears, and gloves hanging right above your workspace. You can outline each tool’s spot with paint markers so returning items becomes second nature.

Position your dresser station under a covered patio or carport. Austin’s intense summer sun will crack unsealed wood and fade finishes quickly, while afternoon thunderstorms can soak exposed stations. A roof overhead extends your dresser’s life and gives you a comfortable workspace even during those surprise rain showers that pop up during growing season.

Choose dressers with lower profiles, around counter height, so you won’t strain your back during transplanting sessions. Solid wood holds up better than particleboard, which crumbles when wet. Check estate sales and thrift stores for sturdy candidates.

3. Rolling Cart Station for Multi-Space Gardening

Rolling tiered potting cart on wheels with pots and soil near indoor and outdoor plants
A mobile potting cart makes it easy to move supplies between indoor greenery and outdoor vertical gardening.

A rolling cart transforms your potting workflow when you’re juggling indoor houseplants, balcony containers, and vertical garden systems across different spaces. Metal utility carts with three or four tiers work exceptionally well, the top shelf becomes your active work surface, while lower levels store potting mix bags, hand tools, watering cans, and plant labels. Look for carts with lipped edges to prevent soil spills during transport, and prioritize models with locking wheels so the station stays stable while you work.

Wooden rolling carts offer a warmer aesthetic if your potting station doubles as indoor décor, though they need a protective sealant if you’re moving them between Austin’s humid outdoor mornings and air-conditioned interiors. Bar cart styles with removable trays make cleanup easier, you can lift out the soil-covered tray and hose it down outside.

The real advantage for renters is portability without permanent installation. Roll your cart to the sunny kitchen window for seed starting, then wheel it to the patio for repotting succulents in your vertical wall planters. When you move apartments, your entire potting setup moves with you intact. Add a small tool caddy or magnetic strip on the side to keep pruners and trowels within arm’s reach as you shift locations.

4. Cedar Potting Table with Built-In Sink

Cedar potting table with built-in sink basin outdoors
A cedar potting table with a built-in sink keeps cleanup simple while offering a durable work surface in outdoor heat.

A cedar potting table with a built-in sink represents a significant upgrade for gardeners ready to invest in a permanent outdoor workspace. This setup transforms routine potting tasks by adding running water right where you need it, no more trips inside to rinse tools or water freshly potted plants.

Cedar handles Austin’s intense summer heat remarkably well. The wood naturally resists rot and insect damage, even when exposed to our occasional downpours and high humidity. You’ll want a table that’s at least 24 inches deep and 48 inches wide, giving you ample room to spread out soil bags, pots, and seedlings without crowding your work area.

The sink doesn’t need to be elaborate. A shallow basin about 6-8 inches deep works perfectly for rinsing hands, cleaning tools, and watering plants. Many DIYers retrofit an old farmhouse sink or stainless steel basin, then connect it to a garden hose with a simple valve system. Some models include a drainage hole that empties onto surrounding plants or into a bucket for reuse during our drier months.

Position your cedar table under a pergola or large umbrella to extend the wood’s lifespan and create a shaded workspace during peak summer heat. The combination of durability and functionality makes this station ideal for gardeners who pot plants weekly and want their workspace to last years.

5. Vertical Pegboard and Shelf Combo

Vertical pegboard with hanging gardening tools and shelves above a potting work surface
Vertical pegboard storage keeps frequently used tools within reach and maximizes space in a compact shed or garage corner.

A vertical pegboard and shelf combo turns any awkward corner or narrow wall into a surprisingly efficient potting station. Mount a large pegboard panel (painted or sealed to protect against moisture) at a comfortable height above a basic work surface, this could be a simple butcher block counter, a wall-mounted fold-down shelf, or even a sturdy plank supported by brackets. The pegboard holds all your small hand tools, gloves, twine, plant markers, and scissors right at eye level where you can grab them without rummaging through drawers.

Install two or three floating shelves above the pegboard to store seed packets, soil amendments, fertilizers, and spare pots. This setup keeps your most-used supplies visible and within arm’s reach while freeing up the work surface below for actual potting tasks. It’s particularly clever in garage or shed corners where floor space is tight but wall space goes unused.

Tip: In Austin’s humid summers, coat your pegboard with water-resistant sealant and store potting soil in sealed plastic bins rather than open bags to prevent moisture absorption and pest issues.

This vertical station pairs beautifully with vertical gardening projects since you’re already thinking upward, many gardeners use the same wall system to hold propagation trays or hanging plant labels. The entire setup costs roughly $60-$100 in materials if you DIY it, and it adapts easily as your gardening needs change by simply rearranging hooks and shelves.

6. Stackable Crate System for Renters

Stackable wooden crates arranged as a temporary potting station
Stackable crates create a temporary, budget-friendly potting setup that’s easy to move and reconfigure.

Renters and frequent movers need gardening solutions that won’t leave holes in walls or require permanent installations. A stackable crate system delivers a fully functional potting station you can set up in minutes and take with you when you leave.

Start with four to six wooden or plastic crates from thrift stores, hardware shops, or even curbside finds. Stack two crates on their sides as the base, creating open-front storage cubbies for soil bags, pots, and watering cans. Place a sturdy piece of plywood or a butcher block across the top to form your work surface at a comfortable height, usually around 36 inches works well for most people.

Add another layer of crates above the work surface if you want overhead storage for hand tools, seed packets, or small containers. The open design keeps everything visible and within reach, eliminating the drawer-digging that slows down potting sessions.

This setup costs under fifty dollars if you source crates secondhand, requires zero tools or assembly skills, and breaks down in under five minutes when it’s time to move. You can adjust the configuration as your needs change, swap crates for different sizes, or even spray paint them to match your balcony aesthetic. It’s the ultimate commitment-free potting solution for Austin’s renter-heavy neighborhoods.

7. Corner Greenhouse Potting Nook

Seedlings on a narrow shelf inside a corner greenhouse potting nook
A dedicated potting nook inside a small greenhouse helps contain mess and protect seedlings while they get started.

A corner greenhouse or enclosed patio transforms into an incredibly efficient potting workspace when you dedicate just a small slice of it to this purpose. The built-in humidity control and protection from Austin’s intense afternoon sun make these spots ideal for seedling work and delicate transplanting tasks.

Start with a narrow shelf at comfortable working height, 18 to 24 inches deep is plenty for most potting tasks without eating up valuable growing space. Mount it securely across the corner at waist height, creating a triangular work surface that feels surprisingly roomy. Below, add moisture-resistant plastic bins or metal shelving to store soil, perlite, and vermiculite where occasional spills won’t create a mess.

Overhead LED grow lights serve double duty here: they illuminate your potting work and provide supplemental light for freshly potted seedlings sitting on the shelf. Position lights 12 to 18 inches above the work surface for comfortable visibility without glare.

Because greenhouses trap moisture, choose materials that won’t warp or rust. Sealed wood, plastic laminate, or powder-coated metal all hold up well. Keep a small hand broom and dustpan hanging nearby to sweep up soil quickly, this prevents tracking mess into the rest of your greenhouse and keeps things tidy for your Austin gardening zone seedlings.

8. Dual-Purpose Outdoor Bar Cart Station

Outdoor bar cart repurposed as a potting station with pots and soil underneath
A stylish outdoor bar cart can double as a potting station, ready for plants by day and drinks by night.

A sleek metal or wooden bar cart transforms into the ultimate multitasker for Austin gardeners who love to entertain. The top tier serves as your active potting surface, just lay down a plastic mat or tray to catch soil spills during transplanting sessions. The middle and lower shelves hold terra cotta pots, bagged soil, and your most-used hand tools. When you’re planning indoor veggies timing or prepping seedlings, everything you need rolls right to your workspace.

What makes this station brilliant for Austin’s outdoor lifestyle is its quick-change personality. On Friday afternoon, swap out the potting supplies for glasses, ice, and bottles. The cart wheels smoothly from your gardening corner to the patio dining area, looking stylish rather than utilitarian. After your gathering, it transitions back to garden duty in minutes.

Choose a cart with weather-resistant finishes, powder-coated metal or sealed wood stands up to our intense sun and humidity. Models with a handlebar make maneuvering easy, and raised edges on shelves prevent pots from sliding off. For under $150, you get functional garden storage that doesn’t scream “shed” when guests arrive.

Setting Up Your Potting Station: Quick Tips

Once you’ve chosen your potting station style, smart setup makes all the difference. Start by positioning your station where you’ll actually use it, east-facing spots work great in Austin since they catch morning sun without the brutal afternoon heat, and remember your zone affects sun needs for seedlings versus mature plants. If your station sits outdoors year-round, seal wooden surfaces with exterior-grade varnish and invest in a waterproof cover for those surprise summer storms.

Organize tools by frequency of use, hang trowels and pruners within arm’s reach on hooks or pegboard, while seasonal items can live in drawers or lower shelves. Store potting soil and amendments in sealed bins rather than leaving bags open; Austin’s humidity swings between bone-dry and surprisingly muggy, and you don’t want clumpy soil when you’re ready to pot. Clean your work surface after each session to prevent soil buildup and pests, and occasionally check for wasp nests if your station’s under an overhang.

Common Questions About Potting Stations

How much space do I really need for a potting station?

You can create a functional potting station in as little as two square feet with a fold-down or wall-mounted design. The key is vertical organization and keeping only essential tools within reach.

What materials hold up best in Austin’s heat?

Cedar, treated pine, and powder-coated metal work well in our intense sun and humidity. Avoid untreated wood and cheap plastics that warp or crack after a season outdoors.

How do I keep pests out of my potting station?

Store soil and amendments in sealed containers with tight lids, clean up spills immediately, and avoid leaving damp organic matter sitting out overnight. A quick wipe-down after each use prevents most pest problems.

Will a potting station work if I mostly do vertical gardening?

Absolutely, vertical gardens need regular repotting and maintenance just like traditional beds. A compact station at the base of your vertical setup makes it easier to choose plants by zone and refresh containers without hauling supplies across your space.

These questions come up constantly among Austin gardeners setting up their first workspace. The answers reflect real-world experience: you don’t need a sprawling shed, just smart use of whatever space you have. Weatherproofing matters here because our summer sun is relentless, and keeping things tidy prevents the fire ants and roaches that love damp potting mix.

Having an organized potting station transforms your gardening routine from chaotic to streamlined, saving time and protecting your plants during crucial transplanting moments. Whether you choose a fold-down wall mount for your balcony or a repurposed dresser for your patio, starting with one setup that matches your available space makes all the difference.

Professional potting services demonstrate how efficient workspaces improve plant care outcomes, and you can apply these same principles at home on any budget. Ready to enhance your urban garden beyond the potting bench? Explore our vertical gardening guides and Austin-specific growing tips to make the most of every square foot in your outdoor space.

How to Start Gardening in a Small Space: From Balcony to Backyard Corner

How to Start Gardening in a Small Space: From Balcony to Backyard Corner

You can absolutely grow a thriving garden in a small space, and the secret is vertical thinking. Whether you’re working with a cramped Austin balcony, a narrow patio, or just a sunny windowsill, container gardening combined with vertical structures lets you maximize every square inch without sacrificing variety or yield. The process is straightforward: choose compact or vining plants, set up vertical supports like trellises or wall planters, and manage your containers for optimal drainage and soil health.

Small space gardening has exploded in popularity across urban Austin neighborhoods, and for good reason. Limited square footage doesn’t mean limited possibilities. In fact, growing upward instead of outward opens up opportunities most traditional gardeners never consider. You’ll discover that herbs, tomatoes, peppers, and leafy greens thrive in containers when given the right conditions, and vertical systems can turn a blank wall into a productive growing surface.

This guide walks you through the exact setup, from selecting the right containers and soil mix to installing vertical supports that can handle our Texas heat. You’ll learn how to position plants for maximum sun exposure (crucial during Austin’s intense summers), establish a watering routine that prevents both drought stress and root rot, and troubleshoot common issues like leggy growth or nutrient deficiencies. By the end, you’ll have a clear roadmap to transform even the tiniest outdoor area into a productive garden that delivers fresh produce and beauty throughout the growing season.

Key Takeaway: Healthy small space gardens show steady new growth, drain water quickly, and maintain vibrant leaf color. If plants yellow, wilt despite watering, or remain static for weeks, adjust light exposure, drainage, or watering frequency before they decline further.

What You’ll Need to Get Started

Starting a small space garden doesn’t require a shed full of equipment. In fact, one of the benefits of gardening on a balcony or patio is that you can begin with just a handful of essentials and add more as you learn what works for your space.

Containers and Growing Spaces

Your containers are the foundation of a small space garden. Look for pots with drainage holes in the bottom, this is non-negotiable for healthy plants. For Austin’s intense summer heat, choose light-colored plastic or glazed ceramic containers that won’t absorb as much heat and stress plant roots. Terra cotta is beautiful but dries out fast in our climate. Start with containers at least 8-10 inches deep for most herbs and vegetables, and go deeper (12-18 inches) for tomatoes, peppers, or root vegetables.

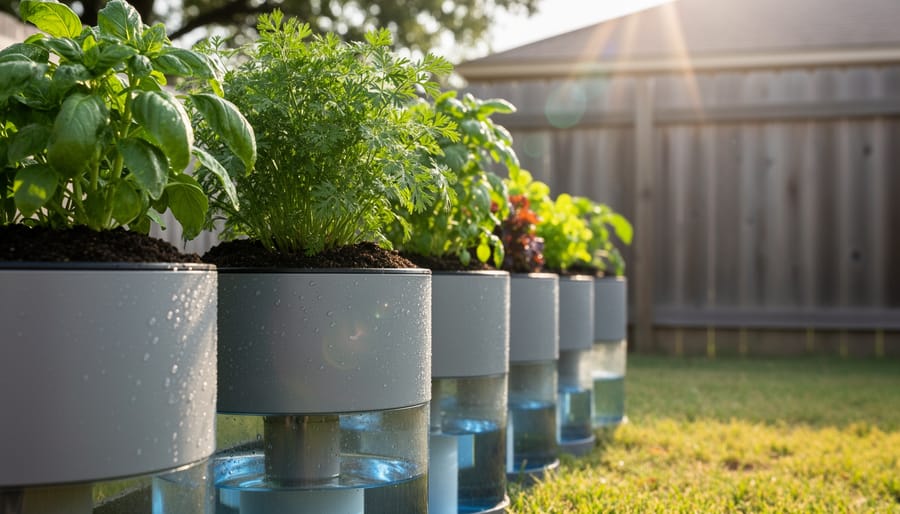
Self-watering containers are worth considering if you travel or work long hours. They have a reservoir that keeps soil consistently moist without daily watering, which is a lifesaver during Austin’s 100-degree stretches.

Soil and Amendments

Skip the cheap “garden soil” bags. You need a high-quality potting mix specifically formulated for containers, it’s lighter, drains better, and won’t compact like ground soil. Look for mixes that contain perlite or vermiculite for drainage. In Austin’s heat, mixing in coconut coir or extra compost helps retain moisture without creating soggy conditions that lead to root rot.

Essential Tools and Equipment

Here’s what you actually need to get started:

  • Hand trowel and cultivator for planting and loosening soil in tight spaces
  • Watering can with a narrow spout or a hose with a spray nozzle for controlled watering
  • Pruning shears or scissors for harvesting and trimming
  • Gardening gloves to protect your hands and keep them clean
  • Moisture meter (optional but helpful) to check when plants actually need water
  • Vertical supports like tomato cages, small trellises, or stakes for vining plants

If you’re planning vertical gardening, add wall-mounted planters, hanging baskets with sturdy hooks, or a simple bamboo trellis. Make sure any wall-mounted system is rated for outdoor use and properly anchored, Austin’s occasional strong winds can pull poorly secured planters right off the wall.

A small bag of organic fertilizer rounds out your starter kit. Container plants need regular feeding since frequent watering leaches nutrients from the soil faster than in-ground gardens.

Before You Plant: Important Safety and Setup Considerations
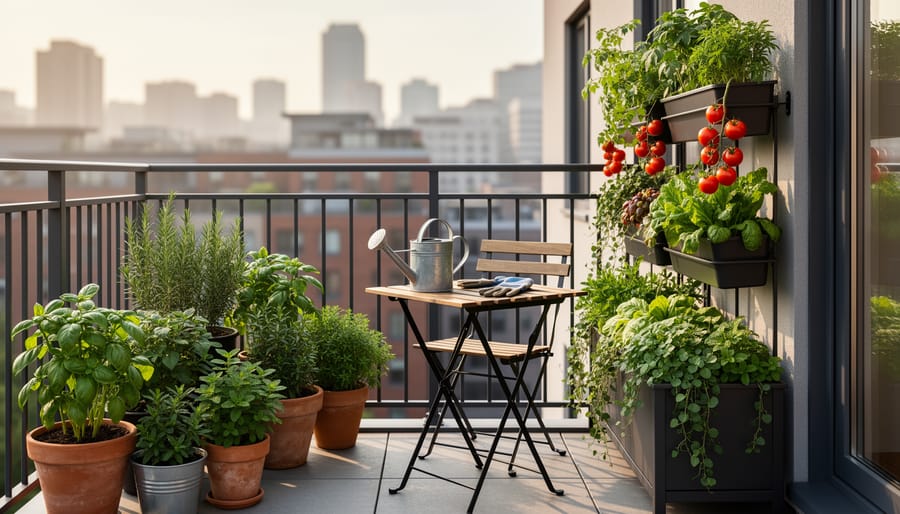
Small-space balcony garden with grow bags, herbs, and a compact trellis next to an apartment railing
A compact balcony setup demonstrates how herbs and vegetables can thrive in containers even in an urban setting.

Before you start filling containers with soil and plants, take time to ensure your space can safely support a garden. A balcony full of wet soil and pots can weigh hundreds of pounds, so check your building’s weight capacity guidelines or consult your landlord or property manager. Most modern balconies handle 50-100 pounds per square foot, but older structures may have lower limits. Distribute weight evenly across the space rather than clustering everything in one corner, and consider lightweight potting mix instead of garden soil, it can weigh 40% less when saturated.

Warning: Always verify your balcony or rooftop’s weight capacity before adding multiple filled containers, and ensure all containers need drainage holes to prevent water accumulation that adds dangerous extra weight.

Water damage is another serious concern. Without proper drainage, excess water will pool under containers and seep into floors, potentially causing structural damage or leaking into units below. Use saucers or trays to catch runoff, but empty them regularly so roots don’t sit in standing water. If you’re on a wooden deck or balcony, elevate containers slightly with pot feet to allow air circulation underneath and prevent rot.

Check your lease, HOA rules, or building codes before you begin. Some communities restrict container placement, prohibit drilling into walls for vertical structures, or limit the types of plants you can grow. In Austin, this is especially common in historic districts or condos with strict exterior appearance guidelines.

Finally, be mindful of container materials in Austin’s intense summer heat. Black plastic pots can reach scorching temperatures that cook roots, and some cheaper plastics may leach chemicals into soil. Stick with food-safe containers, glazed ceramic, or light-colored materials that reflect heat rather than absorb it.

Step-by-Step: Setting Up Your Small Space Garden
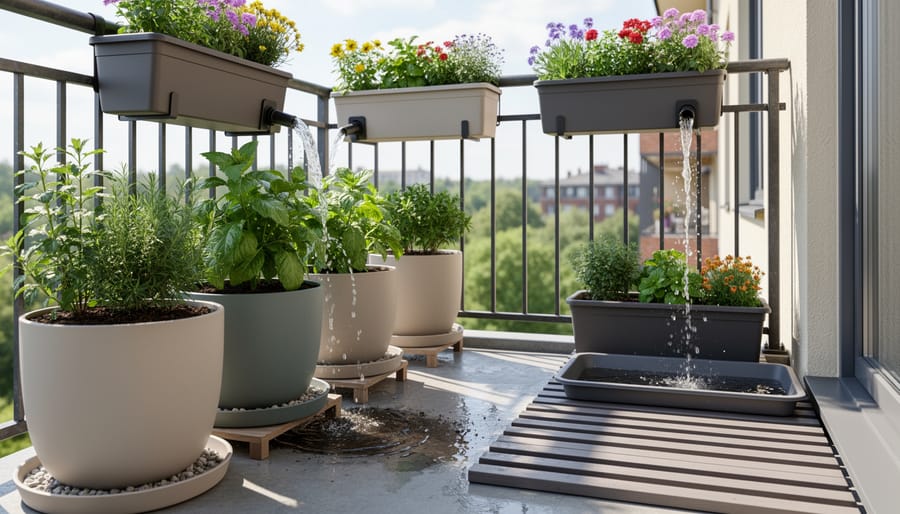
Gardener’s hands setting up a container with drainage and a drip tray on a balcony surface
This image highlights the practical setup details, proper containers and drainage, to help protect small-space gardens from water damage.

Maximizing Vertical Space

Vertical solutions multiply your growing area without claiming precious floor space. Wall planters work beautifully for herbs and shallow-rooted greens, mount them securely with heavy-duty anchors rated for outdoor use, and in Austin, position them on east or north walls to escape the brutal afternoon sun. Trellises turn climbing plants like beans, cucumbers, and cherry tomatoes into productive vertical crops; anchor the base with stakes driven deep into containers or soil, and use zip ties rather than twine to secure vines in our gusty spring winds.

Hanging baskets add layers of interest and suit strawberries, trailing herbs, and compact peppers. Choose baskets with built-in water reservoirs to reduce daily watering in summer heat, and hang them from reinforced hooks, calculate the weight when soil is saturated, not dry. Tiered shelving or ladder-style plant stands let you stack multiple container gardening ideas in a compact footprint, ideal for balconies or patios. Place heat-sensitive plants on lower tiers where they catch some shade from upper containers.

Before installing any vertical structure, check your Austin gardening zone requirements and verify load limits if you’re on a balcony. During summer, mist vertical plantings more frequently, elevated containers dry out faster than ground-level ones. Secure everything with weatherproof hardware; lightweight structures can topple in thunderstorms or sudden gusts.

Know When Your Garden Is Thriving
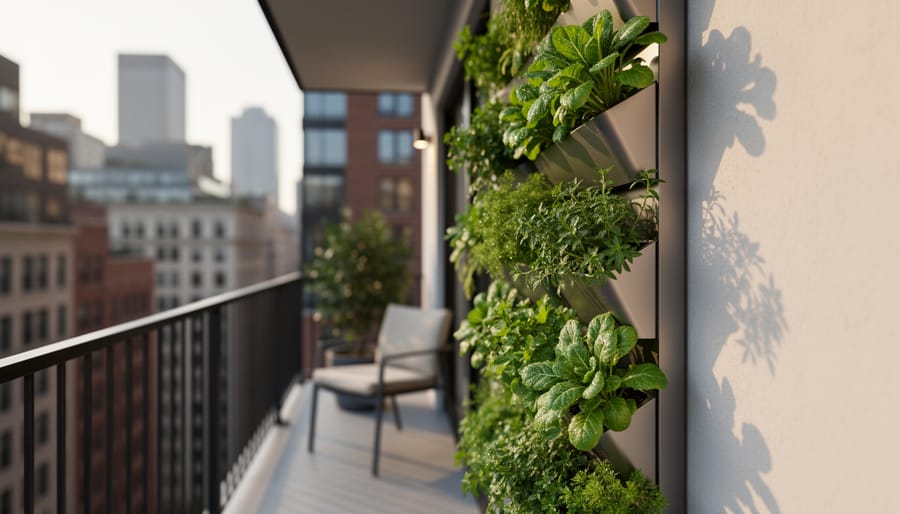
Vertical garden with wall planters and a hanging basket filled with basil and leafy greens in warm sunlight
Vertical planters use limited square footage effectively, letting herbs and greens grow vigorously upward in small outdoor areas.

Your garden is working when you see new growth within 7-10 days of planting, fresh leaves unfurling, stems reaching upward, and a vibrant green color that signals healthy photosynthesis. In Austin’s heat, plants may grow slower during July and August, but consistent new leaves and buds mean your setup is sound. Check that water drains freely from container bottoms within a few seconds of watering; if it pools or takes minutes to drain, you risk root rot and need to add drainage holes or switch to a lighter soil mix.

Struggling plants show yellowing lower leaves (often overwatering), crispy brown edges (underwatering or heat stress), or leggy, stretched stems reaching toward light (insufficient sun). If growth stalls for two weeks or more, reassess your light conditions, most edibles need at least six hours of direct sun, while shade-tolerant herbs and greens can manage with four. Move containers as needed; small space gardening gives you that flexibility.

Once your initial plantings thrive, plan your next steps. Rotate cool-season crops like lettuce and spinach in fall, then switch to heat-lovers like peppers and tomatoes in spring. Austin’s mild winters let you garden year-round if you keep plants alive through occasional freezes with frost cloth. Start a simple log noting what works in each spot, sun hours, which varieties flourished, when you watered, so you refine your approach each season.

Connect with local resources to grow your skills. Austin’s urban gardening meetups, weekend workshops at community gardens, and seasonal plant swaps offer hands-on learning and fellow small space gardeners who understand your challenges. Expanding your garden means adding one or two new containers at a time, testing vertical structures, or trying a new crop, build confidence through small, deliberate experiments rather than overwhelming yourself.

Common Questions About Small Space Gardening

How much sun does my small space garden actually need?

Most vegetables and herbs need at least six hours of direct sunlight daily, but many leafy greens and herbs will tolerate four to five hours. If your space gets less than that, focus on shade-tolerant plants like lettuce, spinach, and mint rather than tomatoes or peppers.

What if I only have a shady balcony?

Shade gardening works fine for leafy greens, herbs like parsley and cilantro, and ornamentals such as coleus or ferns. Austin’s intense summer heat can actually make partial shade a blessing, reducing water stress on plants that would struggle in full sun.

How often should I water containers in Austin’s heat?

During summer, most small containers need daily watering, sometimes twice a day for shallow pots in full sun. Stick your finger an inch into the soil; if it feels dry, water until it drains from the bottom. Larger containers hold moisture longer and may only need watering every other day.

Can I really grow vegetables in containers?

Absolutely. Tomatoes, peppers, lettuce, radishes, beans, and most herbs thrive in containers with proper depth and drainage. Choose compact or dwarf varieties bred for containers, and make sure pots are at least 12 inches deep for root vegetables and 5 gallons for larger plants like tomatoes.

What grows best in Austin’s brutal summer heat?

Heat-loving crops like okra, cherry tomatoes, peppers, basil, and Armenian cucumber excel in Austin summers. Native or adapted plants such as purslane and amaranth also handle the heat. For cooler months, switch to greens, broccoli, and root vegetables.

How do I deal with pests when everything’s right outside my door?

Small space gardening actually makes pest management easier, you notice problems quickly. Hand-pick larger pests like caterpillars, use neem oil spray for aphids, and encourage beneficial insects with herbs like dill and fennel. For more strategies, check out our organic gardening tips that work perfectly in tight quarters.

The beauty of container gardening is that you control the soil quality and can move plants around as needs change. If a spot isn’t working, shift the pot to a better location. Start with one or two plants to get a feel for your space’s quirks, then expand once you understand the light patterns and watering rhythm. Small space gardening rewards observation and quick adjustments more than rigid planning.

Starting a garden in a small space isn’t just possible, it’s one of the most rewarding ways to connect with nature right where you live. Whether you’ve got a sunny balcony, a shaded patio, or just a windowsill, you can grow fresh herbs, vibrant flowers, or even vegetables that thrive in Austin’s climate. Begin with one or two containers, experiment with what works in your specific light and weather conditions, and don’t hesitate to try vertical solutions as you gain confidence.

As compact and vertical gardening continues to evolve in 2026, the options for urban growers keep expanding. If you need supplies, want hands-on guidance, or are curious about classes tailored to Austin gardeners, Gardens Austin Designers offers personalized support to help you succeed. Your small space garden is waiting, start planting today.
Why Leisure Gardening Is Taking Over Urban Spaces (And How You Can Start)

Why Leisure Gardening Is Taking Over Urban Spaces (And How You Can Start)

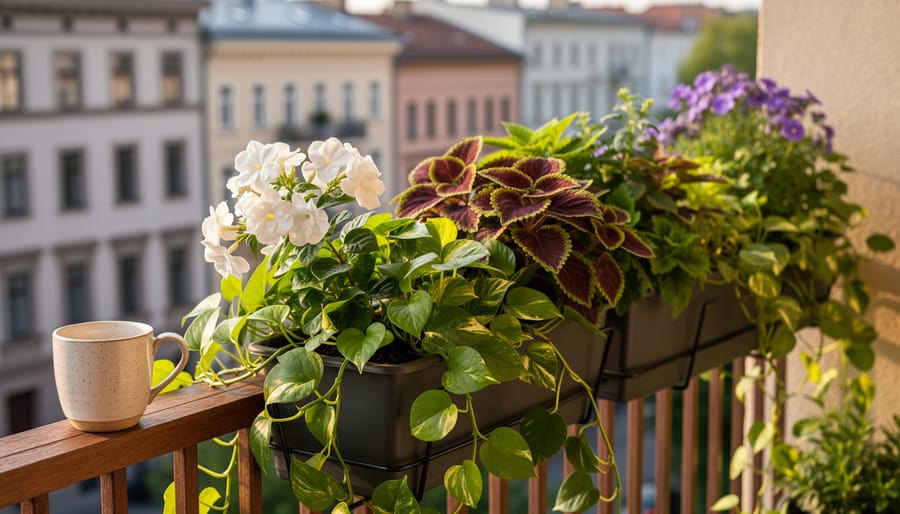
Leisure gardening means growing plants purely for enjoyment, not for maximum yield or self-sufficiency, and in 2026 it’s becoming the antidote to hustle culture that burned out a generation of hobby gardeners. Instead of meticulously planned beds and strict harvesting schedules, you’re planting what looks beautiful, smells good, or simply makes you happy when you walk outside with your morning coffee. No pressure to preserve 40 pounds of tomatoes or justify every square foot of space.

The shift reflects a broader cultural change. People discovered during the gardening boom of the early 2020s that turning a hobby into an optimization project strips away the very stress relief they were seeking. Leisure gardening flips that script entirely. You grow three types of basil because you like the way they look together, not because you need to stock a year’s worth of pesto. You let the cosmos self-seed wherever they want. You dedicate half your balcony to fragrant jasmine that serves no purpose except making your evenings nicer.

For Austin gardeners working with limited outdoor space, this approach feels liberating. Vertical gardening setups become showcases for trailing pothos and colorful coleus rather than cramped vegetable factories. Container gardens hold whatever caught your eye at the nursery last weekend. The goal is simple: if tending your plants feels like another chore on your to-do list, you’re doing it wrong. Leisure gardening invites you to grow things that spark joy, water when you remember, and skip the guilt when life gets busy.

What Makes Leisure Gardening Different

Leisure gardening flips the script on what it means to tend plants. Instead of obsessing over harvest yields, pest control schedules, or picture-perfect flower beds, it treats your garden as a place to unwind and enjoy the process. Think of it as the difference between running a marathon and taking a walk in the park, both involve movement, but only one requires a stopwatch and a training plan.

Traditional gardening often comes with pressure. There are planting calendars to follow, specific fertilizer ratios to calculate, and the nagging feeling that you’re failing if your tomatoes aren’t Instagram-worthy. Production gardening cranks this intensity even higher, focusing on maximizing yield and efficiency. Leisure gardening, by contrast, asks a simpler question: Does this bring you joy?

Note: Leisure gardening prioritizes process over production, enjoyment over efficiency, it’s about how gardening makes you feel, not what you harvest.

The mental health benefits are real. Research shows that community gardening reduces stress and improves wellbeing, and leisure gardening extends these benefits by removing the performance anxiety. You’re not competing with anyone or racing against deadlines. If a plant thrives, great. If it doesn’t, you learned something and moved on without guilt.

This approach also unlocks creative fulfillment in ways goal-driven gardening can’t. You can experiment with unusual plant combinations just because you like how they look together, rearrange containers on a whim, or spend an entire afternoon simply observing how light filters through leaves. The garden becomes a sanctuary rather than a project list, and that shift changes everything about how you engage with it.

Why Leisure Gardening Is Gaining Momentum in 2026

The leisure gardening movement is gathering serious momentum in 2026, and it’s not hard to understand why. After years of grind culture and screens demanding constant attention, people are craving activities that feel restorative rather than exhausting. Gardening has always offered that escape, but the leisure approach strips away the pressure to produce perfect yields or maintain Instagram-worthy landscapes. It’s gardening reimagined as pure enjoyment, a low-stakes hobby that fits into chaotic urban lives without adding to the to-do list.

The lifestyle shifts we’ve seen since the pandemic continue to reshape how people spend their time. Remote and hybrid work arrangements persist, giving urban dwellers more flexibility to step outside during daylight hours. That midday break becomes a chance to water a few plants or simply sit with a coffee near some greenery, rather than scrolling through lunch. There’s also a noticeable pushback against digital overload. Leisure gardening offers something tangible and analog, a way to disconnect that doesn’t require a meditation app or another subscription.

Urban gardening solutions have become remarkably accessible, making it easier than ever to start small. Vertical gardens, self-watering containers, and beginner-friendly plant varieties remove traditional barriers like lack of space or expertise. You don’t need a yard or advanced horticultural knowledge anymore. A balcony and curiosity are enough.

The trend is showing up in unexpected places. Events like the Southern Alberta Home, Garden & Leisure Show, running March 12-14, 2026 at the Lethbridge Trade and Convention Centre, and the Northumberland Home, Garden & Leisure Show returning to the Cobourg Community Centre May 30-31, signal that leisure gardening has moved beyond niche circles into mainstream interest. These shows reflect what people want right now: approachable, enjoyable outdoor pursuits that don’t demand perfection, just presence.

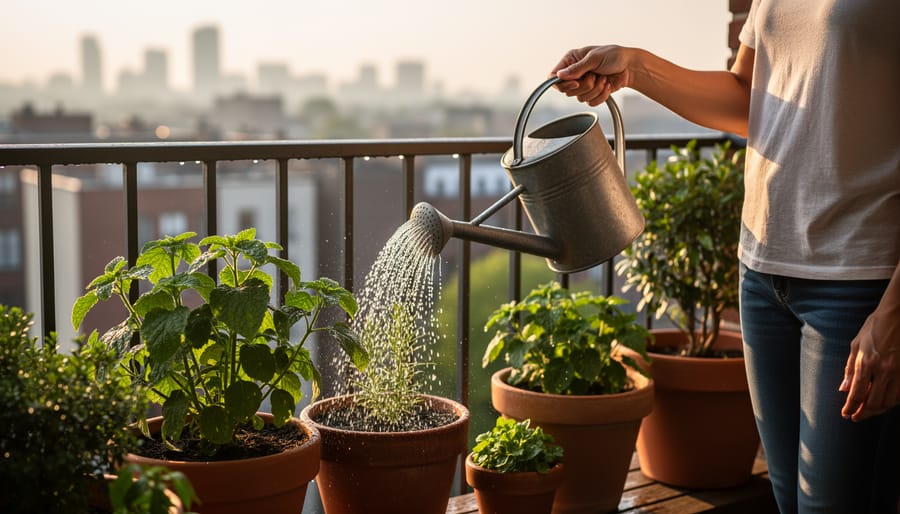
Person watering container plants on an apartment balcony in soft daylight
A quiet moment watering balcony plants captures the low-pressure, feel-good side of leisure gardening.

Leisure Gardening for Austin’s Urban Spaces

Vertical Gardens: Your Low-Effort, High-Joy Solution

Vertical gardens flip the script on traditional gardening by growing up instead of out, making them the perfect match for leisure gardening’s low-stress philosophy. If you’re working with a small Austin balcony or patio, you can create a lush, productive garden without claiming every square foot of floor space. The real beauty is how little effort they demand once you’ve got them set up, plants arranged vertically tend to stay cleaner, drain better, and suffer fewer pest problems than ground-level beds.

For Austin’s climate, vertical setups offer a practical advantage: you can move them into shade during brutal afternoon sun or bring delicate herbs closer to your door when temperatures spike. Wall-mounted planters, tower systems, and hanging pockets all work beautifully, and many pair naturally with container gardening basics you might already know. You water from the top, gravity does the work, and you’re done in minutes.

The visual payoff is immediate and satisfying, there’s something genuinely joyful about stepping outside to a wall of greenery that you didn’t have to weed, till, or wrestle into shape. Herbs like basil and oregano thrive in vertical pockets, cherry tomatoes cascade beautifully, and succulents add texture without any fuss. You get the relaxation and creative fulfillment of gardening without the back-breaking labor or weekend-consuming maintenance schedules that can turn a hobby into a chore.

Vertical garden wall with stacked planters filled with herbs on an urban patio
A lush vertical planter wall turns limited space into an easy, visually rewarding gardening setup.

Getting Started: Your First Leisure Garden Project

Plants That Practically Take Care of Themselves

The easiest way to embrace leisure gardening is choosing plants that thrive with minimal fussing. In Austin’s climate, basil and mint make a perfect beginner herb garden they love heat, forgive occasional watering lapses, and reward you with fresh flavors for your kitchen. Mint grows so enthusiastically it practically tends itself, though you’ll want to contain it in a pot to prevent takeover.

Succulents are the ultimate low-pressure choice for leisure gardeners. Varieties like sedum and echeveria tolerate Austin’s scorching summers and need watering only when the soil dries completely. They’re nearly impossible to kill with neglect.

For color without commitment, zinnias are your friend. Scatter seeds in spring, water occasionally, and they’ll bloom reliably through fall with zero deadheading required. Cherry tomatoes also fit the leisure philosophy, choose patio varieties, give them a sunny spot and consistent water, and you’ll harvest handfuls of fruit all summer without intensive care.

These selections make it simple to keep plants alive while still feeling like a successful gardener, which is exactly the point.

Making It Truly Leisurely: Tips to Keep It Fun

The secret to keeping gardening leisurely isn’t finding more time or better plants. It’s permission to break all the rules that made gardening feel like work in the first place.

Start by ditching the idea that your garden needs to look Instagram-perfect or produce bushels of tomatoes. Your only job is to enjoy the process. Water when you remember, prune when it feels right, and skip a week if life gets busy. Real leisure gardening means your garden fits around your life, not the other way around.

Tip: If it feels like a chore, you’re doing it wrong. Adjust your approach, not your effort level.

Make your garden space somewhere you actually want to be. Add a comfortable chair, keep a speaker nearby for music or podcasts, and treat your watering time as coffee-on-the-balcony time. Some of the best leisure gardeners spend more time sitting with their plants than fussing over them. That’s not lazy, that’s the whole point.

Learn to let go without guilt. Plants die. It happens to everyone, and it doesn’t mean you failed. A wilted basil plant just means you tried something, enjoyed it while it lasted, and now you know what works for your space and routine. Replace it or don’t. There’s zero obligation to maintain a perfect streak.

Keep a casual approach to maintenance by grouping plants with similar needs together and choosing a watering schedule that matches your lifestyle, not some rigid calendar. If you travel often, lean into succulents and drought-tolerant herbs. If you’re home most evenings, herbs that need frequent snipping give you something to do without pressure.

The moment gardening stops being fun is the moment to step back, simplify, or try something completely different. Your garden should recharge you, not drain you.

Terracotta pots of succulents and zinnias on a patio table next to a cup of coffee
Leisure gardening looks like a comfortable routine, plants are cared for, but the day stays easy and enjoyable.

Local Resources and Inspiration in Austin

Austin’s gardening community is quietly building a support network perfect for the leisure gardening mindset. You don’t need to commit to a full semester course or join a formal club, plenty of local options let you dip in at your own pace.

Private gardening classes around Austin offer personalized, low-pressure instruction that fits the leisure approach beautifully. You can book a one-on-one session to learn vertical garden setup or container basics without the intimidation of a group setting. Several local garden centers and independent instructors offer these consultations, letting you ask questions specific to your space and schedule.

If you’d rather skip the setup phase entirely, Austin’s potting services will deliver planted containers ready to enjoy. You choose your plants and aesthetic, they handle the dirty work, and you start with a finished garden that’s already thriving. It’s leisure gardening at its most accessible.

The growing momentum behind leisure gardening nationwide, reflected in events like the Southern Alberta Home, Garden & Leisure Show in March 2026 and the Northumberland show returning in May, signals that the industry is finally catching up to what beginners actually want: approachable entry points without the pressure. That shift is trickling into local offerings, making it easier than ever to explore gardening as a genuine leisure activity rather than a test of horticultural skill. Check in with your neighborhood nursery or search for Austin garden consultants to find your best starting point.

Leisure gardening isn’t about mastering perfect rows or hitting harvest quotas. It’s about stepping outside with your coffee, noticing a new leaf unfurling, and feeling genuinely good about it. That’s the whole point. You’re not failing if your basil gets leggy or your tomatoes stay green longer than expected, you’re learning what works in your space and enjoying the process along the way.

Start with one small project. A vertical planter on your balcony. Three pots of herbs by the kitchen window. Whatever feels manageable and sounds fun. The beauty of leisure gardening is that there’s no finish line, no competition, just you creating a little green space that makes your day better.

If you’re not sure where to begin, consider a vertical garden setup, it’s low-maintenance, fits Austin’s urban spaces perfectly, and gives you immediate visual satisfaction without the pressure. Or take a local class to ease in with guidance and meet others who garden for the same reasons you do. Your version of garden leisure is waiting, and it starts smaller and simpler than you think.

25 Container Gardening Ideas to Transform Your Austin Space in 2026

25 Container Gardening Ideas to Transform Your Austin Space in 2026

Container gardening transforms any outdoor space into a productive growing area, whether you’re working with a balcony, patio, fire escape, or sunny windowsill. The beauty of containers is their flexibility: you control the soil quality, move plants to follow the sun or escape Austin’s punishing afternoon heat, and experiment with combinations impossible in traditional beds. From edible gardens that produce fresh herbs and vegetables year-round to vertical installations that maximize square footage, container gardening solves the urban gardener’s biggest challenges: limited space, poor native soil, and the need for portability.

Austin’s climate makes container gardening especially rewarding. Our long growing season means you can harvest tomatoes well into November and start cool-season greens by September. Containers also let you sidestep our notorious caliche and clay soils, giving heat-loving peppers and citrus the drainage they demand. The catch? Containers dry out faster than ground beds, particularly during triple-digit summers, so choosing the right size pot and understanding watering needs becomes crucial.

This guide breaks down 25 container ideas across edibles, vertical solutions, ornamentals, and specialty projects. Each category addresses different goals, from feeding your family to creating privacy screens or adding seasonal color. You’ll find practical details on container size, plant selection for Central Texas conditions, and maintenance tips that keep your garden thriving without constant intervention.

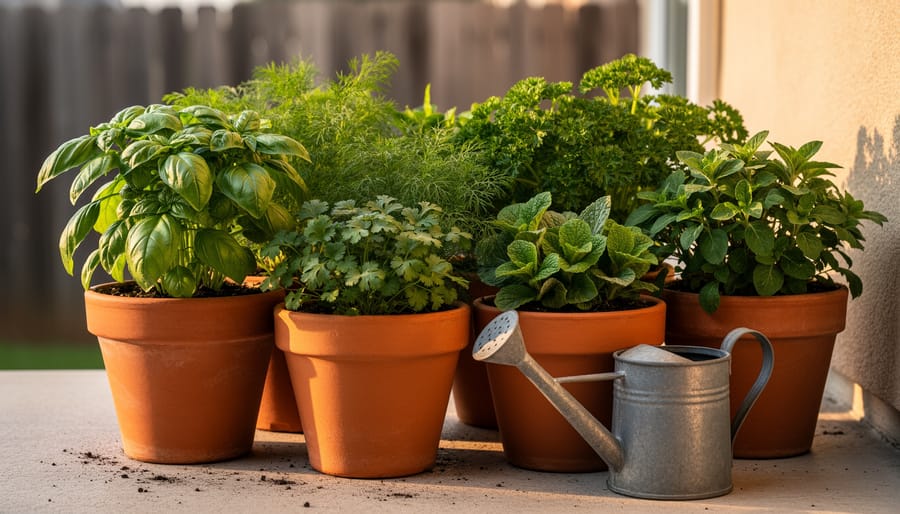
Close-up view of basil, parsley, and cilantro growing in multiple containers on a patio with a watering can nearby.
A well-planned container herb setup shows how easily you can grow usable plants in limited urban space.

What Makes a Great Container Garden

Before diving into specific ideas, let’s talk about what separates a thriving container garden from a disappointing one. The 25 ideas in this guide weren’t chosen at random, each meets specific criteria that matter for Austin’s unique growing conditions and urban spaces.

Container choice matters more than you might think. Your pot needs drainage holes (non-negotiable), but it also needs enough volume for roots to develop properly. A 5-gallon container is the minimum for most vegetables and larger ornamentals, while herbs and succulents can work in smaller spaces. Material affects performance too, terracotta breathes beautifully but dries out fast in our heat, while plastic and glazed ceramic retain moisture longer.

Austin’s climate shaped every recommendation here. We deal with intense summer sun, sporadic rainfall, and a growing season that stretches nearly year-round. The best container ideas either embrace heat-loving plants that thrive in those conditions or provide strategies for protecting more delicate species. Sun exposure drives plant selection: a south-facing balcony in July is a completely different environment than a covered porch.

Here’s what made each idea worth including:

  • Proper drainage system or self-watering capability for Austin’s erratic rainfall patterns
  • Heat tolerance appropriate for USDA Zone 8b/9a conditions
  • Container size matching the plant’s mature root system
  • Space efficiency for apartments, patios, and small urban yards
  • Realistic maintenance requirements for busy schedules

Plant compatibility matters when you’re combining multiple species in one container. The ideas group plants with similar water needs, sun requirements, and growth rates. A sprawling tomato plant and a compact basil can share space, but aggressive spreaders will crowd out slower growers.

Finally, every idea balances ambition with practicality. You’ll find options for beginners starting with three herbs and experienced gardeners ready to tackle vertical systems or specialty crops.

25 Container Gardening Ideas for Your Space

Edible Container Gardens

1. Classic Herb Trio

Start your edible container journey with the easiest win: a single pot holding basil, parsley, and cilantro. These workhorses thrive together in a 12-inch container with excellent drainage. Place them where they’ll get morning sun and afternoon shade, crucial during Austin’s brutal June through August stretch. Basil bolts fast in full Texas sun, so partial shade extends your harvest. If you’re new to growing your own seasonings, check out herb gardening basics for detailed cultivation techniques. Water daily during summer heat, and pinch back stems regularly to keep plants bushy rather than leggy.

2. Salad Bowl Garden

A wide, shallow container (at least 18 inches across, 8 inches deep) becomes your personal salad bar. Mix quick-growing lettuce varieties, Buttercrunch, Red Sails, and Oakleaf, with arugula and spinach for continuous harvests. In Austin, plant this one in March or late September to avoid the heat that turns greens bitter and sends them bolting. Harvest outer leaves as you need them, and the plants keep producing for weeks. Add a layer of mulch on top of the soil to keep roots cooler and moisture more consistent.

3. Tomato Tower

A single determinate tomato variety like Patio or Bush Early Girl fits beautifully in a 5-gallon container, but you’ll need sturdy support. Choose a pot at least 14 inches deep with a cage or stake already in place before planting. Austin tomatoes produce best when planted in March for a spring harvest, our summer heat above 95 degrees stops fruit set cold. Water deeply every other day once fruiting starts, and feed with a balanced fertilizer every two weeks. One plant provides enough tomatoes for fresh eating all season.

4. Pepper Collection

Group three different pepper plants, a sweet bell, a jalapeño, and a shishito, in individual 5-gallon containers positioned together. Peppers actually handle Austin heat better than tomatoes, producing right through summer if you keep them consistently watered. They need full sun and excellent drainage. Start with transplants in April, and you’ll harvest from July through the first frost. The varied heat levels give you options for every meal, from breakfast scrambles to evening stir-fries.

5. Strawberry Planter

Those terracotta pots with side pockets work perfectly for everbearing strawberry varieties. Plant one crown per pocket, ensuring the crown sits just at soil level, bury it and the plant rots, leave it exposed and it dries out. In Austin, strawberries thrive as a winter crop; plant them in October for spring harvests. They need six hours of sun and consistent moisture but not soggy soil. Pinch off runners to direct energy into fruit production rather than new plants.

6. Dwarf Citrus Trees

A Meyer lemon or improved Meyer lime lives happily for years in a 15-gallon container on your patio. These compact trees handle containers better than full-size varieties while still producing real fruit. They need full sun, monthly feeding during the growing season, and protection when temperatures drop below 28 degrees (rare in Austin but it happens). Wheel them near a south-facing wall on those occasional freezing nights, or throw a blanket over the canopy.

7. Culinary Asian Greens

Bok choy, mizuna, and tatsoi grow fast in a rectangular planter box, ready to harvest in 30 days. These cool-season greens tolerate light frost, making them perfect for Austin’s mild winters. Plant them in October or February in a container at least 8 inches deep. They prefer afternoon shade even in cool weather. Cut the entire plant at soil level when it’s 6 inches tall for baby greens, or let them mature for full heads.

8. Container Root Vegetables

Carrots, radishes, and beets all work in deep containers, go at least 12 inches for carrots, 6 inches for radishes. Choose short carrot varieties like Thumbelina or Paris Market rather than long types that need more depth. Austin’s cool seasons (October through March) suit root crops perfectly. Thin seedlings aggressively to give each plant room to develop, and keep soil consistently moist for the sweetest flavor and best texture.

Vertical and Space-Saving Solutions

When you’re working with a compact Austin patio or balcony, thinking vertically transforms your growing potential. These six ideas stack, climb, and hang to multiply your planting space without claiming more square footage.

Idea 9: Tiered Planter Systems
Three or four-tier stackable planters create mini growing zones at different heights. Put sun-loving basil and cherry tomatoes on top, heat-tolerant peppers in the middle, and shade-appreciating parsley at the bottom. The graduated design makes watering easier and gives each plant its spotlight. Look for systems with built-in saucers to catch runoff on your balcony floor.

Idea 10: Wall-Mounted Pocket Planters
Fabric or rigid pocket systems turn any vertical surface into a garden wall. Mount them on a sunny fence section and fill with trailing succulents, compact herbs like thyme and oregano, or small ornamental grasses. Each pocket needs drainage holes punched if they don’t come pre-made, and fabric versions dry out faster in Austin’s heat, so check them daily during summer.

Idea 11: Trellis Containers for Vining Plants
Pair a large container with a sturdy trellis or obelisk for climbing beans, cucumbers, or morning glories. The vertical growth habit gives you pounds of produce from a single pot. Choose containers at least 18 inches deep and position them where vines won’t block afternoon sun from other plants. Sugar snap peas thrive here in Austin’s cooler months.

Idea 12: Stacked Herb Towers
Purpose-built herb towers with multiple planting pockets spiraling up a central column pack serious flavor into minimal footprint. Plant your most-used herbs (cilantro, basil, mint) in easy-reach pockets and experiment with less common varieties like lemon balm or Cuban oregano higher up. Rotate the tower weekly so all sides get equal sun exposure.

Idea 13: Hanging Basket Combinations
Suspend mixed plantings at varying heights to create floating garden layers. Combine upright plants in the center with trailing varieties that cascade over the edges, try upright zinnias with trailing verbena, or cherry tomatoes with trailing rosemary. Use swivel hooks so you can rotate baskets for even growth, and remember that hanging containers dry out twice as fast as ground-level ones.

Idea 14: Ladder Garden Display
An old wooden ladder or purpose-built plant stand creates instant vertical real estate for multiple containers. Arrange pots on each rung by size and sun needs, with largest containers on lower rungs for stability. This setup works beautifully for displaying seasonal color rotations or organizing an entire kitchen herb collection where everything stays visible and accessible.

Vertical stacked and wall-mounted planters with cascading greens and flowers in warm golden-hour light.
Vertical container gardening makes the most of limited space by turning walls and corners into productive plant zones.

Ornamental and Pollinator-Friendly Options

15. Native Texas Wildflower Mix

Transform a large shallow container into a miniature meadow with native bluebonnets, Indian paintbrush, and black-eyed Susans. Use a container at least 18 inches wide and 12 inches deep with excellent drainage. Plant seeds in fall for spring blooms, or buy transplants in late winter. These hardy natives thrive in Austin’s heat and require minimal water once established.

16. Butterfly Garden Container

Create a pollinator paradise with nectar-rich plants like purple coneflower, lantana, and zinnias paired with host plants such as milkweed for monarch caterpillars. Choose a container 16 inches or larger and position it in full sun. Plant in clusters rather than single specimens to attract more butterflies. Add a flat stone as a basking spot.

17. Succulent Arrangement

Combine drought-tolerant beauties like echeveria, sedum, and agave in a wide, shallow container with multiple drainage holes. Succulents handle Austin’s intense summer sun and need watering only every two to three weeks. Layer gravel at the bottom and use cactus-specific potting mix. Perfect for hot patios where other plants struggle.

18. Seasonal Color Rotation

Keep your entrance or patio vibrant year-round by swapping out annuals each season. Plant pansies and snapdragons for winter color, petunias and geraniums for spring, heat-tolerant vinca and pentas for summer, and chrysanthemums for fall. Use the same decorative containers but refresh the plantings quarterly. This approach gives you continuous blooms without committing to perennials.

19. Fragrant Evening Garden

Design a container for your outdoor living area with night-blooming jasmine, moonflower vines, and white nicotiana that release intense fragrance after sunset. Add a small trellis for the vining plants and position the container near seating areas. These plants also attract night-pollinating moths, adding movement and life to evening gatherings.

20. Hummingbird Haven

Fill a tall container with red salvia, coral honeysuckle on a small trellis, and cigar plant to create an irresistible feeding station. Hummingbirds favor tubular flowers in red, orange, and pink. Position the container where you can watch from inside, ideally near a window. Plant densely and deadhead regularly to keep blooms coming through our long growing season.

Butterfly resting on bright wildflowers in a container garden with soft morning light.
Flowering containers can invite butterflies and other pollinators while adding color to your outdoor space.

Creative and Specialty Container Ideas

21. Self-Watering Container System

Perfect for Austin’s busy professionals or frequent travelers. Self-watering planters feature a built-in reservoir that delivers moisture to roots through capillary action, keeping plants hydrated for days without attention. Look for containers with water-level indicators and fill spouts. Plant drought-tolerant herbs like rosemary and oregano, or leafy greens that appreciate consistent moisture. These systems work especially well during Austin’s intense summer heat when twice-daily watering becomes necessary for standard containers. Start with a single self-watering planter to test the system before investing in multiple units.

22. Shade-Loving Container for Covered Porches

Transform that shaded porch or north-facing balcony into a lush retreat. Combine coleus for vibrant foliage, impatiens for pops of color, and trailing vinca vine to soften container edges. Add caladiums with their striking heart-shaped leaves for drama. Use a large container at least 16 inches wide to accommodate multiple plants and retain moisture longer in Austin’s dry air. This combination thrives in dappled light and actually prefers protection from afternoon sun. Water regularly but check soil first since shaded containers dry out more slowly than those in full sun.

23. Drought-Tolerant Texas Tough Planter

Embrace native resilience with a container designed to handle whatever Texas weather throws at it. Mix Texas sage, blackfoot daisy, and trailing lantana in a shallow, wide bowl. These Austin natives tolerate heat, require minimal water once established, and bloom prolifically. Use a terracotta or unglazed ceramic container that allows roots to breathe. Add a layer of gravel mulch on top to reduce evaporation and give a clean desert aesthetic. Water deeply but infrequently, letting soil dry completely between waterings.

24. Kid-Friendly Sensory Garden

Get children excited about gardening with plants they can touch, smell, and taste. Combine soft lamb’s ear leaves, fragrant chocolate mint, cherry tomatoes at kid height, and colorful marigolds. Choose a sturdy container placed at child-accessible height. Let kids decorate the pot with outdoor paint before planting. This hands-on garden teaches responsibility while engaging multiple senses. Avoid plants with thorns or toxic properties, and supervise taste-testing to ensure only edible parts get sampled.

25. Windowsill Micro-Garden

Maximize limited space with a compact indoor or outdoor windowsill setup. Use narrow rectangular containers or a series of small pots for microgreens, sprouting herbs, or dwarf varieties. East or west-facing windows work best in Austin to avoid scorching afternoon sun. Grow basil, chives, or cilantro for cooking, or try fast-growing arugula microgreens ready to harvest in two weeks. Rotate containers regularly for even growth and keep soil consistently moist but not waterlogged in the confined space.

Pepper plant growing in a decorative self-watering container with dark, moist soil visible at the surface.
Self-watering containers help maintain consistent moisture, especially valuable during Austin’s hot stretches.

Getting Started with Your Container Garden

Ready to turn those container gardening ideas into reality? Whether you’re a container gardening beginners or expanding your collection, success starts with the right foundation and consistent care tailored to Austin’s unique climate.

Start by choosing containers with drainage holes, non-negotiable in our climate. Clay pots breathe well but dry out faster; plastic or resin retains moisture longer, which helps during July and August. Go larger than you think you need: a 14-inch pot beats a 10-inch for most vegetables and ornamentals, giving roots room and buffering against rapid temperature swings.

For soil, skip garden dirt entirely. Use a quality potting mix designed for containers, it drains properly while holding enough moisture. Texas heat is brutal, so consider mixing in compost or coconut coir to improve water retention. Remember that nutrients leach with watering especially in our summer downpours, so plan to fertilize every two to three weeks during the growing season with a balanced liquid fertilizer diluted to half strength.

Tip: During Austin’s peak summer months (June through September), check container moisture daily, sometimes twice a day for small pots in full sun.

Water deeply until it drains from the bottom, then let the top inch dry before watering again. Morning watering works best, giving plants a reservoir before afternoon heat hits. Mulch the soil surface with bark chips or stones to slow evaporation.

Understanding your Austin gardening zone (8b or 9a, depending on your neighborhood) helps you time plantings and protect containers during our occasional winter freezes. When frost threatens, move pots to a covered porch or wrap them overnight.

Struggling? Yellow leaves often mean overwatering or poor drainage. Wilting despite moist soil suggests root problems, time to repot. Leggy growth means insufficient light; relocate or choose shade-tolerant plants. The key is observation: check your containers regularly, adjust watering as weather shifts, and don’t be afraid to keep your plants alive through trial and error. Every gardener learns by doing.

Common Container Gardening Questions

When is the best time to start container gardening in Austin?

You can start most container gardens in March or early April after the last frost risk passes. For heat-sensitive greens and cool-season crops, September through October offers ideal planting conditions, and you can grow vegetables indoors during the coldest months.

Which container materials work best in Austin’s heat?

Ceramic and thick resin containers insulate roots better than thin plastic or metal, which can overheat in full sun. Terracotta breathes well but dries out quickly, so plan for more frequent watering during summer months.

How do I keep container plants alive during 100-degree days?

Move containers to areas with afternoon shade, group them together to create humidity, and water in early morning or evening. Add a two-inch mulch layer on top of the soil to reduce evaporation and keep roots cooler.

When should I protect containers from frost?

Austin typically sees frost between late November and mid-February. Move tender plants indoors or against a south-facing wall, and cover with frost cloth when temperatures drop below 35 degrees.

What’s the easiest way to manage pests in container gardens?

Check plants weekly for aphids, spider mites, and whiteflies. Spray affected plants with a strong water stream or use insecticidal soap early in the morning before temperatures climb.

Where can I find container gardening supplies in Austin?

Local nurseries like The Great Outdoors, Shoal Creek Nursery, and Barton Springs Nursery carry quality containers, potting mix, and plants suited to our climate. Natural Gardener on Old Bee Caves Road specializes in organic options and offers expert advice for Central Texas growing conditions.

These questions cover the practical concerns Austin gardeners face when starting container gardens. The answers provide specific, actionable guidance without overwhelming detail, helping you troubleshoot common issues before they become problems. Local resources make it easier to source the right materials and get advice tailored to our unique climate challenges.

Container gardening opens up a world of possibilities for every Austin resident, whether you’re working with a tiny balcony or a spacious patio. These 25 ideas prove that limited space doesn’t mean limited potential, you can grow fresh herbs, colorful flowers, productive vegetables, and even small fruit trees in containers. Start with one or two ideas that excite you most, then expand as you gain confidence. Don’t be afraid to mix and match concepts or adjust them to your specific conditions. Your local resources, including nurseries and gardening communities throughout Austin, offer supplies, advice, and inspiration when you need it. The beauty of container gardening lies not just in what you grow, but in the daily connection to plants, the satisfaction of harvesting your own food, and the creative expression of transforming any space into a thriving garden.

Herb Gardening For Beginners: Start Your Austin Kitchen Garden This Week

Herb Gardening For Beginners: Start Your Austin Kitchen Garden This Week

Starting an herb garden requires nothing more than a sunny spot, decent soil, and a handful of beginner-friendly plants like basil, mint, and rosemary. You can grow a thriving collection in containers on a balcony, a vertical wall planter, or even a sunny windowsill. Most herbs are remarkably forgiving, need minimal space, and deliver fresh flavor within weeks of planting.

If you’ve hesitated because you think gardening requires a yard or special skills, you’re not alone. Austin’s urban gardeners have proven that anyone can cultivate fresh herbs in tight quarters. The key is choosing the right plants for your space and understanding a few basic principles about water, light, and drainage.

Container gardening solves most beginner challenges. You control the soil quality, move plants to follow the sun, and avoid the complications of Texas clay. A 10-inch pot is enough for most herbs, and vertical solutions like wall-mounted planters or tiered shelves multiply your growing area without claiming precious floor space.

The herbs you start with matter. Basil thrives in Austin’s heat and grows fast enough to keep new gardeners motivated. Mint is nearly indestructible but needs its own container because it spreads aggressively. Rosemary tolerates drought and adds structure to small gardens. These three give you versatility in the kitchen and build confidence before you expand to more temperamental varieties.

Summer 2026 brings intense heat, but herbs actually prefer warm weather as long as you water consistently. Start now, and you’ll be harvesting fresh oregano, cilantro, and thyme by late July.

Why Herbs Are the Perfect Starting Point

Herbs give you gardening success fast, which is exactly what you need when you’re starting out. While vegetables demand weeks of care before you see results, most herbs grow noticeably within days. Basil shoots up almost overnight in Austin’s heat, and you can snip usable leaves from your cilantro in just two to three weeks. That quick feedback loop keeps you motivated instead of wondering if you’re doing something wrong.

These plants also forgive your learning curve. Forget to water your tomatoes for a day in July and you’ll lose them, but most herbs bounce back from minor neglect. Overwater your rosemary once and it’ll sulk but usually recover. This resilience matters tremendously when you’re still figuring out what “moist but not waterlogged” actually feels like.

Space constraints won’t hold you back either. A single 6-inch pot on your apartment balcony can support a thriving basil plant that produces more than you’ll use. Three containers stacked vertically on a wall planter give you a complete kitchen herb collection without sacrificing your limited patio square footage. You don’t need a yard or even a big balcony to grow genuinely useful amounts of fresh herbs.

The immediate payoff keeps you engaged. Snip fresh basil for tonight’s pasta, grab mint for your iced tea, or harvest cilantro for taco Tuesday. You’re using what you grow within weeks of planting, which makes the whole endeavor feel practical rather than theoretical. That connection between planting, tending, harvesting, and eating builds real confidence. You’ll quickly realize that you actually can keep something alive and thriving, which naturally leads to trying more ambitious plants later.

Beginner gardener placing herb seedlings into terracotta pots on a sunny balcony
A new gardener is getting started with a simple container setup for fresh herbs right at home.

Best Beginner Herbs for Austin’s Climate

Heat-Loving Heroes

Austin’s scorching summers create perfect conditions for basil, rosemary, and oregano. These three herbs thrive in heat that would stress other plants, making them your most reliable choices from June through September.

Basil loves full sun and actually produces more flavorful leaves in hot weather. Plant it after the last frost (typically mid-March in Austin) and harvest frequently to encourage bushy growth. Genovese and Thai basil varieties handle our heat exceptionally well.

Rosemary is nearly indestructible once established. This Mediterranean native tolerates drought, poor soil, and blazing sun without complaint. Plant it in a spot with good drainage and resist the urge to overwater, rosemary prefers to dry out between waterings.

Oregano thrives in Austin’s alkaline soil and hot, dry conditions. Greek oregano offers the most intense flavor and spreads readily in containers. Let it dry out completely between waterings, and harvest regularly to keep plants compact and productive. All three herbs actually develop stronger flavors when slightly stressed by heat, which means Austin’s climate naturally enhances your harvest.

Cool-Season Champions

Austin’s cooler months, roughly October through March, are prime time for herbs that struggle in summer heat. Cilantro tops this list and grows fast in fall and winter, giving you fresh leaves in just a few weeks. Plant it every three to four weeks for a steady supply, since it bolts quickly once temperatures climb above 75°F. Parsley thrives in the same window and tolerates light frosts, making it reliable through winter. Both prefer morning sun and afternoon shade during warmer stretches.

Chives and dill also excel in Austin’s mild season. Chives stay compact in containers and come back year after year if you protect them during the occasional hard freeze. Dill grows tall and feathery, perfect for pickling or adding to salads, but needs a deeper pot to accommodate its taproot. Start these cool-season herbs in late September or early October, and you’ll harvest fresh greens all winter while your heat-loving basil takes a break.

Setting Up Your First Herb Garden

Container and Vertical Options for Small Spaces

You don’t need a backyard to grow a thriving herb collection. Austin’s apartments and small patios are perfect for vertical and container setups that maximize every square inch you have.

Start with individual pots sized to each herb’s root system. Basil, cilantro, and parsley do well in 6 to 8-inch containers, while rosemary and oregano need 10 to 12-inch pots to spread out. Terra cotta breathes better in Austin’s heat, but plastic retains moisture longer between waterings. Pick what fits your schedule.

Vertical wall planters transform bare balcony walls into productive gardens. Pocket planters with felt pockets or modular grid systems work beautifully for shallow-rooted herbs like thyme and chives. Mount them where they’ll get at least six hours of sun, and you’ll harvest fresh herbs without sacrificing floor space.

Tiered plant stands give you three levels of growing area in the footprint of a single pot. Place taller herbs like rosemary on the bottom tier where they won’t shade smaller plants, and arrange basil and cilantro up top where you can reach them easily. These setups look sharp on patios and make watering a breeze since you can see every plant at once.

For more container gardening tips beyond herbs, you’ll find plenty of Austin-specific guidance that applies to balcony growing. The key is starting with just a few containers this week and adding more as you get comfortable with the rhythm of watering and care.

Basil, rosemary, and oregano growing in a tiered vertical planter in bright sunlight
Heat-friendly herbs fill a vertical container arrangement, showing how beginners can grow multiple varieties in limited space.

Soil and Drainage Basics

Good potting mix makes the difference between thriving herbs and sad, wilted ones. Skip garden soil, it’s too heavy for containers and compacts quickly. Look for bags labeled “potting mix” or “container mix” at any Austin garden center. These blends are lighter, hold moisture without getting soggy, and let roots breathe.

Drainage matters more than most beginners realize. Herbs hate sitting in water, which causes root rot faster than anything else. Every container needs drainage holes in the bottom, no exceptions. If you fall in love with a pot without holes, use it as a decorative outer sleeve for a plastic nursery pot that drains properly.

Here’s a simple test: water your potted herb and watch. If water pools on top instead of soaking in, or if it doesn’t drain out the bottom within a few seconds, you’ve got a problem. Add perlite to improve drainage, or start over with fresh mix. During Austin’s blazing summers, well-draining soil actually helps because you can water more frequently without risking soggy roots.

Daily Care Made Simple

Caring for herbs takes minutes a day once you understand their basic needs. The secret to keep plants alive is consistency, not complexity.

Water your herbs when the top inch of soil feels dry to the touch. Stick your finger in the soil before watering. During Austin’s brutal summer months (June through September), container herbs often need daily watering, especially on balconies and patios where heat radiates off concrete. In cooler months, you might water only twice weekly. Always water at the soil level rather than overhead to prevent fungal issues that thrive in our humidity.

Austin’s intense sun means location matters. Most herbs need 6-8 hours of sunlight, but afternoon shade during peak summer helps prevent stress. If your basil leaves look pale or your cilantro bolts immediately, they’re getting too much heat. Move containers to spots with morning sun and afternoon protection, or use shade cloth during July and August heat waves.

Feed your herbs lightly every 4-6 weeks with a balanced liquid fertilizer diluted to half strength. Container herbs need more frequent feeding than ground-planted ones since nutrients wash out with watering. Skip fertilizing in winter when growth naturally slows, even in our mild Austin gardening zone.

Harvest regularly, even if you don’t need the herbs immediately. Pinching off the top leaves and stems encourages bushier growth and prevents flowering, which makes most herbs taste bitter. Take no more than one-third of the plant at once.

Watch for sudden cold snaps in winter. When temperatures drop below 32°F (rare but possible in December and January), bring containers indoors overnight or cover them with frost cloth. Most culinary herbs handle brief cold, but basil dies at the first freeze. Your rosemary and oregano will bounce back; your basil won’t.

Watering jug pouring water into potted mint and cilantro soil in a container garden
Gentle watering helps container herbs stay healthy, especially during Austin’s hot stretches.

Common Beginner Mistakes (And How to Avoid Them)

Most new herb gardeners don’t fail because they lack a green thumb. They struggle because they’re too careful or too hands-off. Here’s what trips up beginners and how to fix it.

Overwatering kills more herbs than drought. Your instinct might tell you to water daily, but most herbs prefer their soil to dry out between waterings. Stick your finger an inch into the soil. If it’s damp, wait another day. Basil and mint like consistent moisture, but rosemary and oregano actually thrive on neglect. In Austin’s summer heat, containers dry faster, so check daily but don’t automatically water.

Wrong light placement stunts growth. Most herbs need six hours of direct sun, but in Austin’s brutal summer, afternoon shade prevents scorching. If your herbs look leggy and pale, they’re reaching for more light. Move them to a brighter spot. Conversely, wilting leaves in full afternoon sun mean they need shade during peak heat.

Not harvesting enough makes plants weak. This surprises beginners: the more you trim, the bushier your herbs grow. Harvest from the top, cutting just above a leaf node. If you’re waiting for your basil to “get bigger” before picking, you’re doing it backward. Regular trimming prevents flowering and keeps plants productive. Aim to use your herbs at least twice weekly.

Crowding plants invites problems. That cute three-herb combo pot at the nursery? It’s temporary. Give each herb its own container or space them 8-10 inches apart. Crowded plants compete for nutrients and airflow, making them susceptible to pests and disease. When you embrace organic gardening practices, proper spacing becomes even more important for preventing issues without chemicals.

These mistakes are fixable. Notice what your plants tell you and adjust.

Local Resources and Learning Opportunities

Learning alongside other beginners makes herb gardening less intimidating and way more fun. Austin’s gardening community offers plenty of hands-on opportunities to build your skills and connect with fellow urban gardeners who get the challenges of small-space growing.

Seed to Supper
An edible gardening program coming up June 16 at Thistle Cottage that covers everything from soil basics to harvesting. Sign up at https://mcplib.libnet.info/event/16043355 or call 270-338-4760 to reserve your spot.
Thyme to Grow: A Guide to Herb Gardening
This hands-on program happens Saturday, August 23 at LancasterHistory, 230 N. President Ave., Lancaster. Tickets are $10 for adults, $5 for children, and free for Friends of the Tanger Arboretum and American Horticultural Society Reciprocal Admission Program Members.
Local Extension Offices
Travis County AgriLife Extension offers free advice on growing herbs in Austin’s specific climate and can answer questions about pest problems, watering schedules, and variety selection. They’re an invaluable resource when you run into issues your online research can’t solve.

Beyond formal programs, Austin’s community gardens often welcome beginners who want to observe experienced gardeners at work. You’ll pick up practical tricks watching someone stake a sprawling basil plant or divide overgrown mint that no tutorial quite captures the same way.

You don’t need a sprawling garden or years of experience to grow fresh herbs. Start this week with just two or three containers, some potting mix, and a sunny spot on your balcony or windowsill. Pick heat-loving basil and rosemary if it’s summer, or cilantro and parsley when cooler months arrive. Austin’s climate makes herb gardening surprisingly forgiving once you understand your seasons.

Mistakes will happen. You’ll overwater something, forget to harvest, or watch a plant struggle in the wrong spot. That’s how you learn what works in your specific space. The local gardening community is welcoming and eager to share tips, whether you connect through neighborhood plant swaps or programs designed for beginners.

The hardest part is simply starting. Grab those first containers, plant your herbs, and give yourself permission to experiment. Within weeks, you’ll be snipping fresh leaves for dinner and planning which herbs to add next. Your kitchen garden begins now, not when conditions are perfect.

Container Gardening for Beginners: Start Your Austin Patio Garden This Week

Container Gardening for Beginners: Start Your Austin Patio Garden This Week

Container gardening transforms tiny Austin patios, balconies, and doorsteps into productive green spaces without needing a traditional yard. You’ll grow fresh herbs, vegetables, and flowers in pots that fit your available space, whether that’s a sunny apartment balcony or a shaded corner of your deck.

Start with just three to five containers in different sizes. A 14-inch pot works perfectly for tomatoes or peppers, while 6-inch pots handle herbs like basil and cilantro. Grab quality potting mix (never garden soil, which compacts in containers), and you’re already halfway there.

Austin’s intense summer heat actually makes container gardening easier in some ways. You can move pots to shadier spots during our brutal July and August afternoons, something impossible with in-ground beds. Choose heat-loving plants like cherry tomatoes, jalapeños, and Mexican bush sage for summer success, or switch to lettuce and kale when fall arrives.

The real advantage? Containers let you garden vertically when ground space runs out. Stack smaller pots on plant stands, hang baskets from hooks, or arrange tiered shelving to multiply your growing area. This vertical approach turns even the smallest balcony into a surprisingly productive garden.

Watering becomes your main task since containers dry out faster than ground soil, especially in our Texas heat. Check daily by sticking your finger an inch deep. If it feels dry, water thoroughly until it drains from the bottom. That’s the entire learning curve for most beginners.

Why Container Gardening Works Perfectly for Austin Beginners

Austin’s unique combination of rocky limestone soil, intense summer heat, and predominantly urban housing makes container gardening the smartest entry point for beginners. If you’ve ever tried digging into the caliche-heavy ground around here, you know exactly why containers skip that headache entirely, you control the soil from day one.

For apartment dwellers and renters (which describes much of central Austin), containers offer genuine gardening without landlord restrictions or permanent installations. You can start on a balcony, patio, or even a sunny front step, then take everything with you when you move. That mobility matters in a city where the average renter stays two years.

Austin’s climate poses real challenges: triple-digit summers, unpredictable spring freezes, and drought cycles. Containers actually help beginners manage these extremes better than in-ground gardens. You can move pots into shade during July’s worst heat, bring tender plants indoors when a late freeze threatens, and water strategically without fighting compacted soil that sheds moisture.

The learning curve flattens considerably, too. With containers, you’re managing a controlled environment, one pot, one plant, clear results. When something goes wrong, you’re troubleshooting a five-gallon container, not a whole garden bed. Success builds confidence fast.

Limited space stops being a limitation. A 4×6 balcony can hold a dozen productive containers. Vertical arrangements (we’ll cover those later) multiply your growing area without expanding your footprint, perfect for Austin’s space-starved neighborhoods like East Austin or South Congress.

Bottom line: containers eliminate the barriers that stop most Austin beginners before they start. No land required, no soil amendments, no expensive tools, just pots, plants, and a spot that gets some sun.

Assorted herb and tomato containers on an Austin patio with a watering can and gardening gloves nearby.
A thriving mix of herbs and patio vegetables shows how simple container gardening can look on a small space.

What You Actually Need to Get Started

Choosing the Right Containers

The container itself matters more than most beginners realize. Size is your first decision: herbs need at least 6-8 inches of depth, leafy greens 8-10 inches, and tomatoes or peppers 12-18 inches. A container that’s too shallow forces roots to crowd, which means constant watering and stunted growth.

Drainage holes are critical without them, water pools at the bottom and roots rot within days. If you find a container you love without holes, drill them yourself or use it as an outer decorative pot with a draining liner inside.

Material affects how often you’ll water. Terra cotta looks classic but dries out fast in Austin’s heat, sometimes needing daily watering. Plastic and resin hold moisture longer and work better for busy beginners. Fabric grow bags breathe well and prevent root circling, though they’re less stable on windy balconies.

Start with containers at least 10-12 inches wide. Bigger pots hold more soil, which buffers against drying out and temperature swings, both helpful when you’re learning to read your plants’ needs.

Pots and potting mix set up on a balcony floor with a container showing drainage holes and a tray underneath.
A clear view of containers, potting mix, and proper drainage highlights the practical basics that make container gardening succeed.

The Soil Mix That Makes Everything Easier

Garden soil seems like the obvious choice, but it’s actually the worst thing you can put in a container. Regular dirt compacts when watered repeatedly, choking out air pockets your plant roots desperately need. Within weeks, you’ll have a dense, waterlogged brick that kills even the toughest plants.

Potting media for containers is specifically engineered to stay loose and fluffy. It’s lighter, drains excess water quickly, yet holds enough moisture so you’re not watering three times a day in Austin’s brutal summer heat. The mix typically contains peat moss or coir, perlite or vermiculite for drainage, and sometimes a bit of compost.

When you’re shopping at Austin garden centers, look for bags labeled “potting mix” or “container mix.” Avoid anything that says “garden soil” or “topsoil.” A quality mix feels light when you pick up the bag and springs back when you squeeze it. Brands like FoxFarm Ocean Forest or Miracle-Gro Potting Mix work well for beginners, but local nurseries often carry their own blends formulated for Central Texas conditions. Expect to pay around $12-$18 for a bag that fills several containers.

Best Plants for Your First Container Garden in Austin

Herbs That Practically Grow Themselves

Basil thrives in containers with minimal fuss, just give it six hours of sun and consistent moisture. Mint grows so aggressively you’ll actually want it confined to a pot; it tolerates partial shade and forgives occasional neglect. Rosemary handles Austin’s heat like a champ and needs surprisingly little water once established, making it perfect for forgetful beginners. Cilantro prefers cooler months (plant it in fall or early spring), but during those windows it practically explodes in containers. Parsley fills in gaps beautifully and keeps producing if you harvest outer leaves first. Start with these five, and you’ll have fresh herbs for months without drama.

Easy Vegetables for Patio Containers

Cherry tomatoes top the beginner-friendly vegetable list because they produce abundantly in containers and forgive mistakes. Choose compact varieties like ‘Patio Princess’ or ‘Tiny Tim’ for five-gallon pots, and you’ll harvest fruit within 60 days even if you forget to water occasionally. Bell peppers and jalapeños handle Austin’s summer heat beautifully in containers and need less frequent watering than tomatoes, making them perfect for weekday warriors who can’t tend plants daily.

Lettuce and spinach work surprisingly well in shallow containers on shaded patios during Austin’s spring and fall months. Plant them in March or October, give them morning sun only, and you’ll cut fresh salad greens for weeks. Bush beans produce heavily in deep pots without staking, and radishes grow so fast in containers that kids love watching them, sprouting in just three days and ready to harvest in 25.

Low-Maintenance Flowers and Greens

For flowers, zinnias and purslane laugh at Austin’s summer heat and keep blooming without fuss. Zinnias come in bright colors and need only occasional deadheading to look their best. Purslane spreads cheerfully across container edges with tiny blooms in pink, yellow, or orange, and it actually prefers dry conditions between waterings.

Ornamental sweet potato vines add dramatic trailing foliage in chartreuse or deep purple without requiring any bloom care. Dusty miller offers silvery texture that complements other plants and tolerates both heat and neglect. For a pop of color with zero drama, lantana thrives in containers, attracts butterflies, and flowers reliably through Austin’s long summers. All of these handle full sun, forgive missed waterings, and keep your patio looking intentional with minimal effort from you.

Your First Planting: Step-by-Step

You’ve got your container, your potting mix, and your plant. Now comes the fun part, actually putting everything together. This isn’t complicated, and you can’t really mess it up as long as you follow a few basic steps.

Here’s exactly how to plant your first container:

  1. Check that your container has drainage holes in the bottom. If it doesn’t, drill a few or choose a different pot.
  2. Fill the container about two-thirds full with fresh potting mix. Don’t pack it down, leave it loose and fluffy.
  3. Remove your plant gently from its nursery pot by squeezing the sides and tipping it upside down into your hand.
  4. Loosen the roots slightly with your fingers if they’re circling tightly around the root ball. This helps them spread into the new soil.
  5. Place the plant in the center of your container so the top of the root ball sits about an inch below the rim.
  6. Fill in around the plant with more potting mix, gently pressing it down to eliminate air pockets but not compacting it hard.
  7. Water thoroughly until you see water draining from the bottom holes. This settles the soil and gives your plant a good drink.

That’s it. Your container garden is officially planted.

Give the soil surface a light press with your palm to make sure the plant feels stable. If it wobbles, add a bit more mix around the base. The soil will settle slightly over the next few days, which is normal.

After that first watering, place your container in its permanent spot, whether that’s a sunny patio corner or a shaded balcony ledge. Moving a heavy, wet container later is harder than you’d think, so choose wisely now.

For those following organic garden tips you can skip synthetic fertilizers and stick with compost-based potting mixes and organic feeds from the start. Your plants won’t know the difference, and you’ll build healthier soil over time.

The first few days after planting, check the soil moisture daily by sticking your finger an inch deep. You’re learning your plant’s rhythm, and that takes a week or two of paying attention.

Keeping Your Container Garden Alive and Thriving

Watering Without Overdoing It

The difference between thriving plants and dead ones often comes down to watering correctly. In Austin’s brutal summer heat, containers dry out faster than you’d expect, but dumping water on them daily drowns roots just as fast as neglect kills them.

The finger test beats any schedule. Push your finger two inches into the soil, if it feels dry at that depth, water until it runs from the drainage holes. If it’s still moist, wait. During Austin’s peak summer months, you’ll likely water daily or every other day, but spring and fall might need just twice weekly. Morning watering works best since midday evaporation wastes water and evening moisture invites pests.

Containers need deep, thorough watering rather than frequent light sprinkles. When you water, soak the entire root zone until excess drains out the bottom. This flushes salts and encourages roots to grow deep, which helps keep plants alive through Austin’s 100-degree afternoons. If water runs straight through without soaking in, your soil has become hydrophobic, set the pot in a tray of water for 20 minutes to rehydrate it properly.

Close-up of rosemary and pepper plants in sunlit containers with rich potting mix after watering.
Close-up sunlight and rich potting mix illustrate how container plants can thrive with the right watering routine and care.

Simple Feeding Schedule

Container plants eat through nutrients faster than in-ground gardens because every watering leaches minerals from the limited soil. Feed your plants every two weeks during the growing season with a balanced liquid fertilizer diluted to half the package strength. That’s it.

Start fertilizing about a month after planting, once your seedlings have settled in. In Austin’s intense summer heat, your containers dry out quickly and lose nutrients even faster, so consistency matters more than precision. Mix the fertilizer with water in your watering can rather than applying it separately, it saves time and reduces the risk of burning roots.

Stop feeding in late fall when growth naturally slows. Your plants will tell you if they’re hungry: pale leaves, slow growth, or fewer flowers mean it’s time to feed. If they’re thriving, stick with your schedule and don’t overfeed, more fertilizer doesn’t mean bigger plants, just wasted money and potentially damaged roots.

Finding the Right Sunlight Spot

Observe your patio or balcony at different times throughout the day to see where sunlight hits and for how long. Morning sun is gentler, while afternoon sun in Austin can be intense and hot. Full sun means six-plus hours of direct sunlight, partial sun is four to six hours, and shade is less than four. Most vegetables and herbs need full sun, but leafy greens and many flowers do fine with partial sun. If your space only gets morning light or filtered afternoon shade, choose shade-tolerant plants like lettuce, coleus, or begonias instead of fighting your conditions.

Vertical Container Solutions for Tight Spaces

When you’re working with a small balcony or patio, going vertical changes everything. You don’t need more floor space to grow more plants, you just need to think upward.

Stacking containers on tiered plant stands gives you three or four levels of growing space in the same footprint as one pot. These stands work beautifully for herbs and small vegetables, and you can find them at any Austin garden center for $20 to $40. Place taller plants on the bottom tier where they won’t shade shorter ones above.

Wall-mounted planters and hanging containers free up your floor entirely. Attach railing planters to balcony edges for herbs like basil and cilantro, or hang lightweight pots from hooks to grow trailing plants like cherry tomatoes. Just make sure your hanging containers have drainage saucers if they’re over walkways.

Trellises and vertical frames turn climbing plants into living walls. Pole beans, sugar snap peas, and even small cucumbers thrive when grown vertically in containers, and they’re perfect for the Austin gardening zone if you plant them in spring or fall. A simple bamboo trellis costs less than $10 and doubles your growing capacity.

Vertical gardening also improves air circulation around your plants, which helps prevent disease in Austin’s humid summers. Start with one vertical element this week, a tiered stand or a few hanging baskets, and you’ll immediately see how much more you can grow.

Local Resources and Free Learning Opportunities

Austin’s gardening community offers hands-on support that makes starting your container garden much easier. The Texas AgriLife Extension hosts free container gardening workshops throughout the year, and there’s one happening this month on Wednesday, June 17th from 3:00 to 5:00 PM at the Mel Lloyd Centre (167 Centre St, Entrance F). These sessions give you a chance to ask questions and see techniques demonstrated in person, which beats reading alone every time.

For supplies and advice, local spots like The Natural Gardener, Barton Springs Nursery, and Shoal Creek Nursery employ staff who actually garden in Austin’s climate. They can steer you toward plants that work here and away from expensive mistakes. Many community gardens around town, including Sunshine Community Gardens and Zilker Botanical Garden, welcome beginners at volunteer days where you’ll pick up practical skills alongside experienced gardeners.

If you get hooked on container growing, you might eventually want to grow indoors during our cooler months to keep harvesting year-round. The Austin Public Library system also offers free gardening workshops and maintains a solid collection of container gardening books you can check out before buying. Starting with these free and local resources means you’ll have real support as you figure out what works on your own patio.

You don’t need a huge backyard or years of experience to grow your own food and flowers. Container gardening for beginners really is as simple as choosing a few pots, adding quality soil, and starting with easy plants that forgive mistakes. This week, grab a container, pick up some basil or cherry tomatoes, and get your hands dirty. You’ll be surprised how quickly you see results.

If you want hands-on guidance as you start your container garden, Gardens Austin Designers offers personalized consultations and workshops designed specifically for Austin gardeners. Whether you need help choosing the right setup for your balcony or want to learn vertical gardening techniques that maximize your space, our team brings years of local expertise to help you succeed. We make container gardening approachable, fun, and perfectly suited to your unique outdoor space. Start small, start now, and watch your confidence grow along with your plants.

Finding Your Austin Gardening Zone (And Why It Matters for Indoor Veggies)

Finding Your Austin Gardening Zone (And Why It Matters for Indoor Veggies)

Your gardening success in Austin starts with one number: your USDA hardiness zone. Here in the Live Music Capital, we sit right on the boundary between zones 8b and 9a, which means our growing season stretches longer than most of the country and our last frost typically arrives in late February.

Check your exact zone by entering your zip code into the USDA’s Plant Hardiness Zone Map at planthardiness.ars.usda.gov. The tool pinpoints your location and shows whether you’re in the slightly cooler 8b (with winter lows of 15-20°F) or the warmer 9a (20-25°F). Most of central Austin falls into 9a, while northern suburbs often register as 8b.

Understanding your zone matters because it tells you which plants will survive our winters and thrive in our notorious summer heat. When you see a plant labeled “hardy to zone 8,” you know it’ll handle our occasional freezes. This knowledge prevents wasted money on plants that won’t make it past December.

For apartment dwellers and urban gardeners, your zone determination gets even more interesting. Balconies on higher floors often act like mini microclimates, staying warmer than ground level. South-facing walls can push you half a zone warmer, which opens up exciting possibilities for heat-loving peppers and tomatoes in vertical growing systems.

The real power comes from combining zone knowledge with our unique Austin growing calendar. While traditional gardening guides suggest spring planting, we can actually grow vegetables nearly year-round if we choose zone-appropriate varieties and protect them during our brief cold snaps.

What Gardening Zones Actually Tell You

The USDA Plant Hardiness Zone Map is the standard gardeners across the country use to figure out which plants will survive winter in their area. It divides North America into zones based on average annual extreme minimum winter temperatures, essentially, how cold it gets in the worst winters. Each zone represents a 10-degree Fahrenheit range, and they’re further split into “a” and “b” half zones that narrow it down by another 5 degrees.

When the USDA unveiled the updated 2023 map it reflected 30 years of temperature data (1991-2020), making it more accurate than the previous 2012 version. This matters because many areas, including parts of Austin, shifted to slightly warmer zones. The system assigns USDA zones based on extreme minima so a zone 8b location sees winter lows between 15 and 20 degrees F, while zone 9a dips to 20-25 degrees F.

For practical gardening decisions, your zone tells you which perennials will come back year after year, when you can safely transplant indoor-started seedlings outside, and which vegetables need a head start indoors versus direct sowing. In Austin, where we sit in zones 8b and 9a, that means you can grow plants rated for those zones outdoors year-round. It also guides your frost date planning, knowing your zone helps you count backward to figure out when to start tomatoes, peppers, and other warm-season crops indoors so they’re ready to move outside after the last frost. The zone doesn’t dictate everything (soil, rainfall, and summer heat all matter), but it’s your starting point for matching plants to your climate.

How to Find Your Exact Gardening Zone

Finding your exact gardening zone takes less than a minute with the USDA’s online tool. Here’s how Austin gardeners can pinpoint their zone:

  1. Visit the USDA Plant Hardiness Zone Map at planthardiness.ars.usda.gov
  2. Locate the Quick Zip Code Search box on the homepage
  3. Enter your Austin ZIP code (like 78701 for downtown or 78745 for South Austin)
  4. Review the results to see whether you’re in zone 8b or 9a

The tool displays your zone instantly, along with a map showing your location. Most of Austin falls into zone 8b (average minimum winter temperature of 15 to 20°F) or zone 9a (20 to 25°F). If you’re in a neighborhood near the zone boundary, your specific microclimate matters. Urban areas with more pavement and buildings often run slightly warmer than the official designation, effectively pushing you toward the higher zone.

Don’t stress if you’re right on the edge between 8b and 9a. Treat yourself as being in the colder zone (8b) when planning outdoor transitions for tender seedlings you’ve started indoors. This gives you a safety buffer against unexpected late frosts. For heat-tolerant crops that you’re growing year-round inside, the distinction matters less since you control the indoor environment.

Austin’s Gardening Zones: What You Need to Know

Austin sits comfortably in USDA Plant Hardiness Zones 8b and 9a, which means the city’s average annual extreme minimum winter temperature ranges from 15 to 25 degrees F. Most of Austin proper falls into zone 9a (20 to 25 degrees F), while areas in the northern and western outskirts typically register as zone 8b (15 to 20 degrees F). This zone split matters because it influences which perennials survive winter outdoors and when you can safely transition indoor-started vegetables to your patio or backyard.

Texas as a whole spans zones 6 through 9, reflecting the state’s massive geographic and climate diversity. South Texas gardeners in zone 9 enjoy nearly frost-free winters, while Panhandle residents in zone 6 face significantly colder conditions. Austin’s position in zones 8b/9a puts us in the warmer half of the state, giving us a longer growing season and more flexibility for year-round gardening than our northern neighbors.

What makes Austin’s microclimate unique is the urban heat island effect combined with our Hill Country topography. Downtown Austin and densely built neighborhoods often register several degrees warmer than the official zone designation suggests, especially on winter nights. Concrete, asphalt, and clustered buildings absorb and radiate heat, creating pockets that can feel more like zone 9b. If you’re gardening on a high-rise balcony or in a South Austin apartment complex surrounded by pavement, your plants might experience milder conditions than someone with a backyard in the greenbelt.

Conversely, properties in low-lying areas near creeks or on the edges of the Hill Country can experience cooler temperatures and unexpected frost pockets. A tenth-floor balcony in downtown Austin might never see frost, while a backyard garden three miles away could get hit with a surprise freeze. Understanding your specific microclimate within Austin’s broader 8b/9a designation helps you make smarter decisions about when to move seedlings outdoors and which varieties will thrive in your exact location.

Gardener holding seedling trays outdoors on a porch with green seedlings in soil
Seedling trays show how indoor starts eventually become strong outdoor plants, an approach that depends on knowing your local zone and timing.

Why Your Zone Matters for Indoor Vegetable Gardening

Timing Your Indoor Seed Starts

In Austin’s zone 8b/9a climate, timing indoor seed starts requires working backward from your last frost date, which typically falls in mid- to late February. Unlike Corpus Christi gardeners who might see their last frost as early as February 1, or El Paso residents planning around March 24, Austin’s frost window sits comfortably in between. This zone-specific timing matters because starting seeds too early means leggy, overgrown seedlings desperate for outdoor space, while starting too late cuts into your productive growing season.

The calculation is straightforward: count backward from your target transplant date (about two weeks after your last frost) by the number of weeks each vegetable needs indoors. Most tomatoes and peppers need 6-8 weeks of indoor growth before they’re ready to face the Austin heat. Cucumbers and squash, on the other hand, need just 3-4 weeks and actually suffer if started too early. For Austin gardeners looking to grow vegetables indoors year-round, understanding this timing helps you plan succession plantings that keep your indoor space productive even as some seedlings transition outside.

Vegetable Weeks Before Last Frost Austin Start Window
Tomatoes 6-8 weeks Late December – Early January
Peppers 8-10 weeks Mid-December
Cucumbers 3-4 weeks Late January – Early February
Squash 3-4 weeks Late January – Early February

Your zone 8b/9a designation gives you a longer growing season than northern Texas, but Austin’s unpredictable late-winter temperature swings mean you can’t rush transplants outdoors the moment the calendar says it’s safe. Start your seeds indoors when the timing chart suggests, but keep them under lights or on sunny windowsills until outdoor nighttime temperatures consistently stay above 50°F for warm-season crops.

Choosing Vegetables That Match Your Zone

Austin’s zone 8b/9a climate changes which vegetables you should prioritize for indoor starting versus direct outdoor sowing. Heat-loving crops like tomatoes, peppers, and eggplants benefit from a 6-8 week head start indoors, giving them time to fruit before summer’s extreme heat slows production. Basil, cilantro, and parsley also transplant well after indoor germination.

Knowing your zone helps you choose varieties bred for Southern heat. Look for tomatoes labeled “heat-set” or “southern” varieties that produce when temperatures climb above 90°F. For peppers, jalapeños and serranos handle Austin’s summers better than thick-walled bell peppers, which often struggle in prolonged heat.

Some vegetables skip the indoor phase entirely in Austin. Beans, squash, and cucumbers germinate so quickly in warm soil that direct sowing outdoors makes more sense once frost risk passes. Leafy greens like lettuce and spinach grow best as cool-season crops here, started indoors in late summer for fall gardens rather than spring.

Your zone knowledge prevents wasted effort on varieties that won’t transition successfully to Austin’s outdoor conditions, letting you focus indoor space on crops that genuinely need that early start.

Indoor vegetable seedlings on a kitchen windowsill with a watering can
A sunny indoor setup illustrates how Austin gardeners can grow vegetables indoors while planning for when to transplant outside.

Using Your Zone for Year-Round Indoor Growing Success

Your zone knowledge transforms indoor gardening from a guessing game into a strategic operation. In Austin’s zone 8b/9a, you can rotate crops through your indoor setup year-round because our mild winters mean many vegetables can move outdoors earlier than in colder regions. Start heat-lovers like tomatoes and peppers indoors in January, then transition them outside by late March when nighttime temps stay above 50°F. Cool-season crops such as lettuce and spinach work the opposite way: grow them indoors during our brutal summer months (June through August), then shift them to outdoor containers or beds in September when temperatures drop.

The Monthly Gardening Calendar for Austin Area becomes your planning blueprint. Cross-reference it with your indoor veggie schedule to time succession plantings. When the calendar says it’s time to plant basil outdoors (April), start your next indoor batch of leafy greens to harvest through summer. This rotation keeps your kitchen supplied without gaps.

Tip: Austin’s zone 8b/9a winter lows rarely drop below 25°F, so you can harden off seedlings on a covered patio or balcony weeks earlier than gardeners in zone 7 or colder, use this advantage to free up indoor space faster.

Temperature management indoors matters more than you’d think. Most vegetables germinate best between 65-75°F, which matches Austin’s indoor temperatures naturally from fall through spring. Summer is trickier: if your apartment heats up past 80°F, cool-season crops will bolt or refuse to germinate. Position indoor setups away from west-facing windows during May through September, or run a small fan to keep plants alive in the heat. Zone knowledge tells you when outdoor conditions beat indoor ones, so you’re not wasting energy growing things that would thrive outside.

Zone-Smart Indoor Gardening for Small Austin Spaces

When you’re working with limited square footage in an Austin apartment or condo, knowing you’re in zone 8b or 9a directly shapes what indoor gardening setup will actually work. A south-facing windowsill might handle seedlings started in late winter, but Austin’s intense summer sun coming through glass can scorch even heat-tolerant varieties by June. Your zone tells you when outdoor temperatures will support transplanting, which determines whether you need to invest in grow lights or can get by with natural light for the two to six weeks most seedlings need indoors.

Vertical systems make even more sense when you understand your zone’s timing. Those stackable herb towers or wall-mounted planters let you start multiple succession plantings indoors, then move the bottom tier outside once nighttime temps stay above 50°F (typically mid-March for Austin). You can rotate new seedlings up from your indoor nursery area while hardened-off plants head to a small balcony or patio. This flow only works when you know your frost dates and can plan the handoff.

For small spaces transitioning plants between indoors and out, check organic garden tips that account for Austin’s quick spring warmup and brutal summer heat. Your zone information helps you choose compact varieties that won’t outgrow their indoor space before outdoor conditions are right, and it prevents the rookie mistake of moving tender starts outside too early just because you’re tight on room. Plan your indoor setup around your outdoor window, not the other way around.

Knowing your Austin gardening zone isn’t just a technicality for outdoor gardeners. Zone 8b or 9a shapes every indoor vegetable gardening decision you make, from which tomato varieties will thrive when you move them to your patio to exactly when you should start those pepper seeds on your kitchen counter. The USDA zone finder takes seconds to use, and those few degrees of difference between zones translate directly into weeks of adjustment for your seed-starting calendar.

Your zone gives you a framework, but the real magic happens when you pair it with Austin’s specific climate patterns. Check the USDA Plant Hardiness Zone Map to confirm your exact location, then bookmark the Monthly Gardening Calendar for Austin Area to sync your indoor growing with Central Texas reality. Whether you’re starting seeds in a spare bedroom or nurturing seedlings under grow lights in your apartment, zone-smart planning means you’ll transplant at the right time and choose varieties bred to handle what Austin throws at them.

2026 is your year to grow smarter, not harder. Start with your zone, plan with purpose, and watch your indoor garden deliver fresh vegetables all season long.

Raised garden bed with healthy leafy greens growing in rich brown soil
Healthy greens in a raised bed reflect successful gardening choices that match the right zone for your area’s temperatures and growing conditions.

Rocks for Gardening That Actually Transform Your Urban Space

Rocks for Gardening That Actually Transform Your Urban Space

Rocks transform ordinary garden beds into water-wise showcases that thrive in Austin’s challenging climate. Whether you’re covering bare soil around container plants on your balcony or designing a full-scale xeriscaped yard, the right rocks reduce maintenance while adding texture and visual interest that complements the garden trends taking root across Central Texas.

The practical benefits go beyond aesthetics. Rocks suppress weeds by blocking sunlight, retain soil moisture during our brutal summer months, and prevent erosion during sudden downpours. For vertical gardeners working with limited square footage, rocks anchored at the base of wall planters or tower systems stabilize structures and improve drainage.

Choosing the right rock type matters more than most beginners realize. River rock, decomposed granite, and limestone each serve different purposes and price points in 2026. Your selection depends on whether you need ground cover, decorative accents, or functional drainage solutions. This guide walks you through specific rock types available locally, current pricing from Austin suppliers, and step-by-step techniques for installation that won’t break your back or your budget.

River rocks edging a planter with drought-tolerant succulents on an Austin apartment patio
A neatly edged rock garden on an urban patio shows how decorative stones can instantly elevate a small space while keeping maintenance low.

Why Austin Gardeners Are Choosing Rocks Right Now

Austin’s water restrictions aren’t going away, and that’s exactly why rocks have become the go-to solution for gardens across the city in 2026. When you can only water once a week during summer months, traditional mulch dries out and blows away, but a layer of river rocks stays put, helps retain soil moisture and never needs replacing.

The heat is another factor. Austin’s scorching summers mean your garden needs materials that can handle triple-digit temperatures without breaking down. Rocks actually reflect heat away from plant roots during peak afternoon sun, unlike dark mulch that absorbs and radiates warmth. For balcony and patio gardeners dealing with concrete surfaces that turn into ovens, a layer of light-colored stones can drop container temperatures by several degrees.

Space constraints make rocks even more practical. When you’re working with a 4×6 foot balcony or a narrow side yard, you can’t afford materials that decompose, attract pests, or need constant refreshing. Rocks give you a clean, permanent solution that lets you focus on growing plants instead of maintaining your growing medium. You buy them once, arrange them, and they’re done, no seasonal replacement, no mess, no fuss. That simplicity matters when you’re juggling urban gardening with everything else.

Types of Rocks for Gardening (And What Each One Does Best)

River Rocks: The Versatile Workhorse

River rocks are the budget-friendly staple you’ll see in most Austin gardens, and for good reason. A 30-pound bag of 1-1/2 inch decorative river rocks currently runs about $12.62, making them accessible for projects of any size. These smooth stones work beautifully as a 2-3 inch drainage layer at the bottom of containers, preventing waterlogged roots in our heavy clay soil. As top dressing, they lock in moisture during our brutal summers while creating a clean, finished look around plants. Smaller river rocks (1-3 inch sizes) are perfect for lining vertical garden planters or creating simple walkways between raised beds. The natural variation in earth tones means they blend seamlessly with almost any plant palette, while their rounded edges won’t damage roots or hands during planting. Unlike sharp gravel, river rocks are comfortable to work with and won’t puncture landscape fabric.

Assorted gardening rocks in three patio planters: river rocks, glass stones, and granite
Different rock types, river stones, glass stones, and granite, create distinct looks while supporting practical planting needs in small urban containers.

Glass Stones for Visual Impact

Glass stones bring color and shimmer to urban gardens where space is tight and every detail counts. Available in 3 to 18-pound bags, these translucent rocks catch sunlight and create striking focal points in container arrangements and wall-mounted planters.

Use them as top dressing in pots to add visual interest while suppressing weeds, particularly effective in vertical garden pockets where the glass reflects light upward. They work beautifully mixed with river rocks or layered on their own in clear glass containers, where you can see the drainage stones through the sides.

In small Austin balconies or patios, a single container filled with glass stones and a dramatic succulent becomes an instant statement piece. Choose darker colors for heat-absorbing properties in winter containers, or clear and light blues to keep soil cooler during summer months.

Decorative Stones for Specialized Uses

Specialty rocks excel in projects that cross the indoor-outdoor boundary, think enclosed terrariums, aquascapes, and container gardens you can move between your balcony and living room. Granite and river rock sold in 1-3 inch sizes work particularly well for aquariums and terrariums because they’re inert and won’t alter pH levels, which matters when you’re housing plants (or fish) in closed systems.

For apartment gardeners juggling limited outdoor space, these specialty rocks solve multiple problems at once. Use polished granite pieces in large indoor planters near windows, then move the same containers outside during mild Austin evenings. The rocks provide drainage while adding visual weight that keeps tall plants stable without eating up precious soil volume.

Smaller decorative stones also shine in miniature landscape projects. Layer different textures, smooth river stones as a base, then accent with a few angular granite pieces, to create depth in shallow dishes or wall-mounted planters. Since Austin apartments often lack yard access, these tabletop and vertical applications let you build complete garden scenes in spaces smaller than a coffee table.

Smart Ways to Use Rocks in Your Garden Layout

Vertical Garden Rock Integration

Vertical gardens need a solid foundation, and rocks solve three key problems at once. Start with a one to two inch layer of river rocks at the bottom of your wall-mounted planters for drainage. Those $12.62 river rock bags work perfectly here because the 1-1/2 inch size creates air pockets that prevent root rot while adding enough weight to keep lightweight planters stable in Austin’s occasional strong winds.

For decorative impact in visible vertical setups, use glass stones as top dressing. The 3-18 LB glass stone packages give you enough material to create visual interest across multiple wall pockets without breaking your budget. Mix dark river rocks with lighter glass stones to create contrast that makes your plants pop against brick or stucco walls.

The weight factor matters more than most urban gardeners realize. Wall-mounted fabric planters and hanging pocket systems can swing or sag when they’re too light. Adding rocks to the bottom third of each pocket creates stability without the excessive weight that would strain your mounting hardware. Just calculate first: a two-inch rock layer in a 6-inch wide pocket adds about one pound, which most vertical garden systems handle easily.

Vertical wall planter using decorative rocks as a top layer and base for stability
Rock-enhanced vertical planting adds stability and visual depth, making small Austin spaces feel fuller and more intentional.

Container and Planter Rock Techniques

The secret to successful container gardening with rocks starts at the bottom. Layer 1-2 inches of river rocks (the 1-3 inch decorative stones work perfectly) as your drainage foundation before adding soil. This prevents waterlogged roots and creates air pockets that help plants thrive, especially when you grow indoors or on covered patios where drainage matters most.

For top dressing, add a half-inch to one-inch layer of smaller river rocks or dark decorative stones over your soil surface. This simple technique cuts water evaporation by up to 30% in Austin’s scorching summers, meaning you’ll water less frequently. It also blocks weed growth and gives containers a polished, intentional look. The Dark River Rocks available for around $11.59 cover several medium-sized planters and stay put during storms, unlike mulch that blows away.

Size your rocks to your container. Small 4-6 inch pots need pea gravel or glass stones (available in 3-18 LB sizes), while larger planters can handle the standard 1-2 inch river rocks. Leave a half-inch gap between your rock layer and the container rim so water doesn’t run off before soaking in. Replace or rinse your top dressing rocks annually to keep them looking fresh and prevent salt buildup from tap water.

What to Buy and Where to Find It

Shopping for rocks in 2026 is easier than ever, with solid options online and right here in Austin. TikTok Shop has become a surprisingly reliable source, you’ll find 30-pound bags of 1-1/2 inch river rocks for around $12.62, perfect for walkways and container gardens. For smaller projects, top dressing dark river rocks run about $11.59. Etsy remains a go-to for specialty stones, particularly if you’re looking for 1-3 inch decorative river rocks sized for terrariums or aquariums.

Tip: For a one-inch layer of coverage, you’ll need roughly 100 pounds of rocks per 10 square feet, multiply your garden bed dimensions to avoid over-ordering.

Locally, Austin garden centers typically stock river rocks and granite in bulk, letting you see colors and textures before buying. When shopping, check the size range on the label (it matters more than you’d think for drainage versus aesthetics) and compare price per pound rather than per bag. Glass stones come in 3-18 pound packages, ideal for accent spots without committing to bulk quantities. Start with a small bag for your first project, you can always add more once you see how the color works with your plants and containers.

Rock Gardening Mistakes Austin Gardeners Should Avoid

Austin’s unique climate and urban constraints make certain rock garden mistakes especially costly. Here’s what to watch for.

Skipping drainage prep is the fastest way to kill your plants. Dumping rocks directly onto compacted soil creates a waterlogged layer that rots roots, even with drought-tolerant varieties. Before placing those $12.62 river rocks, dig down two inches and mix in compost or sand to improve water flow through the root zone.

Oversizing rocks in small spaces overwhelms the design. Those beautiful 3-inch river stones look stunning in photos but devour visual real estate in a 12-inch container. For balcony planters and vertical gardens, stick with 1-inch stones that provide texture without dominating. Save the larger rocks for ground-level beds where they won’t feel crowded.

Austin’s intense summer sun turns dark rocks into radiant heaters. Black glass stones might catch your eye, but they’ll bake nearby plants in full-sun exposures. Choose lighter river rocks or position dark decorative stones where they get afternoon shade. The heat reflection can push soil temperatures ten degrees higher than planted areas.

Landscape fabric seems logical but causes long-term headaches. While it suppresses weeds briefly it eventually traps debris, blocks water penetration, and creates a maintenance nightmare when it surfaces through rocks. For sustainable weed control that aligns with organic garden tips use a 3-inch rock layer directly over cardboard. The cardboard decomposes while smothering existing weeds, and the rock depth prevents new growth without the fabric’s drawbacks.

Maintaining Your Rock Garden Through Austin Seasons

Austin’s mild winters and scorching summers mean your rock garden needs different care than traditional landscapes, but the beauty is how little effort it actually takes.

Spring brings pollen and oak debris. A quick rinse with the garden hose every few weeks keeps rocks looking fresh without disturbing your plants. Check for any rocks that have shifted during winter rains and redistribute them where needed, especially around container edges where water flow might have moved them.

Summer heat is when rocks really earn their keep. The main task is watching for weeds trying to push through, pull them early while roots are shallow. If you used a weed barrier underneath, you’ll barely see any. Top-dress any thin spots where rocks have settled, particularly around plants that have grown since spring. This is also when you’ll want to keep plants alive by ensuring rocks aren’t piled against stems, which can trap heat and moisture.

Fall means clearing fallen leaves before they decompose and create soil pockets for weeds. A leaf blower works perfectly for this. Winter rarely requires attention beyond the occasional debris cleanup after storms.

The whole maintenance routine takes maybe 20 minutes monthly, which is exactly why rock gardens work so well for busy urban gardeners.

Starting your rock garden journey doesn’t require a complete landscape overhaul or a massive budget. Grab a bag of river rocks for under $13, choose a container that speaks to you, and spend an afternoon experimenting. Mix different textures, smooth river stones with angular granite, or add a pop of color with glass accents. Austin’s climate rewards these low-maintenance choices with year-round beauty and water savings that actually matter.

The best rock gardens grow organically. Start with one planter this weekend. Notice what works in your light conditions and how the rocks interact with your existing plants. Then expand. Try a vertical arrangement. Test different sizes. Swap out seasonal plantings while the rocks stay put, creating a reliable foundation that adapts to your evolving garden vision.

Gardening really does rock when you choose materials that fit your lifestyle, not someone else’s Pinterest board. Your urban space deserves solutions that look great and actually work in the Texas heat.

What Is A Stamped Deck On A Lawn Mower?

by thomas 0 Comments
What Is A Stamped Deck On A Lawn Mower?

When choosing a lawn mower deck, one of the critical components often overlooked is the mower deck. There are primarily two types—stamped decks and fabricated decks. Your choice can significantly affect not just the quality of your cut but also the mower’s durability and ease of use.

In this article, we delve into what is a stamped deck on a lawn mower and how it compares to fabricated mower decks. Also, you’ll learn which one might be the best fit for your garden care needs.

What Is a Stamped Deck on a Lawn Mower?

A stamped deck on a lawn mower is crafted through a unique process that uses a hydraulic press to shape a flat sheet of steel into a curved mowing deck.

This technique results in a single, continuous piece of metal, which minimizes the number of seams and welding points. Therefore, the stamped deck is lighter and more aerodynamic than its fabricated counterpart.

Due to its streamlined design, a stamped deck often provides better airflow, resulting in a more even cut when mowing your lawn.

Because of these attributes, stamped decks are commonly used in residential lawnmowers, tailored for more straightforward mowing tasks and smaller lawns. Their lighter weight makes them easier to maneuver. And their typically lower cost makes them a budget-friendly choice for homeowners who love to use power tools in their gardens.

What Is A Fabricated Mower Deck?

In contrast, a fabricated mower deck is constructed from multiple pieces of thick, heavy-duty steel welded together, forming a robust and durable structure.

Unlike stamped decks, which are molded into shape, fabricated decks are engineered for resilience. This sturdiness makes them well-suited for tackling challenging mowing conditions like uneven terrain, tall grass, and even small debris.

Because they are built to last and endure tougher conditions, fabricated decks are often the go-to choice for commercial mowers and professional landscaping equipment. Their heavier build may require more power. But the trade-off is a machine built to last and perform reliably under strenuous conditions.

Advantages of a Stamped Deck

The choice between stamped and fabricated mower decks often boils down to specific needs and situations. When looking at stamped decks, there are several clear advantages worth considering:

Cost-Effectiveness

Stamped decks are generally less expensive than fabricated decks. This is because they are made from a single sheet of metal pressed into shape. Thus, they require less labor and material than fabricated mower decks, which involve welding multiple pieces together.

Weight and Maneuverability

One of the key benefits of a stamped deck mower is its lightweight nature. The lighter weight allows for better maneuverability. This feature makes it easier for homeowners to navigate their lawns, especially if it’s relatively flat. This contrasts sharply with fabricated deck mowers, which are considerably heavier.

Optimized Airflow

Stamped decks are designed to allow for more efficient airflow beneath the mower deck. This results in a cleaner, even cut, especially when mowing simple lawns with few obstacles. Fabricated decks, while durable, may not offer the same kind of fluid aerodynamics as stamped mower decks.

Ease of Maintenance

Maintaining a stamped deck is generally easier than caring for a fabricated deck. And why is that? That’s because stamped decks have fewer crevices and seams where grass and debris get stuck. Less complexity means less time spent cleaning and more time enjoying your well-manicured lawn.

Residential Use

Stamped decks are commonly found on residential lawn mowers, designed for homeowners who need a reliable and efficient machine for regular lawn care. But these users don’t require the ruggedness of a fabricated deck.

Advantages of Fabricated Decks

The conversation about mower decks often pits stamped vs. fabricated options against each other. While stamped deck mowers have their place, particularly in residential settings, fabricated deck mowers offer their own set of unique advantages:

Durability

One of the most significant benefits of a fabricated deck lawn mower is its enhanced durability. These decks are crafted from multiple pieces of heavy-duty steel welded together. This makes them well-suited for tackling a variety of terrains and cutting conditions. Such usage might wear out stamped deck mowers faster.

Precision and Versatility

Fabricated deck mowers have maximum cutting precision. Thanks to their robust construction, they easily handle tall, thick, or wet grass, boasting versatility not typically found in stamped deck mowers.

Commercial and Heavy-Duty Use

They are a common feature on commercial lawnmowers due to their durability and ability to handle demanding mowing tasks. If you own or manage large properties or are in the lawn care business, a fabricated deck mower is almost necessary.

Long-Term Value

While fabricated deck mowers are more expensive up front, their long-lasting construction often requires less frequent repairs or replacements than stamped deck mowers. So, they are more cost-effective in the long run, especially for those using their lawnmowers extensively.=

Which Is the Best? Stamped vs. Fabricated

When choosing between stamped and fabricated decks, these factors will ultimately guide your choice between a stamped deck lawn mower and a fabricated deck.

Purpose and Use

Stamped deck mowers are generally better suited for relatively flat residential lawns. Moreover, they are free of significant obstacles. On the other hand, fabricated decks are commonly found in commercial mowers. They are structured to handle challenging terrains and professional mowing tasks.

Durability

As previously mentioned, the robustness of fabricated decks makes them ideal for heavy-duty use. If you’re in the market for a machine that can withstand more wear and tear, opt for a fabricated deck.

Mowing Quality

Both decks afford a high-quality cut, but their performances vary based on the conditions. A stamped deck is often better for achieving an even cut on flat terrains due to its optimized airflow.

Conversely, the fabricated deck’s robust construction allows it to handle diverse mowing conditions more effectively, from tall grass to damp conditions.

Weight and Maneuverability

Stamped deck mowers are generally lighter, making them easier to operate and navigate around a lawn. This is an essential consideration if ease of use and quick maneuverability are priorities for you.

Cost Factor

Stamped decks are usually less expensive regarding initial purchase price and maintenance. However, if you consider the mower a long-term investment, especially for commercial use, fabricated decks offer better value over time.

Commercial vs. Residential

As noted, stamped decks are common in residential mowers, while fabricated decks are a staple in commercial mowers. The durability and versatility of fabricated lawn mower decks make them more suitable for the rigorous demands of commercial mowing.

Choice of Mowing Deck

Ultimately, your needs will dictate whether a stamped or fabricated mowing deck is more appropriate. Whether it’s the complexity of your lawn, the frequency of use, or your professional requirements. Both stamped and fabricated decks have merits and drawbacks, so weigh your options.

Practical Implications for Lawn Mowers

Both stamped and fabricated decks have practical implications for the types of lawnmowers they are usually found on.

Stamped decks are often on residential, less expensive mowers, while fabricated decks are generally part of high-end or commercial mowers.

When considering lawnmowers with either of these decks, think about your specific organic garden care needs. This includes the complexity of your lawn and how frequently you’ll be using the mower.

Man using lawn mower

Should You Choose a Fabricated or Stamped Deck?

After considering all the factors, choosing between a fabricated or stamped deck hinges on your needs and how you intend to use the mower.

For homeowners who need to maintain a small to medium-sized lawn with minimal complexity, stamped deck mowers are sufficient. Their lighter weight and lower cost make them popular for residential settings.

Conversely, if you are a landscaping professional or have a large property with varying terrain types, fabricated deck mowers boast the durability and precision you’ll likely require.

These mowers work for heavy-duty use and have a longer lifespan, particularly under strenuous conditions.

Final Thoughts

Understanding the difference between stamped and fabricated decks significantly impacts lawn maintenance activities.

Both types have pros and cons. But your specific requirements—whether you are a homeowner with a small yard or a professional landscaper—will ultimately dictate your best choice.

Whether you opt for a lawn mower with a stamped deck or a fabricated one, consider the initial purchase price and the long-term costs. Don’t forget to factor in the maintenance and potential repairs.

Remember, a more expensive, heavy-duty fabricated deck mower could be more cost-effective in the long run, especially for commercial mowers with a lot of use. And there you have it—an in-depth look at what is a stamped deck on a lawn mower. Remember to stay safe while mowing!