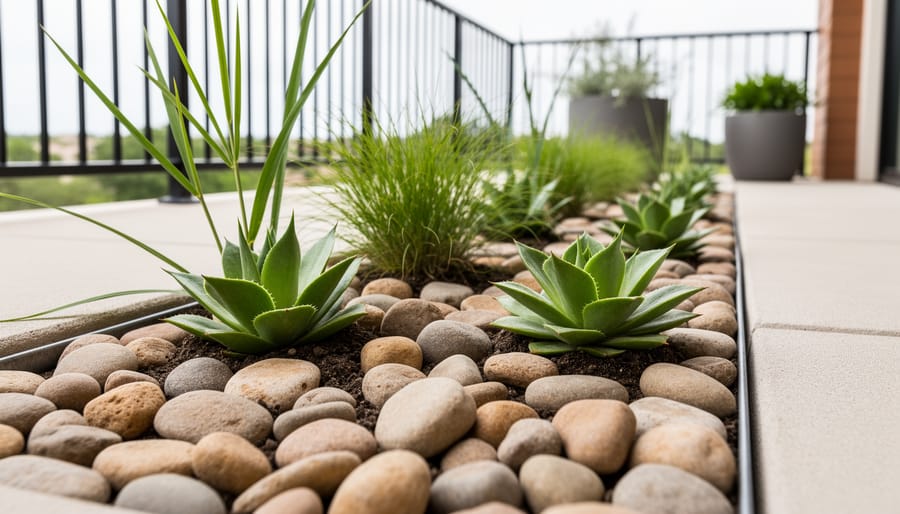
Gardening with stones transforms ordinary beds and containers into water-smart, low-maintenance landscapes by layering decorative rock as mulch, building raised borders with stacked stone, or creating drainage zones with gravel. For Austin gardeners working with limited space and intense summer heat, stones offer a practical triple benefit: they suppress weeds, retain soil moisture through our long dry spells, and add structure to small patios and balconies where every square foot counts.
The technique is simpler than you might think. You’ll choose appropriate stone types based on your project, from river rock for pathways to crushed granite for desert-style beds, then prep your soil and install landscape fabric before placing stones in a 2- to 3-inch layer. Even beginners can complete a small border or mulched bed in an afternoon with basic tools you probably already own.
In vertical gardens and container setups, stones serve double duty as drainage material and visual contrast. A layer of pebbles at the bottom of your wall planters prevents root rot, while top-dressing with decorative gravel keeps soil cool and cuts down on evaporation during those brutal July and August afternoons. The result is a garden that looks polished year-round without the constant watering and weeding that traditional mulch demands.
What You’ll Need to Get Started
Gathering the right supplies before you start makes your stone garden project smoother and helps you avoid mid-project trips to the hardware store. Here’s everything you’ll need to transform your space with stones.
- Stone varieties: river rock for smooth texture and drainage, gravel for pathways and ground cover, flagstone for stepping stones or patios, decomposed granite for a natural compacted surface
- Hand tools: sturdy rake for spreading, square-point shovel for digging, wheelbarrow for hauling heavy loads
- Landscape fabric: weed barrier that allows water drainage while blocking unwanted growth
- Edging materials: metal or plastic landscape edging to contain stones, or use larger rocks as natural borders
- Optional plants: drought-tolerant varieties like succulents, ornamental grasses, or native Texas perennials
- Work gloves and closed-toe shoes for safety when handling rough stones
River rock works beautifully as a decorative top layer and comes in sizes from pea gravel to fist-sized stones. Gravel is your workhorse material for creating stable pathways that drain well during Austin’s occasional downpours. Flagstone gives you flat surfaces perfect for stepping stones or small seating areas, while decomposed granite packs down to create a firm, natural-looking surface that feels softer underfoot than traditional gravel.
Your landscape fabric prevents weeds from pushing through while still letting water reach the soil beneath, which matters in our clay-heavy Austin ground. The wheelbarrow saves your back when moving bags of stone. Don’t skimp on quality here since stones are heavy.
Calculate roughly how many cubic feet you’ll need by measuring your garden bed’s length, width, and desired stone depth (typically 2-3 inches for decorative coverage). Most stone suppliers sell by the cubic yard or in bags for smaller projects.
Before You Begin: Important Considerations
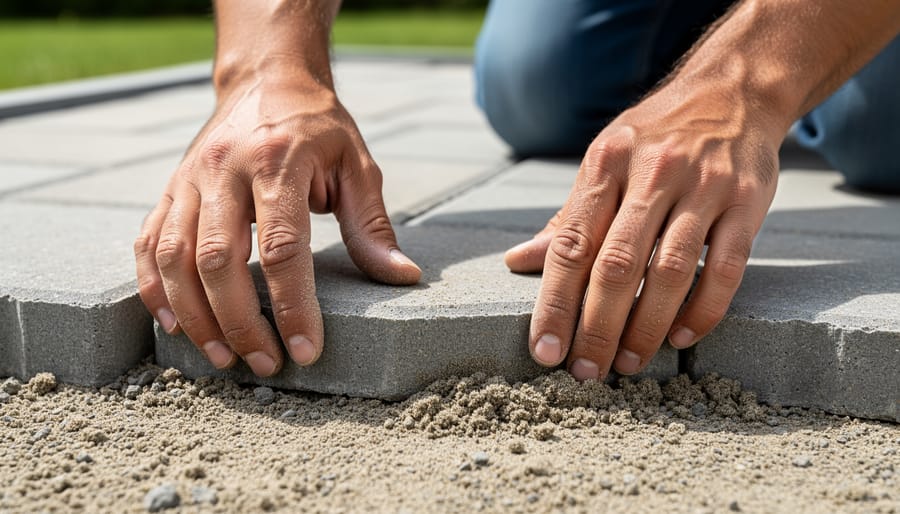
Before you start hauling stones and digging into your yard, a little prep work will save you from serious headaches and potential disasters. Austin’s clay soil, underground utilities, and the sheer weight of decorative rocks mean you can’t just dive in without thinking things through first.
Safety gear matters more than you might think. Wear sturdy gloves to protect your hands from sharp edges and closed-toe shoes with good grip since you’ll be carrying weight on uneven ground. If you’re moving flagstone or large river rocks, bend at the knees and keep your back straight, or better yet, use a dolly or wheelbarrow. A strained back will sideline your project for weeks.
Drainage is critical in Austin because our heavy clay soil doesn’t absorb water well. Stone installations without proper grading or drainage planning can create puddles that breed mosquitoes or channel water toward your foundation. Think about where runoff will go before you place a single stone.
Check with your HOA or the City of Austin about any landscaping restrictions or permits you might need, especially if you’re altering drainage patterns or working near the property line. Some neighborhoods have rules about hardscape coverage or water runoff that could affect your design. Skipping this step might mean tearing out finished work later.
Step-by-Step: Creating Your Stone Garden
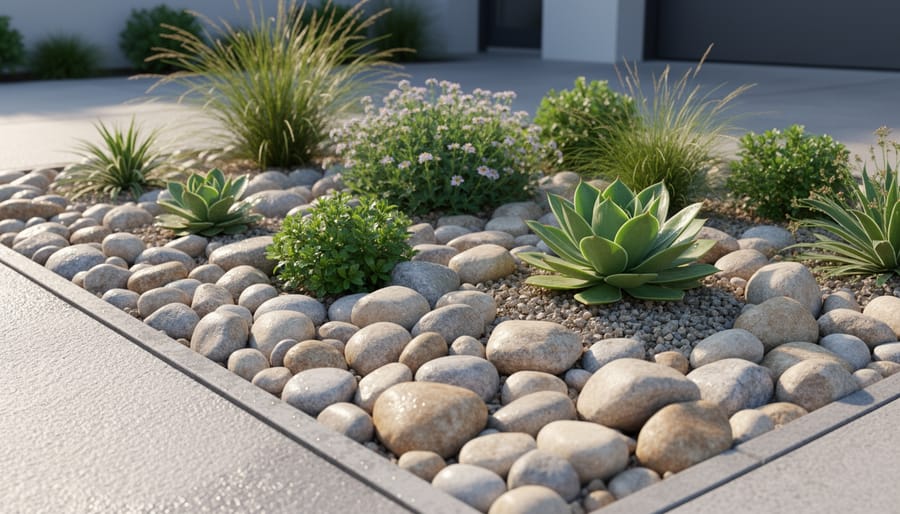
Plan Your Design and Mark the Area
Start by observing your space at different times of day. Austin’s intense afternoon sun hits from the west, so note which areas get full sun (6+ hours), partial shade, or stay cooler under tree cover. This matters because hot stones in full sun will radiate heat, great for heat-loving plants, less ideal near seating areas where you’ll actually want to relax.
Grab a notebook and sketch a rough overhead view of your garden. Mark existing features like trees, walls, or vertical structures where you might add stone borders or use stones as mulch in wall-mounted planters. Don’t worry about artistic perfection, circles and rectangles work fine. Indicate where you want pathways, borders, or decorative stone clusters.
Once you’ve settled on a layout, transfer it to the ground using landscape marking spray paint (available at any hardware store) or wooden stakes with string stretched between them. For curved edges, use a garden hose laid on the ground to visualize the shape before spraying. Step back and view from multiple angles, especially from windows or your main outdoor seating spot.
For vertical gardens, mark the ground directly below where stone borders or base layers will support your wall planters. This creates visual continuity between ground-level and vertical elements, making small spaces feel larger and more cohesive.
Prepare the Ground
Start by removing all grass, weeds, and plants from your marked area. Dig down about 2-3 inches to create a clean base, this depth prevents old roots from pushing through later and competing with your new design. Rake out debris and roots thoroughly.
Next, level the soil. Austin’s clay soil tends to compact unevenly, creating low spots where water pools. Use a rake to smooth high areas and fill depressions with additional soil, then tamp it down firmly with your feet or a hand tamper. Proper leveling ensures stones won’t shift or sink over time.
Address drainage now, before adding stones. Clay holds water, which can suffocate plant roots and create muddy patches. If your site stays wet after rain, consider adding a thin layer of coarse sand or digging shallow drainage channels that direct water away from planting areas. This step saves you from soggy problems later.
Finally, roll out landscape fabric over the prepared soil. This permeable barrier landscape fabric suppresses weeds by blocking light while allowing water and air to reach the soil. Overlap seams by 6 inches and secure with landscape staples every few feet. Fabric keeps your stone garden low-maintenance and weed-free for years.
Install Edging and Borders
Start by digging a shallow trench along your marked border lines, about 3 to 4 inches deep and slightly wider than your edging stones. This trench creates a stable foundation and prevents stones from shifting when you water or during Austin’s occasional heavy rains.
Place your larger border stones into the trench, nestling them firmly against the soil. For best stability, choose stones that are at least fist-sized or larger. Flat-bottomed rocks work particularly well since they won’t wobble. If you’re using flagstone or larger decorative rocks for edging, set them so about one-third of each stone sits below ground level.
Pack soil tightly around each stone, tamping it down with your hands or the back of your shovel. Test stability by pushing gently on each stone, it shouldn’t rock or move easily. For curved borders, overlap stones slightly or use smaller river rocks to fill gaps and create smooth transitions.
Once your edging is secure, backfill any remaining gaps in the trench with soil and compact it well. This border will hold your interior stones in place and give your garden clean, defined lines that make the whole design look intentional.
Lay Your Stones
Start at the farthest point from your entry and work backward so you’re not walking on freshly laid stones. For gravel or small stones, pour them onto the landscape fabric and spread with a garden rake, aiming for two to three inches of depth. Work in small sections to keep coverage even.
Larger decorative stones need individual placement. Set the flattest side down for stability, leaving one to two inches between stones for drainage and the occasional plant pocket. Vary sizes and colors to create natural-looking patterns, avoid rigid rows or perfect spacing, which look forced.
For pathways, place stepping stones twelve to eighteen inches apart to match a comfortable stride. Test the spacing by walking through before finalizing placement. In Austin’s heat, choose lighter-colored stones for paths that won’t scorch bare feet in summer.
Mix textures deliberately: combine smooth river rock with rougher limestone chunks, or frame a gravel bed with larger boulders at corners and transitions. Step back frequently to check your work from different angles. Stones that look balanced close-up might read as cluttered or sparse from your patio.
Add Plants and Final Touches
With your stones in place, it’s time to bring life to your garden. Choose drought-tolerant plants that thrive in your Austin gardening zone such as succulents, lavender, or native grasses. Use a trowel to create small pockets between stones, adding quality potting mix to give roots room to establish. Plant in these gaps, then add a thin layer of organic mulch around each plant to retain moisture and regulate soil temperature. For finishing touches, consider adding a few larger statement stones as focal points, or nestle smaller decorative rocks around plant bases for visual interest. If you’ve incorporated vertical elements, tuck creeping plants near the base to soften the transition. Step back and adjust any stones or plants that feel out of place until the composition looks natural and balanced.
How to Know Your Stone Garden is Working
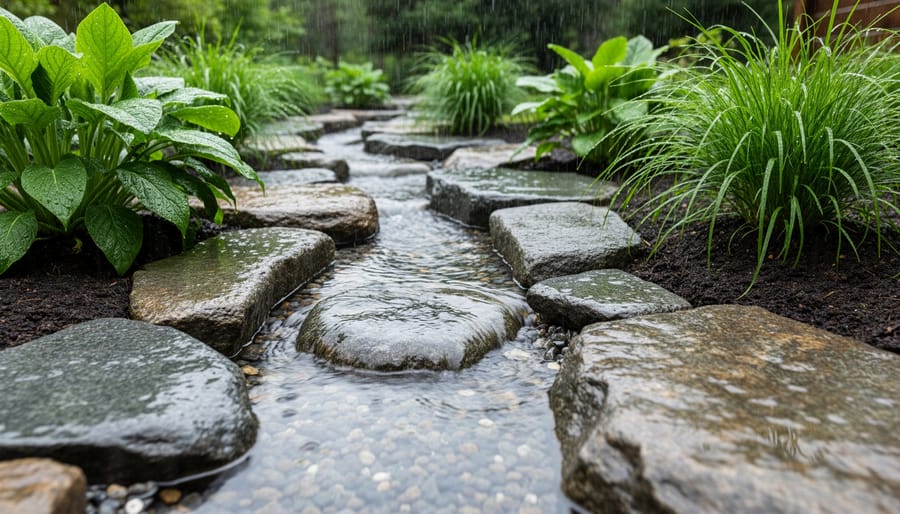
Your stone garden is working properly when you can check off these five indicators after the first heavy rain. Start with drainage, water should soak into the ground within a few hours rather than pooling on the surface. If you notice standing water lasting more than half a day, you may need to adjust your soil grade or add drainage channels beneath the stones.
Check for weed suppression by inspecting the stone-covered areas weekly for the first month. You should see minimal weed growth breaking through if your landscape fabric was installed correctly and your stone layer is at least two to three inches deep. A few stray weeds are normal, pull them promptly before they establish roots.
Test stone stability by walking across pathways and borders. Stones shouldn’t shift significantly under your weight or scatter when you step on them. If they do, you likely need a thicker base layer or compacted gravel underneath for support.
Evaluate aesthetic appeal from multiple angles. Your design should create clear definition between garden zones, guide the eye naturally through the space, and complement rather than overwhelm your plants. Austin’s intense sun will highlight any unevenness, so look at your garden during midday to spot bare patches or overly dense areas that need rebalancing.
Monitor plant health in the pockets and borders around your stones. Drought-tolerant plants should show new growth within a few weeks and maintain green foliage. Yellowing or wilting suggests the stones are trapping too much heat or preventing proper air circulation, try spacing them slightly or choosing heat-hardy varieties.
Troubleshooting common issues: If stones shift frequently, excavate and add a compacted gravel base. For persistent poor drainage, install perforated drain pipe beneath problem areas. Weed breakthrough means your fabric has gaps, overlap seams by six inches minimum and add more stone depth. If plants struggle, ensure you’ve left adequate soil pockets and aren’t crowding roots with stones.
For seasonal maintenance, refresh displaced stones after Austin’s occasional heavy storms, top up thin areas annually, and trim back plant growth that obscures your stone features. Summer heat may fade colored stones, while winter rains can expose fabric edges, address these as you spot them to keep your garden looking intentional year-round.
Stone Garden Ideas for Small Urban Spaces
Small urban spaces are perfect for creative stone gardening, you just need to think vertically and strategically. In container gardening use small decorative stones as a top dressing to reduce water evaporation in Austin’s heat. A one-inch layer of pea gravel or river rocks keeps soil moist while adding a polished look to pots on balconies or patios.
For vertical gardens, arrange flat stones or flagstone pieces at the base to create a textured foundation that anchors wall planters and catches overflow water. Miniature rock gardens work beautifully in shallow containers, combine succulents with small polished stones and sand to create desert-inspired displays that thrive in our climate.
In small-space gardening stones serve double duty as decorative elements and functional drainage layers. Line balcony herb planters with small stones at the bottom, or create a pebble “tray” under potted plants to increase humidity and protect surfaces. Mixing stone colors and sizes adds visual depth without taking up precious growing space, making even the tiniest urban garden feel intentionally designed.
Frequently Asked Questions
How deep should I lay stones in my garden?
For gravel or small decorative stones, aim for 2-3 inches of depth to effectively suppress weeds while allowing proper drainage. Larger feature stones can sit directly on landscape fabric with minimal additional coverage needed around them.
Will stones make my garden too hot in Austin summers?
Light-colored stones like limestone or white river rock reflect heat better than dark stones, helping moderate temperature. Pair stones with strategic shade plantings and use them in areas that naturally get morning sun rather than intense afternoon exposure.
Can I use stones from my yard instead of buying new ones?
Yes, you can repurpose existing stones from your property, but clean them first to remove soil and potential weed seeds. Just make sure they’re similar in size and appearance for a cohesive look, and avoid stones that may leach minerals harmful to plants.
How often do stone gardens need maintenance?
Stone gardens are low-maintenance compared to traditional beds. You’ll mainly need to rake stones back into place every few months, pull any weeds that break through, and occasionally rinse dust off decorative stones during dry spells.
These questions address the practical concerns Austin gardeners face when moving from planning to actual implementation. Stone depth affects both function and budget, while heat management matters significantly in our climate. Many urban gardeners want to work with what they have rather than buying everything new, and understanding the maintenance commitment helps you decide if stone gardening fits your lifestyle. The beauty of stone gardens is their flexibility, you can start small, learn what works for your specific space, and expand your design as you gain confidence.
You’re ready to transform your urban garden with stones. Start small, even a single pathway or container top dressing makes a difference, and you’ll quickly see how stones simplify maintenance while conserving precious Austin water. Stone gardening welcomes mistakes and adjustments, so don’t wait for the perfect plan. Explore different stone types, experiment with layouts, and remember that your garden will evolve with the seasons. Your drought-smart, low-maintenance stone garden starts today.