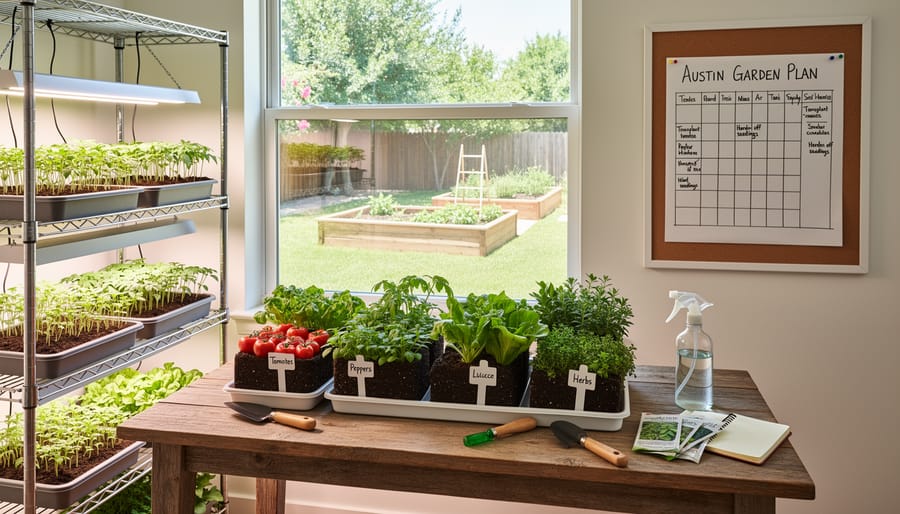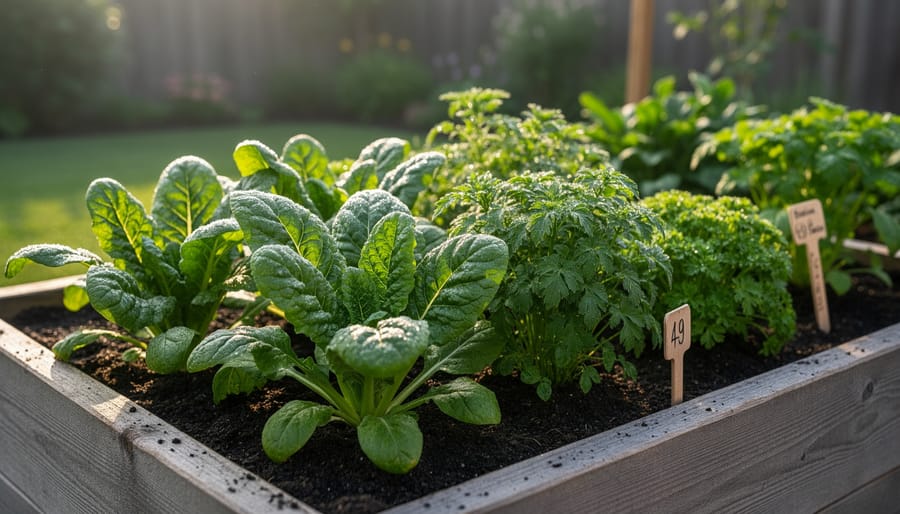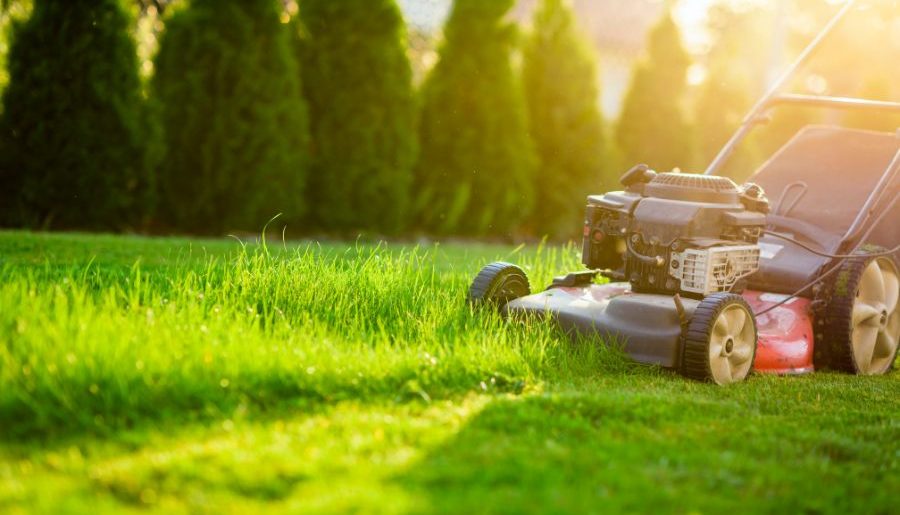
Header Image - Gardens Austin Designers

Category Archives

9 Articles

How to Start Gardening in a Small Space: From Balcony to Backyard Corner

How to Start Gardening in a Small Space: From Balcony to Backyard Corner

You can absolutely grow a thriving garden in a small space, and the secret is vertical thinking. Whether you’re working with a cramped Austin balcony, a narrow patio, or just a sunny windowsill, container gardening combined with vertical structures lets you maximize every square inch without sacrificing variety or yield. The process is straightforward: choose compact or vining plants, set up vertical supports like trellises or wall planters, and manage your containers for optimal drainage and soil health.

Small space gardening has exploded in popularity across urban Austin neighborhoods, and for good reason. Limited square footage doesn’t mean limited possibilities. In fact, growing upward instead of outward opens up opportunities most traditional gardeners never consider. You’ll discover that herbs, tomatoes, peppers, and leafy greens thrive in containers when given the right conditions, and vertical systems can turn a blank wall into a productive growing surface.

This guide walks you through the exact setup, from selecting the right containers and soil mix to installing vertical supports that can handle our Texas heat. You’ll learn how to position plants for maximum sun exposure (crucial during Austin’s intense summers), establish a watering routine that prevents both drought stress and root rot, and troubleshoot common issues like leggy growth or nutrient deficiencies. By the end, you’ll have a clear roadmap to transform even the tiniest outdoor area into a productive garden that delivers fresh produce and beauty throughout the growing season.

Key Takeaway: Healthy small space gardens show steady new growth, drain water quickly, and maintain vibrant leaf color. If plants yellow, wilt despite watering, or remain static for weeks, adjust light exposure, drainage, or watering frequency before they decline further.

What You’ll Need to Get Started

Starting a small space garden doesn’t require a shed full of equipment. In fact, one of the benefits of gardening on a balcony or patio is that you can begin with just a handful of essentials and add more as you learn what works for your space.

Containers and Growing Spaces

Your containers are the foundation of a small space garden. Look for pots with drainage holes in the bottom, this is non-negotiable for healthy plants. For Austin’s intense summer heat, choose light-colored plastic or glazed ceramic containers that won’t absorb as much heat and stress plant roots. Terra cotta is beautiful but dries out fast in our climate. Start with containers at least 8-10 inches deep for most herbs and vegetables, and go deeper (12-18 inches) for tomatoes, peppers, or root vegetables.

Self-watering containers are worth considering if you travel or work long hours. They have a reservoir that keeps soil consistently moist without daily watering, which is a lifesaver during Austin’s 100-degree stretches.

Soil and Amendments

Skip the cheap “garden soil” bags. You need a high-quality potting mix specifically formulated for containers, it’s lighter, drains better, and won’t compact like ground soil. Look for mixes that contain perlite or vermiculite for drainage. In Austin’s heat, mixing in coconut coir or extra compost helps retain moisture without creating soggy conditions that lead to root rot.

Essential Tools and Equipment

Here’s what you actually need to get started:

  • Hand trowel and cultivator for planting and loosening soil in tight spaces
  • Watering can with a narrow spout or a hose with a spray nozzle for controlled watering
  • Pruning shears or scissors for harvesting and trimming
  • Gardening gloves to protect your hands and keep them clean
  • Moisture meter (optional but helpful) to check when plants actually need water
  • Vertical supports like tomato cages, small trellises, or stakes for vining plants

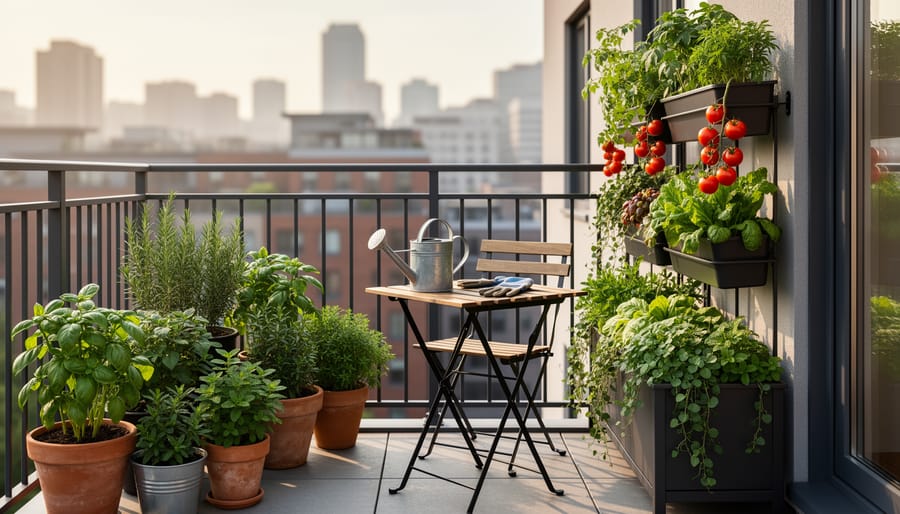
If you’re planning vertical gardening, add wall-mounted planters, hanging baskets with sturdy hooks, or a simple bamboo trellis. Make sure any wall-mounted system is rated for outdoor use and properly anchored, Austin’s occasional strong winds can pull poorly secured planters right off the wall.

A small bag of organic fertilizer rounds out your starter kit. Container plants need regular feeding since frequent watering leaches nutrients from the soil faster than in-ground gardens.

Before You Plant: Important Safety and Setup Considerations
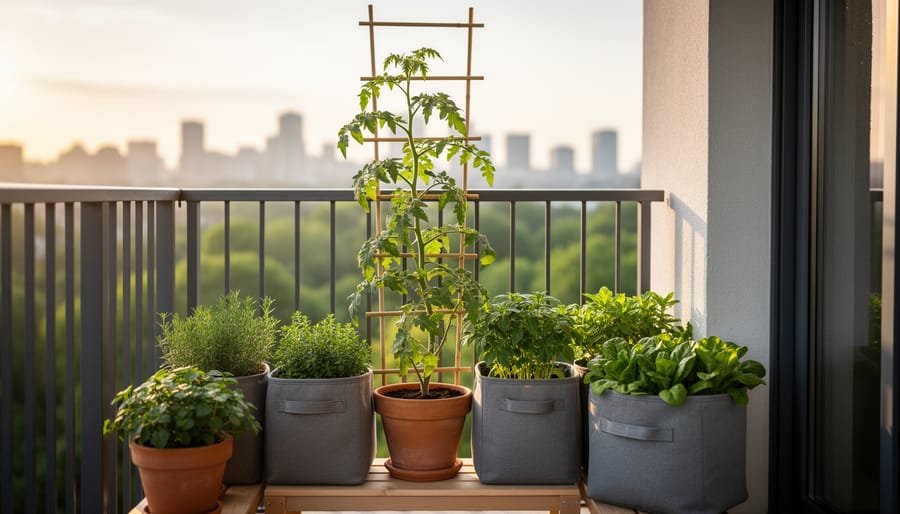
Small-space balcony garden with grow bags, herbs, and a compact trellis next to an apartment railing
A compact balcony setup demonstrates how herbs and vegetables can thrive in containers even in an urban setting.

Before you start filling containers with soil and plants, take time to ensure your space can safely support a garden. A balcony full of wet soil and pots can weigh hundreds of pounds, so check your building’s weight capacity guidelines or consult your landlord or property manager. Most modern balconies handle 50-100 pounds per square foot, but older structures may have lower limits. Distribute weight evenly across the space rather than clustering everything in one corner, and consider lightweight potting mix instead of garden soil, it can weigh 40% less when saturated.

Warning: Always verify your balcony or rooftop’s weight capacity before adding multiple filled containers, and ensure all containers need drainage holes to prevent water accumulation that adds dangerous extra weight.

Water damage is another serious concern. Without proper drainage, excess water will pool under containers and seep into floors, potentially causing structural damage or leaking into units below. Use saucers or trays to catch runoff, but empty them regularly so roots don’t sit in standing water. If you’re on a wooden deck or balcony, elevate containers slightly with pot feet to allow air circulation underneath and prevent rot.

Check your lease, HOA rules, or building codes before you begin. Some communities restrict container placement, prohibit drilling into walls for vertical structures, or limit the types of plants you can grow. In Austin, this is especially common in historic districts or condos with strict exterior appearance guidelines.

Finally, be mindful of container materials in Austin’s intense summer heat. Black plastic pots can reach scorching temperatures that cook roots, and some cheaper plastics may leach chemicals into soil. Stick with food-safe containers, glazed ceramic, or light-colored materials that reflect heat rather than absorb it.

Step-by-Step: Setting Up Your Small Space Garden
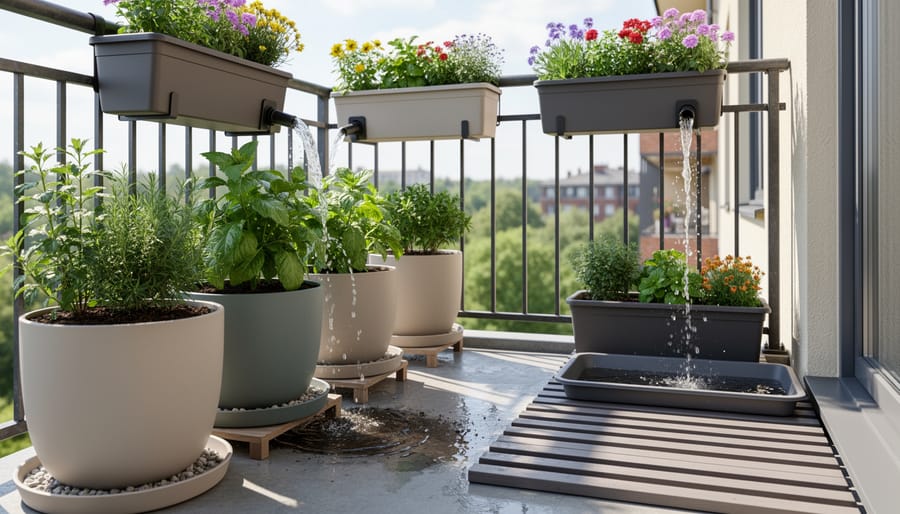
Gardener’s hands setting up a container with drainage and a drip tray on a balcony surface
This image highlights the practical setup details, proper containers and drainage, to help protect small-space gardens from water damage.

Maximizing Vertical Space

Vertical solutions multiply your growing area without claiming precious floor space. Wall planters work beautifully for herbs and shallow-rooted greens, mount them securely with heavy-duty anchors rated for outdoor use, and in Austin, position them on east or north walls to escape the brutal afternoon sun. Trellises turn climbing plants like beans, cucumbers, and cherry tomatoes into productive vertical crops; anchor the base with stakes driven deep into containers or soil, and use zip ties rather than twine to secure vines in our gusty spring winds.

Hanging baskets add layers of interest and suit strawberries, trailing herbs, and compact peppers. Choose baskets with built-in water reservoirs to reduce daily watering in summer heat, and hang them from reinforced hooks, calculate the weight when soil is saturated, not dry. Tiered shelving or ladder-style plant stands let you stack multiple container gardening ideas in a compact footprint, ideal for balconies or patios. Place heat-sensitive plants on lower tiers where they catch some shade from upper containers.

Before installing any vertical structure, check your Austin gardening zone requirements and verify load limits if you’re on a balcony. During summer, mist vertical plantings more frequently, elevated containers dry out faster than ground-level ones. Secure everything with weatherproof hardware; lightweight structures can topple in thunderstorms or sudden gusts.

Know When Your Garden Is Thriving
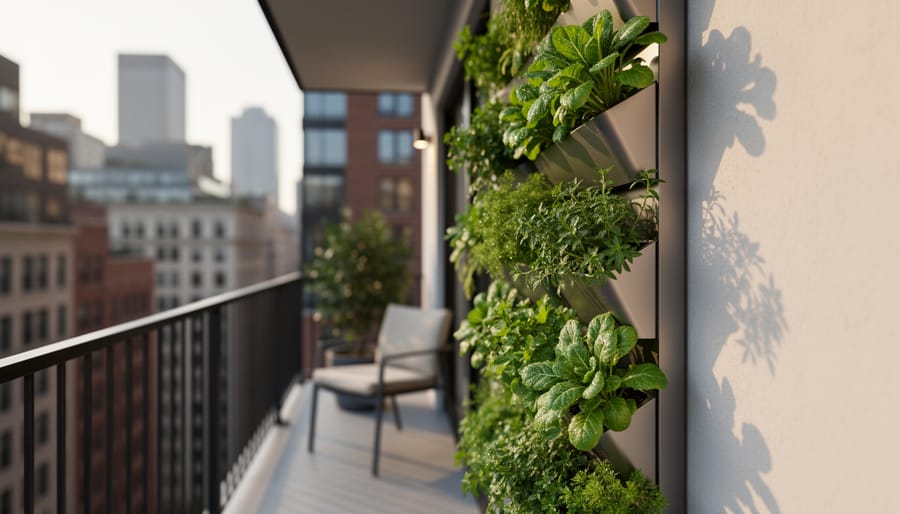
Vertical garden with wall planters and a hanging basket filled with basil and leafy greens in warm sunlight
Vertical planters use limited square footage effectively, letting herbs and greens grow vigorously upward in small outdoor areas.

Your garden is working when you see new growth within 7-10 days of planting, fresh leaves unfurling, stems reaching upward, and a vibrant green color that signals healthy photosynthesis. In Austin’s heat, plants may grow slower during July and August, but consistent new leaves and buds mean your setup is sound. Check that water drains freely from container bottoms within a few seconds of watering; if it pools or takes minutes to drain, you risk root rot and need to add drainage holes or switch to a lighter soil mix.

Struggling plants show yellowing lower leaves (often overwatering), crispy brown edges (underwatering or heat stress), or leggy, stretched stems reaching toward light (insufficient sun). If growth stalls for two weeks or more, reassess your light conditions, most edibles need at least six hours of direct sun, while shade-tolerant herbs and greens can manage with four. Move containers as needed; small space gardening gives you that flexibility.

Once your initial plantings thrive, plan your next steps. Rotate cool-season crops like lettuce and spinach in fall, then switch to heat-lovers like peppers and tomatoes in spring. Austin’s mild winters let you garden year-round if you keep plants alive through occasional freezes with frost cloth. Start a simple log noting what works in each spot, sun hours, which varieties flourished, when you watered, so you refine your approach each season.

Connect with local resources to grow your skills. Austin’s urban gardening meetups, weekend workshops at community gardens, and seasonal plant swaps offer hands-on learning and fellow small space gardeners who understand your challenges. Expanding your garden means adding one or two new containers at a time, testing vertical structures, or trying a new crop, build confidence through small, deliberate experiments rather than overwhelming yourself.

Common Questions About Small Space Gardening

How much sun does my small space garden actually need?

Most vegetables and herbs need at least six hours of direct sunlight daily, but many leafy greens and herbs will tolerate four to five hours. If your space gets less than that, focus on shade-tolerant plants like lettuce, spinach, and mint rather than tomatoes or peppers.

What if I only have a shady balcony?

Shade gardening works fine for leafy greens, herbs like parsley and cilantro, and ornamentals such as coleus or ferns. Austin’s intense summer heat can actually make partial shade a blessing, reducing water stress on plants that would struggle in full sun.

How often should I water containers in Austin’s heat?

During summer, most small containers need daily watering, sometimes twice a day for shallow pots in full sun. Stick your finger an inch into the soil; if it feels dry, water until it drains from the bottom. Larger containers hold moisture longer and may only need watering every other day.

Can I really grow vegetables in containers?

Absolutely. Tomatoes, peppers, lettuce, radishes, beans, and most herbs thrive in containers with proper depth and drainage. Choose compact or dwarf varieties bred for containers, and make sure pots are at least 12 inches deep for root vegetables and 5 gallons for larger plants like tomatoes.

What grows best in Austin’s brutal summer heat?

Heat-loving crops like okra, cherry tomatoes, peppers, basil, and Armenian cucumber excel in Austin summers. Native or adapted plants such as purslane and amaranth also handle the heat. For cooler months, switch to greens, broccoli, and root vegetables.

How do I deal with pests when everything’s right outside my door?

Small space gardening actually makes pest management easier, you notice problems quickly. Hand-pick larger pests like caterpillars, use neem oil spray for aphids, and encourage beneficial insects with herbs like dill and fennel. For more strategies, check out our organic gardening tips that work perfectly in tight quarters.

The beauty of container gardening is that you control the soil quality and can move plants around as needs change. If a spot isn’t working, shift the pot to a better location. Start with one or two plants to get a feel for your space’s quirks, then expand once you understand the light patterns and watering rhythm. Small space gardening rewards observation and quick adjustments more than rigid planning.

Starting a garden in a small space isn’t just possible, it’s one of the most rewarding ways to connect with nature right where you live. Whether you’ve got a sunny balcony, a shaded patio, or just a windowsill, you can grow fresh herbs, vibrant flowers, or even vegetables that thrive in Austin’s climate. Begin with one or two containers, experiment with what works in your specific light and weather conditions, and don’t hesitate to try vertical solutions as you gain confidence.

As compact and vertical gardening continues to evolve in 2026, the options for urban growers keep expanding. If you need supplies, want hands-on guidance, or are curious about classes tailored to Austin gardeners, Gardens Austin Designers offers personalized support to help you succeed. Your small space garden is waiting, start planting today.
Why Leisure Gardening Is Taking Over Urban Spaces (And How You Can Start)

Why Leisure Gardening Is Taking Over Urban Spaces (And How You Can Start)

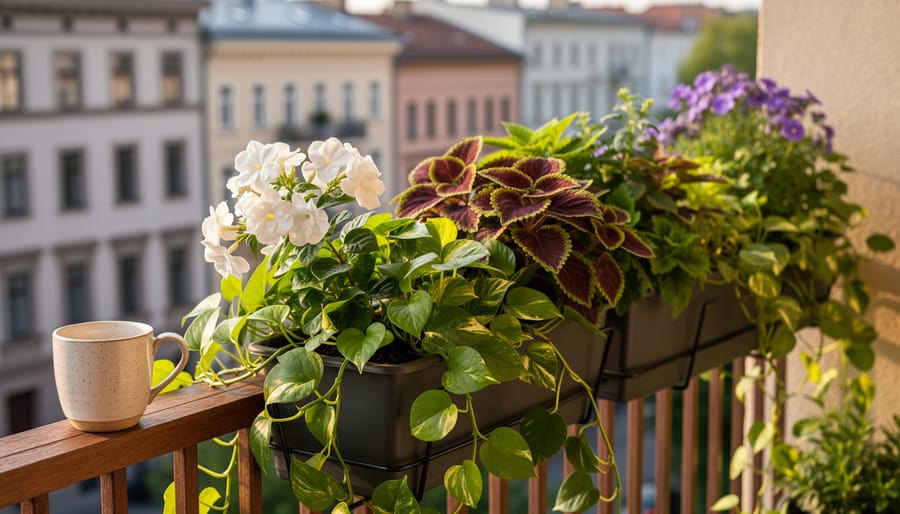
Leisure gardening means growing plants purely for enjoyment, not for maximum yield or self-sufficiency, and in 2026 it’s becoming the antidote to hustle culture that burned out a generation of hobby gardeners. Instead of meticulously planned beds and strict harvesting schedules, you’re planting what looks beautiful, smells good, or simply makes you happy when you walk outside with your morning coffee. No pressure to preserve 40 pounds of tomatoes or justify every square foot of space.

The shift reflects a broader cultural change. People discovered during the gardening boom of the early 2020s that turning a hobby into an optimization project strips away the very stress relief they were seeking. Leisure gardening flips that script entirely. You grow three types of basil because you like the way they look together, not because you need to stock a year’s worth of pesto. You let the cosmos self-seed wherever they want. You dedicate half your balcony to fragrant jasmine that serves no purpose except making your evenings nicer.

For Austin gardeners working with limited outdoor space, this approach feels liberating. Vertical gardening setups become showcases for trailing pothos and colorful coleus rather than cramped vegetable factories. Container gardens hold whatever caught your eye at the nursery last weekend. The goal is simple: if tending your plants feels like another chore on your to-do list, you’re doing it wrong. Leisure gardening invites you to grow things that spark joy, water when you remember, and skip the guilt when life gets busy.

What Makes Leisure Gardening Different

Leisure gardening flips the script on what it means to tend plants. Instead of obsessing over harvest yields, pest control schedules, or picture-perfect flower beds, it treats your garden as a place to unwind and enjoy the process. Think of it as the difference between running a marathon and taking a walk in the park, both involve movement, but only one requires a stopwatch and a training plan.

Traditional gardening often comes with pressure. There are planting calendars to follow, specific fertilizer ratios to calculate, and the nagging feeling that you’re failing if your tomatoes aren’t Instagram-worthy. Production gardening cranks this intensity even higher, focusing on maximizing yield and efficiency. Leisure gardening, by contrast, asks a simpler question: Does this bring you joy?

Note: Leisure gardening prioritizes process over production, enjoyment over efficiency, it’s about how gardening makes you feel, not what you harvest.

The mental health benefits are real. Research shows that community gardening reduces stress and improves wellbeing, and leisure gardening extends these benefits by removing the performance anxiety. You’re not competing with anyone or racing against deadlines. If a plant thrives, great. If it doesn’t, you learned something and moved on without guilt.

This approach also unlocks creative fulfillment in ways goal-driven gardening can’t. You can experiment with unusual plant combinations just because you like how they look together, rearrange containers on a whim, or spend an entire afternoon simply observing how light filters through leaves. The garden becomes a sanctuary rather than a project list, and that shift changes everything about how you engage with it.

Why Leisure Gardening Is Gaining Momentum in 2026

The leisure gardening movement is gathering serious momentum in 2026, and it’s not hard to understand why. After years of grind culture and screens demanding constant attention, people are craving activities that feel restorative rather than exhausting. Gardening has always offered that escape, but the leisure approach strips away the pressure to produce perfect yields or maintain Instagram-worthy landscapes. It’s gardening reimagined as pure enjoyment, a low-stakes hobby that fits into chaotic urban lives without adding to the to-do list.

The lifestyle shifts we’ve seen since the pandemic continue to reshape how people spend their time. Remote and hybrid work arrangements persist, giving urban dwellers more flexibility to step outside during daylight hours. That midday break becomes a chance to water a few plants or simply sit with a coffee near some greenery, rather than scrolling through lunch. There’s also a noticeable pushback against digital overload. Leisure gardening offers something tangible and analog, a way to disconnect that doesn’t require a meditation app or another subscription.

Urban gardening solutions have become remarkably accessible, making it easier than ever to start small. Vertical gardens, self-watering containers, and beginner-friendly plant varieties remove traditional barriers like lack of space or expertise. You don’t need a yard or advanced horticultural knowledge anymore. A balcony and curiosity are enough.

The trend is showing up in unexpected places. Events like the Southern Alberta Home, Garden & Leisure Show, running March 12-14, 2026 at the Lethbridge Trade and Convention Centre, and the Northumberland Home, Garden & Leisure Show returning to the Cobourg Community Centre May 30-31, signal that leisure gardening has moved beyond niche circles into mainstream interest. These shows reflect what people want right now: approachable, enjoyable outdoor pursuits that don’t demand perfection, just presence.

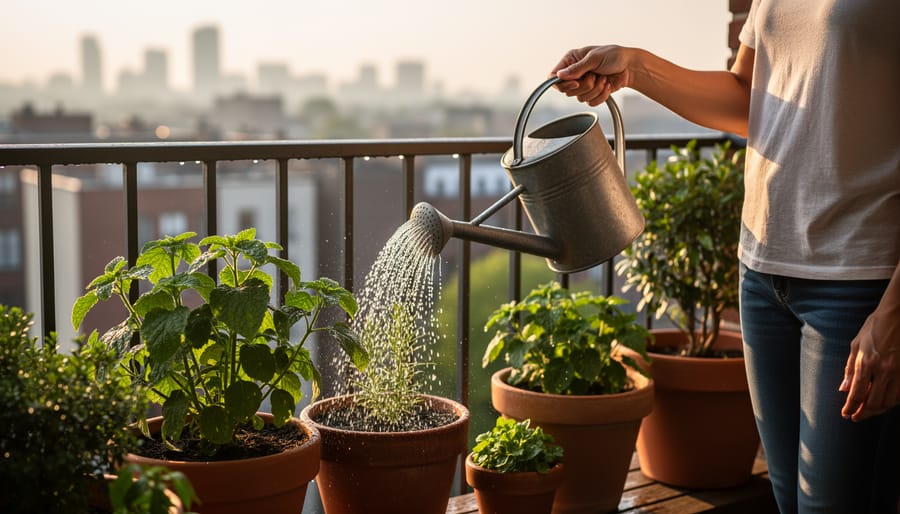
Person watering container plants on an apartment balcony in soft daylight
A quiet moment watering balcony plants captures the low-pressure, feel-good side of leisure gardening.

Leisure Gardening for Austin’s Urban Spaces

Vertical Gardens: Your Low-Effort, High-Joy Solution

Vertical gardens flip the script on traditional gardening by growing up instead of out, making them the perfect match for leisure gardening’s low-stress philosophy. If you’re working with a small Austin balcony or patio, you can create a lush, productive garden without claiming every square foot of floor space. The real beauty is how little effort they demand once you’ve got them set up, plants arranged vertically tend to stay cleaner, drain better, and suffer fewer pest problems than ground-level beds.

For Austin’s climate, vertical setups offer a practical advantage: you can move them into shade during brutal afternoon sun or bring delicate herbs closer to your door when temperatures spike. Wall-mounted planters, tower systems, and hanging pockets all work beautifully, and many pair naturally with container gardening basics you might already know. You water from the top, gravity does the work, and you’re done in minutes.

The visual payoff is immediate and satisfying, there’s something genuinely joyful about stepping outside to a wall of greenery that you didn’t have to weed, till, or wrestle into shape. Herbs like basil and oregano thrive in vertical pockets, cherry tomatoes cascade beautifully, and succulents add texture without any fuss. You get the relaxation and creative fulfillment of gardening without the back-breaking labor or weekend-consuming maintenance schedules that can turn a hobby into a chore.

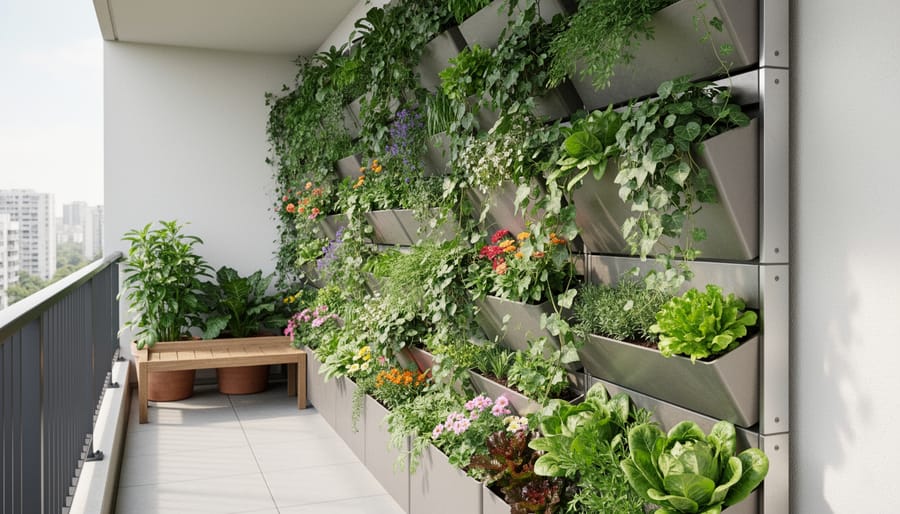
Vertical garden wall with stacked planters filled with herbs on an urban patio
A lush vertical planter wall turns limited space into an easy, visually rewarding gardening setup.

Getting Started: Your First Leisure Garden Project

Plants That Practically Take Care of Themselves

The easiest way to embrace leisure gardening is choosing plants that thrive with minimal fussing. In Austin’s climate, basil and mint make a perfect beginner herb garden they love heat, forgive occasional watering lapses, and reward you with fresh flavors for your kitchen. Mint grows so enthusiastically it practically tends itself, though you’ll want to contain it in a pot to prevent takeover.

Succulents are the ultimate low-pressure choice for leisure gardeners. Varieties like sedum and echeveria tolerate Austin’s scorching summers and need watering only when the soil dries completely. They’re nearly impossible to kill with neglect.

For color without commitment, zinnias are your friend. Scatter seeds in spring, water occasionally, and they’ll bloom reliably through fall with zero deadheading required. Cherry tomatoes also fit the leisure philosophy, choose patio varieties, give them a sunny spot and consistent water, and you’ll harvest handfuls of fruit all summer without intensive care.

These selections make it simple to keep plants alive while still feeling like a successful gardener, which is exactly the point.

Making It Truly Leisurely: Tips to Keep It Fun

The secret to keeping gardening leisurely isn’t finding more time or better plants. It’s permission to break all the rules that made gardening feel like work in the first place.

Start by ditching the idea that your garden needs to look Instagram-perfect or produce bushels of tomatoes. Your only job is to enjoy the process. Water when you remember, prune when it feels right, and skip a week if life gets busy. Real leisure gardening means your garden fits around your life, not the other way around.

Tip: If it feels like a chore, you’re doing it wrong. Adjust your approach, not your effort level.

Make your garden space somewhere you actually want to be. Add a comfortable chair, keep a speaker nearby for music or podcasts, and treat your watering time as coffee-on-the-balcony time. Some of the best leisure gardeners spend more time sitting with their plants than fussing over them. That’s not lazy, that’s the whole point.

Learn to let go without guilt. Plants die. It happens to everyone, and it doesn’t mean you failed. A wilted basil plant just means you tried something, enjoyed it while it lasted, and now you know what works for your space and routine. Replace it or don’t. There’s zero obligation to maintain a perfect streak.

Keep a casual approach to maintenance by grouping plants with similar needs together and choosing a watering schedule that matches your lifestyle, not some rigid calendar. If you travel often, lean into succulents and drought-tolerant herbs. If you’re home most evenings, herbs that need frequent snipping give you something to do without pressure.

The moment gardening stops being fun is the moment to step back, simplify, or try something completely different. Your garden should recharge you, not drain you.

Terracotta pots of succulents and zinnias on a patio table next to a cup of coffee
Leisure gardening looks like a comfortable routine, plants are cared for, but the day stays easy and enjoyable.

Local Resources and Inspiration in Austin

Austin’s gardening community is quietly building a support network perfect for the leisure gardening mindset. You don’t need to commit to a full semester course or join a formal club, plenty of local options let you dip in at your own pace.

Private gardening classes around Austin offer personalized, low-pressure instruction that fits the leisure approach beautifully. You can book a one-on-one session to learn vertical garden setup or container basics without the intimidation of a group setting. Several local garden centers and independent instructors offer these consultations, letting you ask questions specific to your space and schedule.

If you’d rather skip the setup phase entirely, Austin’s potting services will deliver planted containers ready to enjoy. You choose your plants and aesthetic, they handle the dirty work, and you start with a finished garden that’s already thriving. It’s leisure gardening at its most accessible.

The growing momentum behind leisure gardening nationwide, reflected in events like the Southern Alberta Home, Garden & Leisure Show in March 2026 and the Northumberland show returning in May, signals that the industry is finally catching up to what beginners actually want: approachable entry points without the pressure. That shift is trickling into local offerings, making it easier than ever to explore gardening as a genuine leisure activity rather than a test of horticultural skill. Check in with your neighborhood nursery or search for Austin garden consultants to find your best starting point.

Leisure gardening isn’t about mastering perfect rows or hitting harvest quotas. It’s about stepping outside with your coffee, noticing a new leaf unfurling, and feeling genuinely good about it. That’s the whole point. You’re not failing if your basil gets leggy or your tomatoes stay green longer than expected, you’re learning what works in your space and enjoying the process along the way.

Start with one small project. A vertical planter on your balcony. Three pots of herbs by the kitchen window. Whatever feels manageable and sounds fun. The beauty of leisure gardening is that there’s no finish line, no competition, just you creating a little green space that makes your day better.

If you’re not sure where to begin, consider a vertical garden setup, it’s low-maintenance, fits Austin’s urban spaces perfectly, and gives you immediate visual satisfaction without the pressure. Or take a local class to ease in with guidance and meet others who garden for the same reasons you do. Your version of garden leisure is waiting, and it starts smaller and simpler than you think.

Finding Your Austin Gardening Zone (And Why It Matters for Indoor Veggies)

Finding Your Austin Gardening Zone (And Why It Matters for Indoor Veggies)

Your gardening success in Austin starts with one number: your USDA hardiness zone. Here in the Live Music Capital, we sit right on the boundary between zones 8b and 9a, which means our growing season stretches longer than most of the country and our last frost typically arrives in late February.

Check your exact zone by entering your zip code into the USDA’s Plant Hardiness Zone Map at planthardiness.ars.usda.gov. The tool pinpoints your location and shows whether you’re in the slightly cooler 8b (with winter lows of 15-20°F) or the warmer 9a (20-25°F). Most of central Austin falls into 9a, while northern suburbs often register as 8b.

Understanding your zone matters because it tells you which plants will survive our winters and thrive in our notorious summer heat. When you see a plant labeled “hardy to zone 8,” you know it’ll handle our occasional freezes. This knowledge prevents wasted money on plants that won’t make it past December.

For apartment dwellers and urban gardeners, your zone determination gets even more interesting. Balconies on higher floors often act like mini microclimates, staying warmer than ground level. South-facing walls can push you half a zone warmer, which opens up exciting possibilities for heat-loving peppers and tomatoes in vertical growing systems.

The real power comes from combining zone knowledge with our unique Austin growing calendar. While traditional gardening guides suggest spring planting, we can actually grow vegetables nearly year-round if we choose zone-appropriate varieties and protect them during our brief cold snaps.

What Gardening Zones Actually Tell You

The USDA Plant Hardiness Zone Map is the standard gardeners across the country use to figure out which plants will survive winter in their area. It divides North America into zones based on average annual extreme minimum winter temperatures, essentially, how cold it gets in the worst winters. Each zone represents a 10-degree Fahrenheit range, and they’re further split into “a” and “b” half zones that narrow it down by another 5 degrees.

When the USDA unveiled the updated 2023 map it reflected 30 years of temperature data (1991-2020), making it more accurate than the previous 2012 version. This matters because many areas, including parts of Austin, shifted to slightly warmer zones. The system assigns USDA zones based on extreme minima so a zone 8b location sees winter lows between 15 and 20 degrees F, while zone 9a dips to 20-25 degrees F.

For practical gardening decisions, your zone tells you which perennials will come back year after year, when you can safely transplant indoor-started seedlings outside, and which vegetables need a head start indoors versus direct sowing. In Austin, where we sit in zones 8b and 9a, that means you can grow plants rated for those zones outdoors year-round. It also guides your frost date planning, knowing your zone helps you count backward to figure out when to start tomatoes, peppers, and other warm-season crops indoors so they’re ready to move outside after the last frost. The zone doesn’t dictate everything (soil, rainfall, and summer heat all matter), but it’s your starting point for matching plants to your climate.

How to Find Your Exact Gardening Zone

Finding your exact gardening zone takes less than a minute with the USDA’s online tool. Here’s how Austin gardeners can pinpoint their zone:

  1. Visit the USDA Plant Hardiness Zone Map at planthardiness.ars.usda.gov
  2. Locate the Quick Zip Code Search box on the homepage
  3. Enter your Austin ZIP code (like 78701 for downtown or 78745 for South Austin)
  4. Review the results to see whether you’re in zone 8b or 9a

The tool displays your zone instantly, along with a map showing your location. Most of Austin falls into zone 8b (average minimum winter temperature of 15 to 20°F) or zone 9a (20 to 25°F). If you’re in a neighborhood near the zone boundary, your specific microclimate matters. Urban areas with more pavement and buildings often run slightly warmer than the official designation, effectively pushing you toward the higher zone.

Don’t stress if you’re right on the edge between 8b and 9a. Treat yourself as being in the colder zone (8b) when planning outdoor transitions for tender seedlings you’ve started indoors. This gives you a safety buffer against unexpected late frosts. For heat-tolerant crops that you’re growing year-round inside, the distinction matters less since you control the indoor environment.

Austin’s Gardening Zones: What You Need to Know

Austin sits comfortably in USDA Plant Hardiness Zones 8b and 9a, which means the city’s average annual extreme minimum winter temperature ranges from 15 to 25 degrees F. Most of Austin proper falls into zone 9a (20 to 25 degrees F), while areas in the northern and western outskirts typically register as zone 8b (15 to 20 degrees F). This zone split matters because it influences which perennials survive winter outdoors and when you can safely transition indoor-started vegetables to your patio or backyard.

Texas as a whole spans zones 6 through 9, reflecting the state’s massive geographic and climate diversity. South Texas gardeners in zone 9 enjoy nearly frost-free winters, while Panhandle residents in zone 6 face significantly colder conditions. Austin’s position in zones 8b/9a puts us in the warmer half of the state, giving us a longer growing season and more flexibility for year-round gardening than our northern neighbors.

What makes Austin’s microclimate unique is the urban heat island effect combined with our Hill Country topography. Downtown Austin and densely built neighborhoods often register several degrees warmer than the official zone designation suggests, especially on winter nights. Concrete, asphalt, and clustered buildings absorb and radiate heat, creating pockets that can feel more like zone 9b. If you’re gardening on a high-rise balcony or in a South Austin apartment complex surrounded by pavement, your plants might experience milder conditions than someone with a backyard in the greenbelt.

Conversely, properties in low-lying areas near creeks or on the edges of the Hill Country can experience cooler temperatures and unexpected frost pockets. A tenth-floor balcony in downtown Austin might never see frost, while a backyard garden three miles away could get hit with a surprise freeze. Understanding your specific microclimate within Austin’s broader 8b/9a designation helps you make smarter decisions about when to move seedlings outdoors and which varieties will thrive in your exact location.

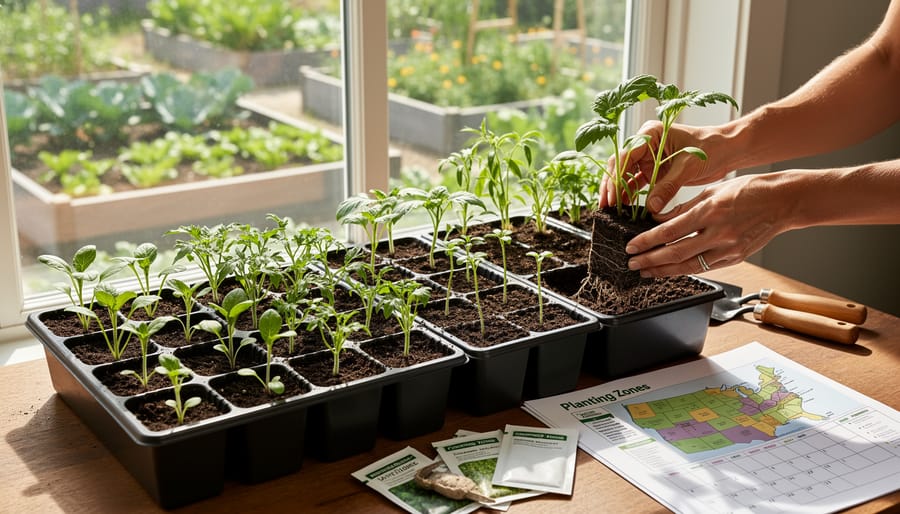
Gardener holding seedling trays outdoors on a porch with green seedlings in soil
Seedling trays show how indoor starts eventually become strong outdoor plants, an approach that depends on knowing your local zone and timing.

Why Your Zone Matters for Indoor Vegetable Gardening

Timing Your Indoor Seed Starts

In Austin’s zone 8b/9a climate, timing indoor seed starts requires working backward from your last frost date, which typically falls in mid- to late February. Unlike Corpus Christi gardeners who might see their last frost as early as February 1, or El Paso residents planning around March 24, Austin’s frost window sits comfortably in between. This zone-specific timing matters because starting seeds too early means leggy, overgrown seedlings desperate for outdoor space, while starting too late cuts into your productive growing season.

The calculation is straightforward: count backward from your target transplant date (about two weeks after your last frost) by the number of weeks each vegetable needs indoors. Most tomatoes and peppers need 6-8 weeks of indoor growth before they’re ready to face the Austin heat. Cucumbers and squash, on the other hand, need just 3-4 weeks and actually suffer if started too early. For Austin gardeners looking to grow vegetables indoors year-round, understanding this timing helps you plan succession plantings that keep your indoor space productive even as some seedlings transition outside.

Vegetable Weeks Before Last Frost Austin Start Window
Tomatoes 6-8 weeks Late December – Early January
Peppers 8-10 weeks Mid-December
Cucumbers 3-4 weeks Late January – Early February
Squash 3-4 weeks Late January – Early February

Your zone 8b/9a designation gives you a longer growing season than northern Texas, but Austin’s unpredictable late-winter temperature swings mean you can’t rush transplants outdoors the moment the calendar says it’s safe. Start your seeds indoors when the timing chart suggests, but keep them under lights or on sunny windowsills until outdoor nighttime temperatures consistently stay above 50°F for warm-season crops.

Choosing Vegetables That Match Your Zone

Austin’s zone 8b/9a climate changes which vegetables you should prioritize for indoor starting versus direct outdoor sowing. Heat-loving crops like tomatoes, peppers, and eggplants benefit from a 6-8 week head start indoors, giving them time to fruit before summer’s extreme heat slows production. Basil, cilantro, and parsley also transplant well after indoor germination.

Knowing your zone helps you choose varieties bred for Southern heat. Look for tomatoes labeled “heat-set” or “southern” varieties that produce when temperatures climb above 90°F. For peppers, jalapeños and serranos handle Austin’s summers better than thick-walled bell peppers, which often struggle in prolonged heat.

Some vegetables skip the indoor phase entirely in Austin. Beans, squash, and cucumbers germinate so quickly in warm soil that direct sowing outdoors makes more sense once frost risk passes. Leafy greens like lettuce and spinach grow best as cool-season crops here, started indoors in late summer for fall gardens rather than spring.

Your zone knowledge prevents wasted effort on varieties that won’t transition successfully to Austin’s outdoor conditions, letting you focus indoor space on crops that genuinely need that early start.

Indoor vegetable seedlings on a kitchen windowsill with a watering can
A sunny indoor setup illustrates how Austin gardeners can grow vegetables indoors while planning for when to transplant outside.

Using Your Zone for Year-Round Indoor Growing Success

Your zone knowledge transforms indoor gardening from a guessing game into a strategic operation. In Austin’s zone 8b/9a, you can rotate crops through your indoor setup year-round because our mild winters mean many vegetables can move outdoors earlier than in colder regions. Start heat-lovers like tomatoes and peppers indoors in January, then transition them outside by late March when nighttime temps stay above 50°F. Cool-season crops such as lettuce and spinach work the opposite way: grow them indoors during our brutal summer months (June through August), then shift them to outdoor containers or beds in September when temperatures drop.

The Monthly Gardening Calendar for Austin Area becomes your planning blueprint. Cross-reference it with your indoor veggie schedule to time succession plantings. When the calendar says it’s time to plant basil outdoors (April), start your next indoor batch of leafy greens to harvest through summer. This rotation keeps your kitchen supplied without gaps.

Tip: Austin’s zone 8b/9a winter lows rarely drop below 25°F, so you can harden off seedlings on a covered patio or balcony weeks earlier than gardeners in zone 7 or colder, use this advantage to free up indoor space faster.

Temperature management indoors matters more than you’d think. Most vegetables germinate best between 65-75°F, which matches Austin’s indoor temperatures naturally from fall through spring. Summer is trickier: if your apartment heats up past 80°F, cool-season crops will bolt or refuse to germinate. Position indoor setups away from west-facing windows during May through September, or run a small fan to keep plants alive in the heat. Zone knowledge tells you when outdoor conditions beat indoor ones, so you’re not wasting energy growing things that would thrive outside.

Zone-Smart Indoor Gardening for Small Austin Spaces

When you’re working with limited square footage in an Austin apartment or condo, knowing you’re in zone 8b or 9a directly shapes what indoor gardening setup will actually work. A south-facing windowsill might handle seedlings started in late winter, but Austin’s intense summer sun coming through glass can scorch even heat-tolerant varieties by June. Your zone tells you when outdoor temperatures will support transplanting, which determines whether you need to invest in grow lights or can get by with natural light for the two to six weeks most seedlings need indoors.

Vertical systems make even more sense when you understand your zone’s timing. Those stackable herb towers or wall-mounted planters let you start multiple succession plantings indoors, then move the bottom tier outside once nighttime temps stay above 50°F (typically mid-March for Austin). You can rotate new seedlings up from your indoor nursery area while hardened-off plants head to a small balcony or patio. This flow only works when you know your frost dates and can plan the handoff.

For small spaces transitioning plants between indoors and out, check organic garden tips that account for Austin’s quick spring warmup and brutal summer heat. Your zone information helps you choose compact varieties that won’t outgrow their indoor space before outdoor conditions are right, and it prevents the rookie mistake of moving tender starts outside too early just because you’re tight on room. Plan your indoor setup around your outdoor window, not the other way around.

Knowing your Austin gardening zone isn’t just a technicality for outdoor gardeners. Zone 8b or 9a shapes every indoor vegetable gardening decision you make, from which tomato varieties will thrive when you move them to your patio to exactly when you should start those pepper seeds on your kitchen counter. The USDA zone finder takes seconds to use, and those few degrees of difference between zones translate directly into weeks of adjustment for your seed-starting calendar.

Your zone gives you a framework, but the real magic happens when you pair it with Austin’s specific climate patterns. Check the USDA Plant Hardiness Zone Map to confirm your exact location, then bookmark the Monthly Gardening Calendar for Austin Area to sync your indoor growing with Central Texas reality. Whether you’re starting seeds in a spare bedroom or nurturing seedlings under grow lights in your apartment, zone-smart planning means you’ll transplant at the right time and choose varieties bred to handle what Austin throws at them.

2026 is your year to grow smarter, not harder. Start with your zone, plan with purpose, and watch your indoor garden deliver fresh vegetables all season long.

Raised garden bed with healthy leafy greens growing in rich brown soil
Healthy greens in a raised bed reflect successful gardening choices that match the right zone for your area’s temperatures and growing conditions.

What Is A Stamped Deck On A Lawn Mower?

by thomas 0 Comments
What Is A Stamped Deck On A Lawn Mower?

When choosing a lawn mower deck, one of the critical components often overlooked is the mower deck. There are primarily two types—stamped decks and fabricated decks. Your choice can significantly affect not just the quality of your cut but also the mower’s durability and ease of use.

In this article, we delve into what is a stamped deck on a lawn mower and how it compares to fabricated mower decks. Also, you’ll learn which one might be the best fit for your garden care needs.

What Is a Stamped Deck on a Lawn Mower?

A stamped deck on a lawn mower is crafted through a unique process that uses a hydraulic press to shape a flat sheet of steel into a curved mowing deck.

This technique results in a single, continuous piece of metal, which minimizes the number of seams and welding points. Therefore, the stamped deck is lighter and more aerodynamic than its fabricated counterpart.

Due to its streamlined design, a stamped deck often provides better airflow, resulting in a more even cut when mowing your lawn.

Because of these attributes, stamped decks are commonly used in residential lawnmowers, tailored for more straightforward mowing tasks and smaller lawns. Their lighter weight makes them easier to maneuver. And their typically lower cost makes them a budget-friendly choice for homeowners who love to use power tools in their gardens.

What Is A Fabricated Mower Deck?

In contrast, a fabricated mower deck is constructed from multiple pieces of thick, heavy-duty steel welded together, forming a robust and durable structure.

Unlike stamped decks, which are molded into shape, fabricated decks are engineered for resilience. This sturdiness makes them well-suited for tackling challenging mowing conditions like uneven terrain, tall grass, and even small debris.

Because they are built to last and endure tougher conditions, fabricated decks are often the go-to choice for commercial mowers and professional landscaping equipment. Their heavier build may require more power. But the trade-off is a machine built to last and perform reliably under strenuous conditions.

Advantages of a Stamped Deck

The choice between stamped and fabricated mower decks often boils down to specific needs and situations. When looking at stamped decks, there are several clear advantages worth considering:

Cost-Effectiveness

Stamped decks are generally less expensive than fabricated decks. This is because they are made from a single sheet of metal pressed into shape. Thus, they require less labor and material than fabricated mower decks, which involve welding multiple pieces together.

Weight and Maneuverability

One of the key benefits of a stamped deck mower is its lightweight nature. The lighter weight allows for better maneuverability. This feature makes it easier for homeowners to navigate their lawns, especially if it’s relatively flat. This contrasts sharply with fabricated deck mowers, which are considerably heavier.

Optimized Airflow

Stamped decks are designed to allow for more efficient airflow beneath the mower deck. This results in a cleaner, even cut, especially when mowing simple lawns with few obstacles. Fabricated decks, while durable, may not offer the same kind of fluid aerodynamics as stamped mower decks.

Ease of Maintenance

Maintaining a stamped deck is generally easier than caring for a fabricated deck. And why is that? That’s because stamped decks have fewer crevices and seams where grass and debris get stuck. Less complexity means less time spent cleaning and more time enjoying your well-manicured lawn.

Residential Use

Stamped decks are commonly found on residential lawn mowers, designed for homeowners who need a reliable and efficient machine for regular lawn care. But these users don’t require the ruggedness of a fabricated deck.

Advantages of Fabricated Decks

The conversation about mower decks often pits stamped vs. fabricated options against each other. While stamped deck mowers have their place, particularly in residential settings, fabricated deck mowers offer their own set of unique advantages:

Durability

One of the most significant benefits of a fabricated deck lawn mower is its enhanced durability. These decks are crafted from multiple pieces of heavy-duty steel welded together. This makes them well-suited for tackling a variety of terrains and cutting conditions. Such usage might wear out stamped deck mowers faster.

Precision and Versatility

Fabricated deck mowers have maximum cutting precision. Thanks to their robust construction, they easily handle tall, thick, or wet grass, boasting versatility not typically found in stamped deck mowers.

Commercial and Heavy-Duty Use

They are a common feature on commercial lawnmowers due to their durability and ability to handle demanding mowing tasks. If you own or manage large properties or are in the lawn care business, a fabricated deck mower is almost necessary.

Long-Term Value

While fabricated deck mowers are more expensive up front, their long-lasting construction often requires less frequent repairs or replacements than stamped deck mowers. So, they are more cost-effective in the long run, especially for those using their lawnmowers extensively.=

Which Is the Best? Stamped vs. Fabricated

When choosing between stamped and fabricated decks, these factors will ultimately guide your choice between a stamped deck lawn mower and a fabricated deck.

Purpose and Use

Stamped deck mowers are generally better suited for relatively flat residential lawns. Moreover, they are free of significant obstacles. On the other hand, fabricated decks are commonly found in commercial mowers. They are structured to handle challenging terrains and professional mowing tasks.

Durability

As previously mentioned, the robustness of fabricated decks makes them ideal for heavy-duty use. If you’re in the market for a machine that can withstand more wear and tear, opt for a fabricated deck.

Mowing Quality

Both decks afford a high-quality cut, but their performances vary based on the conditions. A stamped deck is often better for achieving an even cut on flat terrains due to its optimized airflow.

Conversely, the fabricated deck’s robust construction allows it to handle diverse mowing conditions more effectively, from tall grass to damp conditions.

Weight and Maneuverability

Stamped deck mowers are generally lighter, making them easier to operate and navigate around a lawn. This is an essential consideration if ease of use and quick maneuverability are priorities for you.

Cost Factor

Stamped decks are usually less expensive regarding initial purchase price and maintenance. However, if you consider the mower a long-term investment, especially for commercial use, fabricated decks offer better value over time.

Commercial vs. Residential

As noted, stamped decks are common in residential mowers, while fabricated decks are a staple in commercial mowers. The durability and versatility of fabricated lawn mower decks make them more suitable for the rigorous demands of commercial mowing.

Choice of Mowing Deck

Ultimately, your needs will dictate whether a stamped or fabricated mowing deck is more appropriate. Whether it’s the complexity of your lawn, the frequency of use, or your professional requirements. Both stamped and fabricated decks have merits and drawbacks, so weigh your options.

Practical Implications for Lawn Mowers

Both stamped and fabricated decks have practical implications for the types of lawnmowers they are usually found on.

Stamped decks are often on residential, less expensive mowers, while fabricated decks are generally part of high-end or commercial mowers.

When considering lawnmowers with either of these decks, think about your specific organic garden care needs. This includes the complexity of your lawn and how frequently you’ll be using the mower.

Man using lawn mower

Should You Choose a Fabricated or Stamped Deck?

After considering all the factors, choosing between a fabricated or stamped deck hinges on your needs and how you intend to use the mower.

For homeowners who need to maintain a small to medium-sized lawn with minimal complexity, stamped deck mowers are sufficient. Their lighter weight and lower cost make them popular for residential settings.

Conversely, if you are a landscaping professional or have a large property with varying terrain types, fabricated deck mowers boast the durability and precision you’ll likely require.

These mowers work for heavy-duty use and have a longer lifespan, particularly under strenuous conditions.

Final Thoughts

Understanding the difference between stamped and fabricated decks significantly impacts lawn maintenance activities.

Both types have pros and cons. But your specific requirements—whether you are a homeowner with a small yard or a professional landscaper—will ultimately dictate your best choice.

Whether you opt for a lawn mower with a stamped deck or a fabricated one, consider the initial purchase price and the long-term costs. Don’t forget to factor in the maintenance and potential repairs.

Remember, a more expensive, heavy-duty fabricated deck mower could be more cost-effective in the long run, especially for commercial mowers with a lot of use. And there you have it—an in-depth look at what is a stamped deck on a lawn mower. Remember to stay safe while mowing!

Things You Should Know About Using Generators in Your Garden

by thomas 0 Comments
Things You Should Know About Using Generators in Your Garden

Trimming your hedges or the edge of your lawn is usually done manually. However, it’s also common to see people relying on power tools to make the job faster and easier. Most of these power tools are powered via solar power, batteries, and petrol.

Generators can be useful during gardening, especially portable generators. Whether you want to work on a shed, on your car, or repair the fence, having easy access to electricity makes these tasks easier.

Depending on what you can afford, you can opt for either solar-powered portable DIY generators, a brand-new generating set, or a used one. It’s also advisable you have a separate generator for your garden to avoid having long power leads trailing back to your home.

This article will discuss how to use generators in your garden.

Power Tools

Making your own solar generator that’s small in size is the ideal option if are on a budget and you’ll be using only small power tools such as a sander, electric drill, saw, and others. It can also work for power tools such as lawnmowers, chainsaws, strimmers, and hedge trimmers.

Typically, the above-mentioned power tools consume less than 3 kilowatts, and a small solar-powered generator is capable of providing that.

For tradesmen or artisans using bigger power tools such as big-sized air compressors and brick saws, the go-to power source should be a portable generator of a bigger size.

Safety Precautions

Safety must be taken very seriously, especially regarding electricity or generators. Many deaths have been caused by carbon monoxide poisoning, which is from generators.

These deaths were caused by generators used in basements, porches, and garages. Unfortunately, these are all the right places for the toxic pollutant from the generator to gain access to the home.

Using gas generators comes with specific guidelines or safety tips that you should know before purchasing them. They are listed below:

  • Don’t risk running your generator in your garage, regardless of the doors are fully open or not. Carbon monoxide is a deadly pollutant, and it’s odorless, so you won’t even know you’re inhaling it.
  • Don’t risk running your generator in the rain. Instead, shield it with a tarpaulin or gazebo.
  • Don’t use old or worn-out extension cords because they can be dangerous. Also, don’t overload these cords by plugging in many devices.
  • Never connect your generator to your service panel because the excess current can move back up the power lines and may put utility workers in a dangerous situation.
  • Never attempt to refuel the tank of petrol-powered generators when the generator is running or off and still hot. Any slight spill of fuel coming in contact with a very hot generator part can trigger a sudden outburst of flames. It’s best if you let the generator cool off before you refuel.
  • Always keep your petrol in the appropriate containers meant for that purpose. Using a container not meant for storing petrol might result in a dangerous situation or accident.
  • Finally, ensure that your generator is well-maintained and serviced periodically to sustain optimal performance.

Tips For Your Organic Garden

by thomas 0 Comments
Tips For Your Organic Garden
Birds eye view of a woman gardener weeding an organic vegetable garden with a hand fork.

Whether you are already veteran gardeners or somebody new, there is always something unique and new to learn to make your gardening experience better. Today, we will share various tips that you can do to help you when it comes to improving your gardening skills.

Eggshell Pots

Many do not know that eggshells are rich in nutrients such as magnesium and calcium that can help plants to grow healthy. To use the shells, you can fill them with soil and put the seedlings.

Cooking Water

You will be surprised to know that cooking water can help to make your plants thrive. This gardening hack will not only add nutrition to the plants but also prevents you from wasting water. To do this method, just let the water cool down after boiling eggs or vegetables then use it. This acts as a fertilizer to the plant.

DIY Weed Killer

If you are not keen on using chemicals for your garden, Vinegar is the best ingredient that you should use. Vinegar will act as a multipurpose agent that deters pests, removes weeds, and helps nourish plants. To make this, just add a tablespoon of liquid soap in a gallon of vinegar that is mixed with one cup of salt. However, you should avoid using vinegar that is highly concentrated to keep your plants safe. It should be used every two weeks to kill the weed completely. Spray only in affected areas.

Coffee Grounds

Plants also need caffeine, not to wake them up but to have better growth. Coffee grounds are used on the soil as a fertilizer for better moisture and also attracts earthworms. You can either use an unused or used coffee ground depending on the plant that you plan on growing.

Grow Your Vegetables Indoors This Winter

by thomas 0 Comments
Grow Your Vegetables Indoors This Winter
Selection of fresh vegetables in metal wire basket

Are you wondering if it is possible to grow your own vegetables this winter? With the right attention and care, you can definitely do that. If you have limited room but are really eager to grow your own green, just find a sunny area and you are good to go.

The plants where leaves are used are usually better when grown indoors than fruit-bearing plants. A vegetable garden indoors may sometimes have the impression that it is an exhausting task. The simplest way to do this is to start little and expand gradually as you continue.

Starting with salad greens and herbs is a good idea as they are easier to manage. For this reason, it is a wise idea to get a growing light as it helps to grow your vegetables indoors. Get your garden to grow, take advantage of your greens, and inspire others with the skill that you acquired.

Winter season does not have to hinder you from starting your own vegetable garden, starting one will not only allow you to keep yourself busy during the gloomy days, but it will also nourish you and your family by having fresh produce. Also, you will be able to save up money during the process.

How to Keep Your Plants Alive

by thomas 0 Comments
How to Keep Your Plants Alive

Gardening is not really a challenging task to finish but it takes time and skill to do it correctly. If you always panic upon seeing brown spots on your plants, we are here to tell you that it is normal, especially if you are just starting out in gardening. Today, we will discuss some points that you should follow to keep your plants alive.

Know The Plant That You Have

Make an effort by researching what kind of climate it thrives to prevent it from dying, don’t just learn the plant’s name. Let’s be honest, most plant owners just purchase their plants because it’s pretty but they don’t know if it really is compatible with their weather. If you are not sure what to do, seek the help of a garden expert to assist you in selecting the right plant and how to grow it.

Pick The Right Soil And Fertilizer

After knowing the right plant for your garden the next thing to do is to find the right soil and fertilizer. Sometimes, regular soil is not beneficial for the garden, especially if you are growing a vegetable. Also, picking the right fertilizer is also essential. Imagine giving the wrong food to a baby, this means that they will not be nourished well.

New Garden Trends This 2020

by thomas 0 Comments
New Garden Trends This 2020

Every year, trends always find a way to change the game, may it be in fashion or gardening. Because of this, new ideas in gardening are coming out for people to have a better gardening experience. Here in this article, we will discuss various gardening trends that 2020 has to offer.

  1. Urban Gardening

This type of gardening has acquired a following throughout the years for being adaptable even when you are living in a small space. this allows people to do container and vertical gardening. Because most of the younger generation today choose to have a better lifestyle they wanted to find out what urban gardening benefits are and they were not disappointed. Still, it will continue as a trend, especially for plant lovers that have a smaller living space.

  1. Grow Your Own Vegetables

We all know that the majority of food companies are quiet about what they really put in our food. Vegetables that you buy in the market, for example, may have different chemicals in it that can disrupt our hormones or damage our bodies. For this reason, more people are adopting the trend of growing their own vegetables to make sure that they are eating clean produce.

  1. Smart Gardening Tools

Every year, innovation makes everything much simpler and easier. Garden-friendly tech gadgets are already in and this allowed gardeners to check the humidity of soil to the health of plants, ensuring that they are growing the right way. Not only that, there are other smart tools that you can get with outstanding features to keep your gardening needs in check.