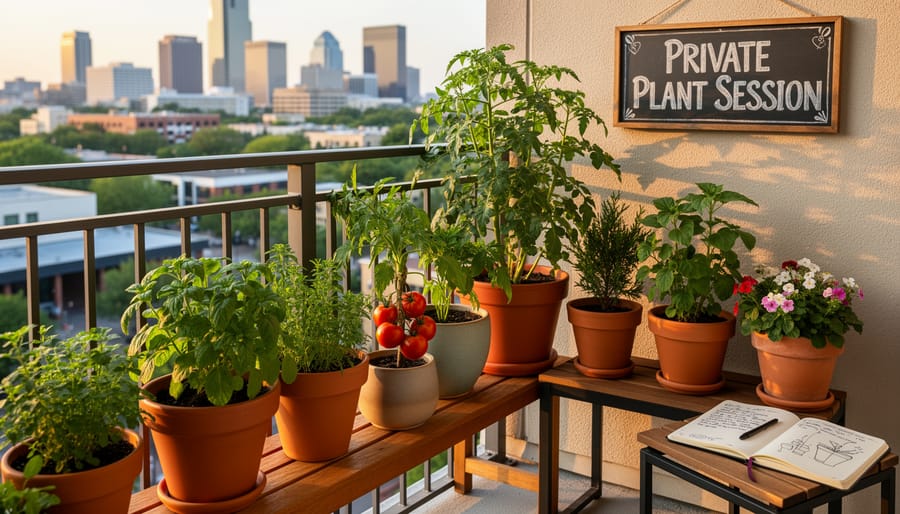
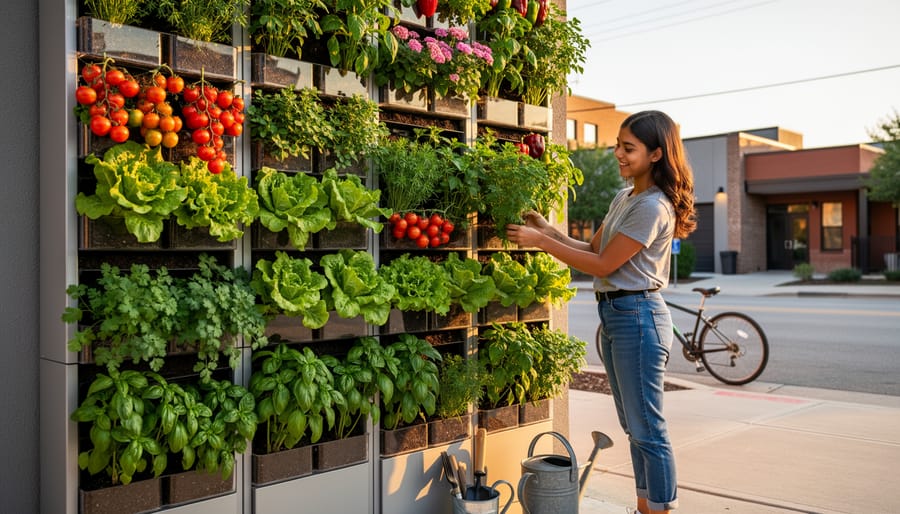
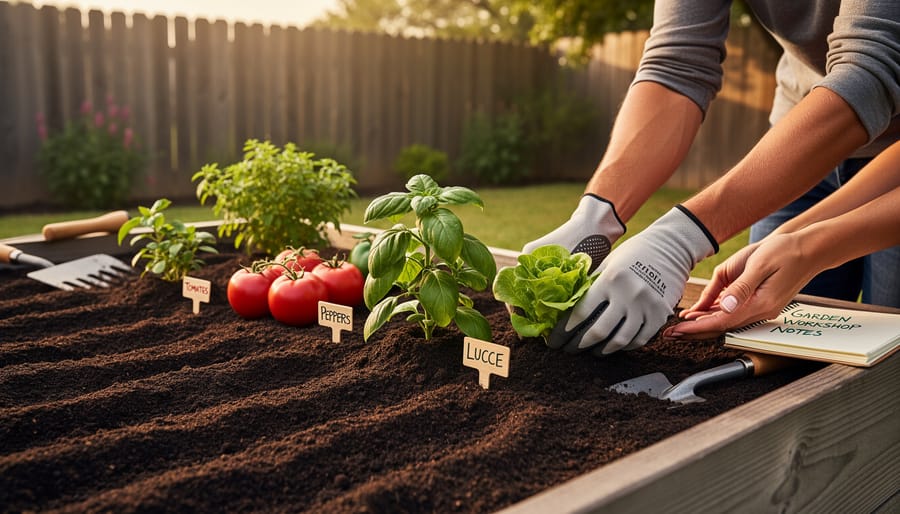
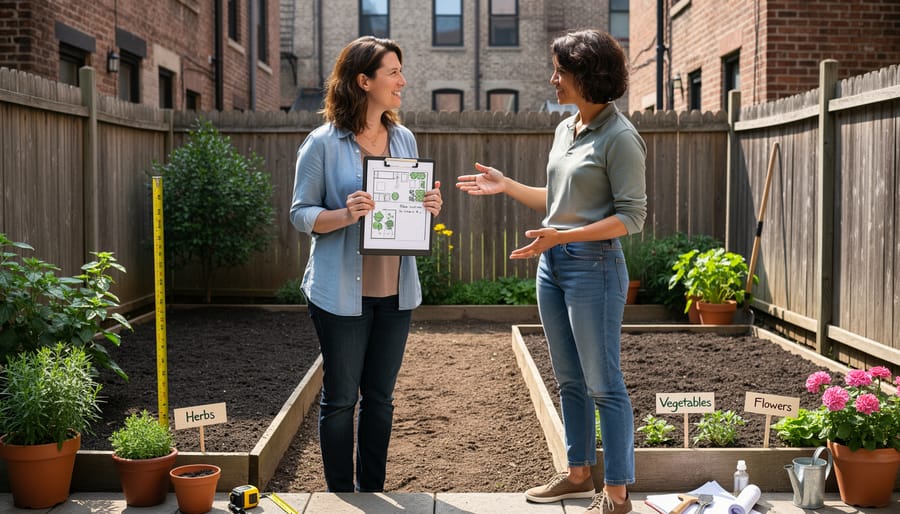
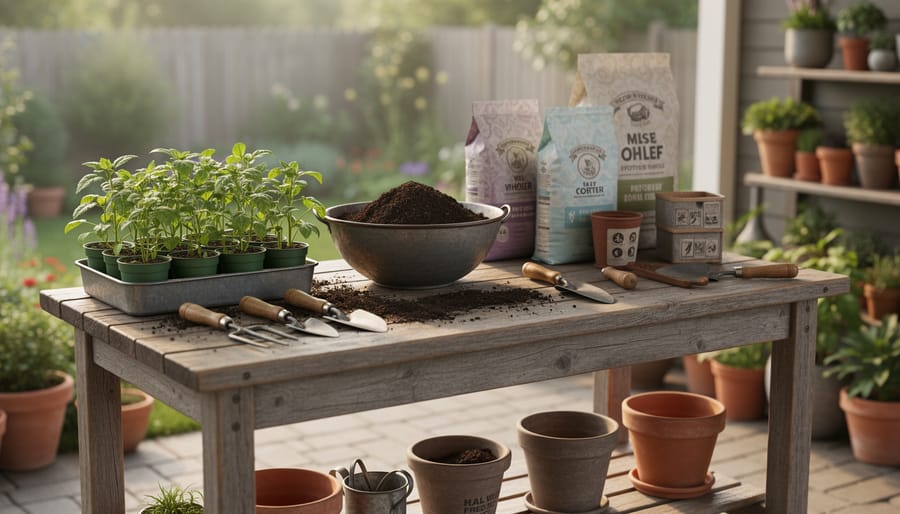
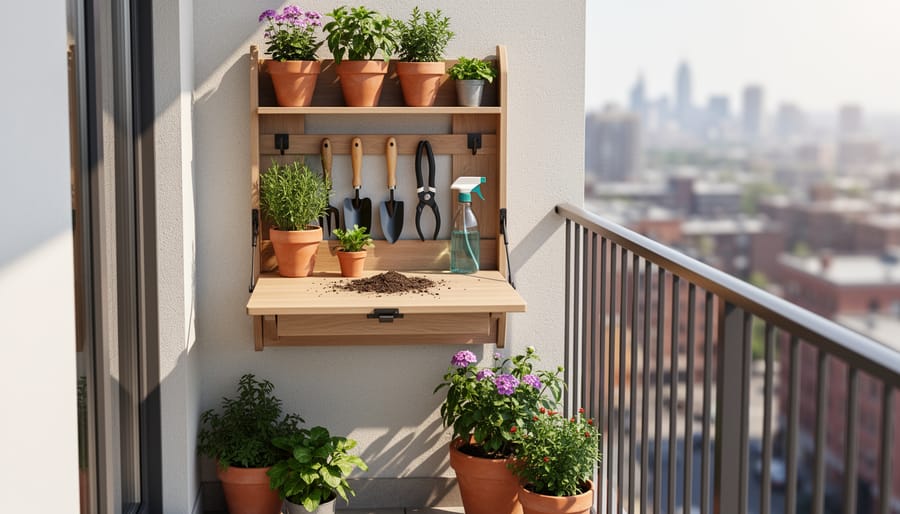
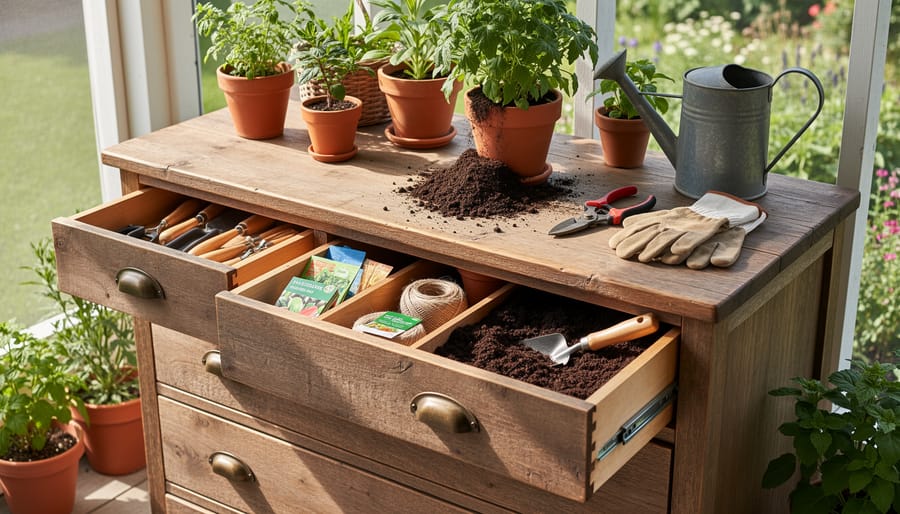
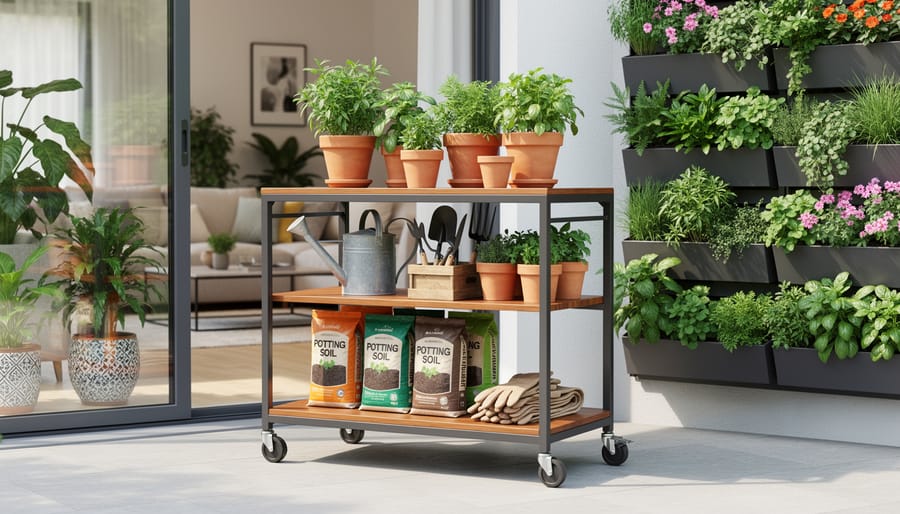
Header Image - Gardens Austin Designers

Category Archives

5 Articles

Guide to Beginner Gardening Classes Near Me in Austin: Private Options, Practical Information, and Local Tips

by thomas 0 Comments
Guide to Beginner Gardening Classes Near Me in Austin: Private Options, Practical Information, and Local Tips

Finding beginner gardening classes near you in Austin is easier than ever, with local private instructors, community workshops, and garden centers offering hands-on training designed specifically for newcomers. These classes take the guesswork out of getting started, teaching you what to plant in Central Texas’s unique climate, how to prepare soil that actually supports growth, and which watering schedules work when summer temperatures hit triple digits.

Austin’s gardening scene welcomes beginners with open arms. You don’t need prior experience or a sprawling backyard to get started. Many local instructors specialize in urban gardening techniques, including vertical gardening solutions perfect for balconies, patios, and small yards. You’ll learn to grow food and flowers in containers, make the most of limited space, and work with Austin’s alkaline soil and unpredictable weather patterns.

Private gardening classes offer personalized attention you won’t find in generic online tutorials. A local instructor can walk your actual growing space, recommend plants that thrive in your specific light conditions, and troubleshoot problems as they arise. Most beginner courses run two to four sessions, covering everything from seed starting and transplanting to pest management and seasonal planning.

The investment typically ranges from $50 for single workshops to $300 for comprehensive multi-week courses, but the payoff is a solid foundation that saves you from costly trial-and-error mistakes. You’ll gain confidence knowing exactly when to plant tomatoes, how to protect tender seedlings from late spring freezes, and which native plants attract pollinators while requiring minimal water. Local classes also connect you with fellow Austin gardeners, building a support network that lasts well beyond your first harvest.

Key Takeaway: Private gardening classes offer personalized curriculum tailored to your exact space, one-on-one troubleshooting for your soil and light conditions, flexible scheduling that fits your life, and hands-on learning in the environment where you’ll actually garden, eliminating guesswork and building confidence faster than group settings.

Why Choose Private Beginner Gardening Classes in Austin

Private gardening instruction gives beginners something group workshops can’t: a curriculum built around your actual space, your schedule, and your specific questions. Instead of sitting in a classroom hearing general advice, you work hands-on in your own yard or patio while an instructor addresses the exact conditions you’re dealing with, whether that’s a shaded balcony, a sun-baked backyard, or a few square feet of concrete. You set the pace, ask follow-up questions without competing for attention, and learn techniques you’ll use immediately rather than trying to remember what applied to your situation from a lecture three weeks ago.

For Austin gardeners, that personalization matters even more. Private instructors assess your soil on-site, crucial when you’re working with the city’s notorious alkaline clay that behaves nothing like the generic potting mix advice in most gardening books. They help you choose plants that survive July and August without constant watering, recommend timing for spring planting before the heat hits, and design vertical or container solutions that make sense for urban spaces with limited square footage. A group class might mention heat-tolerant varieties in passing; a private session puts the right ones in your hands and shows you exactly where to plant them in your yard’s microclimates.

Flexible scheduling removes the biggest barrier for busy adults: you’re not locked into a six-week evening series or missing sessions because of conflicts. Book a two-hour session when it works for you, schedule follow-ups as questions arise through the season, and get real-time coaching when problems show up rather than waiting until the next class meets.

Top Private Beginner Gardening Classes and Services in Austin

Thriving beginner garden with healthy plants in containers and a visible drip line in an Austin backyard setting.
A lush, watered-in garden scene reflects what confident beginner care can look like in Austin’s climate.

1. Gardens Austin Designers Private Classes

Private gardening instructor demonstrating potting basics next to terracotta pots and seedlings on an Austin patio.
A private instructor demonstrates hands-on potting in a sunny backyard setting, reflecting the personalized learning experience.

Gardens Austin Designers offers private beginner gardening classes designed specifically for Austin’s urban gardeners and small-space enthusiasts. Their one-on-one instruction covers essential topics including container potting techniques, selecting plants that thrive in Austin’s heat and alkaline soil, and vertical gardening solutions for patios and balconies. Each session is tailored to your specific space and goals, whether you’re working with a sunny balcony, a shaded courtyard, or a small backyard plot.

The hands-on learning approach means you’ll get your hands dirty from the first session. Instructors guide you through practical tasks like mixing potting soil, choosing the right container sizes, and installing vertical garden structures. They emphasize Austin-specific challenges, teaching you which plants tolerate triple-digit summer heat, how to manage watering schedules during drought conditions, and strategies for dealing with Central Texas clay soil.

What sets these classes apart is the personalized attention and ongoing support. You’ll learn at your own pace without the pressure of keeping up with a group, and instructors adapt the curriculum based on what you want to grow and where. After your sessions, you have access to their shop for supplies and tools, plus their blog library offers continued guidance as you develop your gardening skills. Most beginners start with a two-hour introductory session and then schedule follow-up visits as their garden evolves through Austin’s distinct growing seasons.

2. One-on-One Container and Patio Gardening Sessions

Hands tending a container garden on an apartment balcony with planters, watering can, and seedlings.
Container plants on a balcony illustrate how private sessions help beginners succeed in small Austin spaces.

For apartment balconies and small patios, one-on-one container gardening sessions teach you exactly what you need to grow successfully in pots. These private classes focus on the fundamentals beginners need most: choosing the right container size and drainage, selecting potting mix that holds moisture without compacting in Austin’s heat, and understanding how containers dry out faster than ground beds.

Your instructor will show you how to water deeply, not lightly ensuring roots develop properly even in small pots. You’ll learn which herbs, vegetables, and flowers thrive in containers here, from cherry tomatoes and peppers to heat-loving basil and drought-tolerant succulents. The session covers grouping plants with similar water needs, setting up simple drip irrigation or self-watering systems for busy schedules, and adjusting care through Austin’s seasons.

Because these classes happen at your location, the instructor can assess your specific light conditions, help you arrange containers for maximum sun exposure, and recommend plants that will actually succeed on your balcony or patio. You leave with a personalized planting plan and the confidence to keep your container garden thriving year-round.

3. Vertical Garden Design and Installation Classes

Hand planting a seedling in a vertical garden panel with lush herbs on an outdoor wall.
A vertical garden wall demonstrates how beginners can grow more in Austin’s urban spaces using structured, space-saving planters.

Vertical gardening classes offer beginners a smart solution when ground space is tight. These private sessions teach you how to grow vegetables, herbs, and flowers upward instead of outward, perfect for Austin balconies, patios, and narrow side yards where every square foot counts.

Your instructor will walk you through selecting the right vertical structures for your space and skill level. Trellises, wall-mounted planters, pocket gardens, and tower systems each work differently, and you’ll learn which suits your budget and the weight your walls or railings can handle. You’ll discover which beginner-friendly plants thrive vertically in Austin’s heat: cherry tomatoes, pole beans, cucumbers, trailing herbs like oregano and thyme, and heat-tolerant flowers.

Irrigation presents unique challenges when plants grow upward. These classes show you simple drip systems and self-watering setups that keep upper plants hydrated without constant hand-watering, crucial during Austin’s brutal summer months when container plants dry out fast. You’ll also troubleshoot common vertical garden problems: uneven moisture distribution, plants becoming top-heavy, and managing pests that hide in dense vertical foliage. By the end of your session, you’ll have a workable plan for installing and maintaining a productive vertical garden in your actual space.

4. Seasonal Planting Private Workshops

Gardener planting seedlings into a raised garden bed with mulch during a seasonal workshop.
Seasonal seedlings being planted into a prepared bed captures the practical, Austin-ready guidance covered in private workshops.

Seasonal planting private workshops take the guesswork out of Austin’s quirky climate by teaching you exactly what to plant when. These one-on-one sessions walk you through the Austin monthly gardening calendar explaining why fall is your prime planting window for cool-season crops and spring arrivals, and how to navigate our unpredictable last frost dates. Your instructor assesses your specific space and helps you prep beds or containers for each season, from amending clay soil to choosing the right potting mix for summer heat.

You’ll learn which varieties actually thrive here: heat-tolerant tomatoes for our brutal summers, leafy greens timed for mild winters, and herbs that handle drought without constant babysitting. The focus stays practical, how deep to plant, proper spacing for airflow, mulching techniques that conserve water, and maintenance schedules that fit Austin’s long growing season. These sessions typically include a personalized planting calendar for your garden, so you know what seeds to start in January, what transplants to buy in March, and when to let beds rest. Most instructors offer follow-up check-ins as seasons change, helping beginners stay on track year-round without feeling overwhelmed.

5. Custom Garden Planning and Coaching

Instructor coaching a beginner in a small Austin yard while reviewing garden layout tools like a measuring tape and clipboard.
Two people assess a small space for a personalized garden plan, showing how coaching translates ideas into a workable layout.

Custom garden planning sessions put you in direct collaboration with an experienced instructor who evaluates your actual growing space, whether that’s a cramped balcony, a shaded patio, or a narrow side yard, and builds a realistic garden plan around it. The instructor measures sunlight exposure throughout the day, assesses soil conditions if you have ground access, notes drainage issues, and identifies microclimates that affect what will thrive.

Together, you’ll select beginner-appropriate plants suited to your specific light and space constraints, prioritizing varieties that handle Austin’s heat and require minimal fussing. The instructor sketches a layout showing where each plant goes, accounting for mature sizes so nothing gets crowded out. You’ll discuss container choices if you’re working with hard surfaces, vertical solutions for tight quarters, and how to layer plants for visual interest without creating maintenance headaches.

The session concludes with a written maintenance roadmap: a month-by-month guide covering watering frequency adjustments as seasons shift, when to fertilize, pruning timing, and how to recognize early signs of trouble. This personalized plan removes guesswork and gives you a clear reference to follow as your garden establishes, making it easier to build confidence and avoid common beginner mistakes that derail enthusiasm.

What You’ll Learn in Beginner Private Gardening Classes

Most private beginner classes in Austin cover the same essential foundation, giving you hands-on confidence to grow successfully in our unique climate. You’ll start with soil basics, understanding how to amend Austin’s notorious alkaline clay, when to use compost, and how to create healthy growing conditions whether you’re planting in the ground or working with containers.

Your instructor will guide you through:

  • Soil preparation and amendment techniques for Austin’s alkaline clay
  • Selecting heat and drought-tolerant plants suited to Central Texas
  • Watering schedules and techniques for our hot, dry summers
  • Fertilizing basics: what, when, and how much for container and in-ground gardens
  • Common pest identification and organic control methods
  • Seasonal planting calendars tailored to Austin’s growing zones
  • Troubleshooting issues like leaf burn, wilting, and nutrient deficiencies
  • Space-maximizing strategies for balconies, patios, and small yards

Plant selection gets special attention since choosing the right varieties makes or breaks beginner success in Austin’s heat. You’ll learn which herbs, vegetables, and ornamentals thrive here, plus proven small-space garden trends like vertical growing and succession planting. Many instructors also cover practical workspace setup, including potting station ideas that make maintaining your garden easier. Since private classes adapt to your specific space and goals, your instructor can spend more time on the topics most relevant to you, whether that’s container gardening, raised beds, or maximizing a shady courtyard.

Practical Information: Cost, Scheduling, and What to Expect

Private beginner gardening classes in Austin typically range from $75 to $150 per session, with most instructors offering 90-minute to two-hour sessions. Many providers bundle multiple classes at discounted rates: a three-session package might run $200-$350, while ongoing monthly coaching sessions often start around $100 per visit when purchased as a series.

Most instructors offer flexible scheduling, including evenings and weekends to accommodate working gardeners. Classes can take place at your home, apartment balcony, or patio so you learn directly in the space you’ll be tending, or at a teaching garden if you prefer a demonstration setting before tackling your own area. In-home sessions let instructors assess your soil, sun exposure, and specific challenges related to your Austin gardening zone making the instruction immediately actionable.

Class Type Typical Duration Price Range Best For
Single private session 1.5-2 hours $75-$150 Complete beginners testing the waters
Three-session package 1.5 hours each $200-$350 Hands-on learners wanting seasonal guidance
Container gardening focus 1-1.5 hours $85-$125 Apartment and balcony gardeners
Monthly coaching 1 hour $100+ per visit Ongoing support through growing seasons

Materials vary by instructor. Some include starter supplies like soil amendments, small tools, or plant samples in the session fee, while others provide a shopping list you’ll source beforehand. Always clarify what’s covered when booking.

To prepare for your first session, photograph your garden space from multiple angles, note how many hours of sun it receives, and jot down any specific problems you’ve encountered or goals you have. Wear comfortable clothes and sun protection if meeting outdoors, and have a notebook ready for taking notes.

Local Austin Gardening Tips for Beginners

Austin’s clay soil presents the biggest challenge for new gardeners. Before planting anything, work in 3-4 inches of compost to improve drainage and aeration, clay dries brick-hard in summer and becomes waterlogged in winter if left untreated. Raised beds or large containers bypass this problem entirely if you’re working with especially stubborn soil.

Plant selection makes or breaks your success here. Prioritize native and adapted species like black-eyed Susans, salvias, esperanza, and Texas sage, they thrive in heat and need minimal water once established. For edibles, try heat-tolerant varieties of tomatoes, peppers, and herbs like rosemary and oregano. Avoid plants that demand constant moisture or afternoon shade unless you can provide both.

Timing matters in Austin’s climate. Fall (September through November) is actually prime planting season, mild temperatures let roots establish before summer stress hits. Spring works too, but you’ll need to water more frequently. Skip planting anything between July and late August; the heat will overwhelm new transplants no matter how much you water.

Tip: Austin enforces strict watering restrictions during summer months, typically twice weekly maximum. Water deeply in early morning to minimize evaporation and stay compliant with city ordinances.

Container gardening solves multiple problems for beginners. Pots let you control soil quality completely, relocate plants as needed, and maximize patios or balconies. Use containers at least 12 inches deep for most vegetables and herbs. Mastering beginner potting basics sets you up for vertical gardening success, stacking planters or using wall-mounted systems multiplies your growing space without requiring yard access. Add mulch to all plantings, potted or in-ground, to retain moisture and moderate soil temperature through Austin’s temperature swings.

Frequently Asked Questions About Beginner Gardening Classes

Do I need any gardening experience to take beginner classes?

No experience is required. These classes are designed for absolute beginners who have never gardened before, and instructors start with the fundamentals like soil, watering, and plant selection.

What should I bring to my first gardening class?

Most private instructors provide all necessary materials, but bring a notebook for taking notes, wear comfortable clothes you don’t mind getting dirty, and have sunscreen and a hat ready if the session is outdoors. Check with your instructor beforehand about any specific items they recommend.

How many sessions do most beginners need?

Most beginners start with a single 1-2 hour session to learn the basics, then decide if they want follow-up sessions for seasonal guidance or specific projects. Some instructors offer 3-4 session packages that cover a full growing cycle from planting through harvest.

Can classes be conducted at my home?

Yes, many Austin instructors come directly to your space, whether that’s a backyard, patio, or balcony. Teaching in your actual growing area lets the instructor assess your specific conditions like sunlight, soil, and microclimates, then tailor advice to what will actually work there.

Are supplies and plants included in the class cost?

Basic instruction typically doesn’t include plants or supplies, though some instructors provide starter materials or offer package deals. Expect to purchase your own seeds, plants, soil, and containers separately, and ask upfront what’s included when you book.

What if I only have a balcony or small patio?

Small spaces are perfect for beginner classes focused on container and vertical gardening. Instructors can show you how to maximize limited square footage with wall-mounted planters, tiered containers, and compact varieties that thrive in pots.

When choosing an instructor, look for someone with experience teaching absolute beginners and knowledge of Austin’s specific growing conditions. Read reviews or ask for references from other students, and don’t hesitate to ask questions about their teaching style during your initial contact. The right match will make you feel comfortable asking basic questions and will adapt the pace to your learning speed rather than rushing through material.

Starting your gardening journey doesn’t have to feel overwhelming. Private beginner gardening classes give you the personalized attention and hands-on experience you need to build real confidence, whether you’re working with a sunny balcony or a small backyard. You’ll learn exactly what works in Austin’s climate, from choosing heat-tolerant plants to managing our challenging clay soil, without the pressure of keeping up with a large group or wondering if your questions are too basic.

The beauty of private instruction is that every lesson addresses your specific space, your schedule, and your goals. You won’t waste time on techniques that don’t apply to your situation. Instead, you’ll walk away with practical skills you can use immediately and a clear plan for growing food, flowers, or both in the heart of Texas.

Ready to get your hands dirty? Gardens Austin Designers offers private beginner gardening classes designed for Austin’s urban gardeners. Their experienced instructors bring the classroom to your space, teaching you vertical gardening techniques, container planting strategies, and seasonal care tailored to our local conditions. Visit their shop or website to schedule your first session and start growing with confidence.

8 Creative Potting Station Ideas to Transform Your Garden Workspace

by thomas 0 Comments
8 Creative Potting Station Ideas to Transform Your Garden Workspace

A potting station transforms gardening from a messy floor operation into an organized, ergonomic workspace where you can transplant seedlings, mix soil, and prep containers without wrecking your back or your patio. Whether you’re working with a narrow apartment balcony or a full backyard corner, the right setup keeps supplies within arm’s reach and saves you from hunting for trowels every time you need to pot up tomatoes.

The best potting stations balance three priorities: work surface height (typically 36 inches to avoid hunching), smart storage for soil and tools, and weather resistance if you’re keeping it outdoors year-round in Austin’s heat and humidity. You don’t need a custom-built unit. Some of the most functional stations come from repurposed furniture, wall-mounted fold-down tables, or simple shelving units fitted with hooks and bins.

Urban gardeners especially benefit from dual-purpose designs. A potting bench that doubles as a display shelf for houseplants or integrates vertical growing space below the work surface makes every square foot count. The ideas ahead cover temporary setups you can break down when guests arrive, budget DIY builds using reclaimed materials, and more permanent structures that anchor your gardening routine. Each option offers practical solutions for keeping soil contained, tools organized, and your planting process efficient.

Key Takeaway: Place stations in morning-sun locations to avoid Austin’s harsh afternoon heat, weatherproof all wood surfaces, keep frequently-used tools at eye level, and store bagged soil in sealed containers to prevent moisture absorption during humid months.

What Makes a Great Potting Station

Before diving into specific potting station ideas, it helps to understand what separates a truly functional workspace from a cluttered corner that frustrates more than it helps. The eight ideas featured here were selected based on criteria that matter most to urban gardeners working within real-world constraints.

Each station idea addresses specific challenges Austin gardeners face: limited square footage on balconies and patios, intense summer heat that degrades certain materials, and the need to move between indoor seedlings and outdoor vertical gardens. The best potting stations don’t just look organized, they make your gardening tasks genuinely easier.

Here’s what went into choosing these ideas:

  • Space efficiency: works in compact urban settings without sacrificing functionality
  • Weather resistance: stands up to Austin’s heat, UV exposure, and occasional heavy rain
  • Storage capacity: keeps soil, pots, and tools accessible but contained
  • Ease of setup: achievable without advanced carpentry skills or permanent modifications
  • Austin-climate suitability: accommodates year-round gardening and outdoor living

Some ideas prioritize portability for renters, while others offer permanent solutions for homeowners with dedicated outdoor space. You’ll find options across different budgets and skill levels, from repurposed furniture to purpose-built workbenches. The common thread is that each one transforms chaotic potting tasks into streamlined, enjoyable work.

1. Fold-Down Wall-Mounted Station for Tiny Balconies

Fold-down wall-mounted potting bench open on a small urban balcony
A space-saving wall-mounted potting station keeps tools ready while staying out of the way on a tiny balcony.

When you’re gardening on a compact Austin balcony where every square foot counts, a fold-down wall-mounted station solves your workspace problem without eating up precious floor space. This clever setup attaches directly to your balcony wall and hinges down to create a sturdy work surface only when you need it.

The basic design uses a simple plywood board (around 24 by 18 inches works well for most balconies) mounted with heavy-duty folding shelf brackets. When you’re done potting, the whole surface folds flat against the wall, completely out of the way. Add a few small shelves above the fold-down surface to keep seed packets and plant labels organized, and install hooks along the sides for hanging trowels, pruning shears, and watering tools.

For materials, choose weather-resistant plywood or cedar that can handle Austin’s intense summer heat and occasional rain. A coat of outdoor sealant extends its life significantly. Mount everything to wall studs or use heavy-duty masonry anchors if you’re attaching to concrete balcony walls, since the station needs to support the weight of soil bags and pots during use.

This setup transforms a blank wall into functional gardening space, making it perfect for renters who need a temporary solution that won’t damage their lease agreement.

2. Repurposed Dresser Potting Bench

Repurposed wooden dresser used as a potting bench with open drawers and gardening tools
An old dresser becomes a functional potting station with drawers for tools and soil, plus a sturdy top for everyday planting.

Transform that old wooden dresser gathering dust in your garage into a charming potting bench with surprising functionality. The dresser’s sturdy top becomes your prep surface, sand it down and seal it with weatherproof finish to handle soil and water. Those drawers that once held clothes now organize seed packets, hand tools, twine, and bags of potting mix, keeping everything sorted and within arm’s reach.

The real magic happens when you remove the dresser’s mirror backing (if it has one) and mount pegboard in its place. Suddenly you’ve got vertical storage for trowels, pruning shears, and gloves hanging right above your workspace. You can outline each tool’s spot with paint markers so returning items becomes second nature.

Position your dresser station under a covered patio or carport. Austin’s intense summer sun will crack unsealed wood and fade finishes quickly, while afternoon thunderstorms can soak exposed stations. A roof overhead extends your dresser’s life and gives you a comfortable workspace even during those surprise rain showers that pop up during growing season.

Choose dressers with lower profiles, around counter height, so you won’t strain your back during transplanting sessions. Solid wood holds up better than particleboard, which crumbles when wet. Check estate sales and thrift stores for sturdy candidates.

3. Rolling Cart Station for Multi-Space Gardening

Rolling tiered potting cart on wheels with pots and soil near indoor and outdoor plants
A mobile potting cart makes it easy to move supplies between indoor greenery and outdoor vertical gardening.

A rolling cart transforms your potting workflow when you’re juggling indoor houseplants, balcony containers, and vertical garden systems across different spaces. Metal utility carts with three or four tiers work exceptionally well, the top shelf becomes your active work surface, while lower levels store potting mix bags, hand tools, watering cans, and plant labels. Look for carts with lipped edges to prevent soil spills during transport, and prioritize models with locking wheels so the station stays stable while you work.

Wooden rolling carts offer a warmer aesthetic if your potting station doubles as indoor décor, though they need a protective sealant if you’re moving them between Austin’s humid outdoor mornings and air-conditioned interiors. Bar cart styles with removable trays make cleanup easier, you can lift out the soil-covered tray and hose it down outside.

The real advantage for renters is portability without permanent installation. Roll your cart to the sunny kitchen window for seed starting, then wheel it to the patio for repotting succulents in your vertical wall planters. When you move apartments, your entire potting setup moves with you intact. Add a small tool caddy or magnetic strip on the side to keep pruners and trowels within arm’s reach as you shift locations.

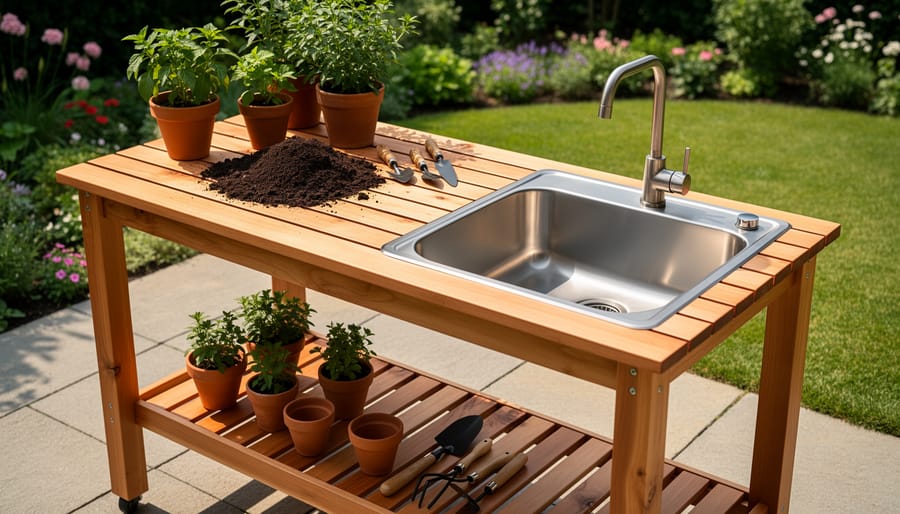
4. Cedar Potting Table with Built-In Sink

Cedar potting table with built-in sink basin outdoors
A cedar potting table with a built-in sink keeps cleanup simple while offering a durable work surface in outdoor heat.

A cedar potting table with a built-in sink represents a significant upgrade for gardeners ready to invest in a permanent outdoor workspace. This setup transforms routine potting tasks by adding running water right where you need it, no more trips inside to rinse tools or water freshly potted plants.

Cedar handles Austin’s intense summer heat remarkably well. The wood naturally resists rot and insect damage, even when exposed to our occasional downpours and high humidity. You’ll want a table that’s at least 24 inches deep and 48 inches wide, giving you ample room to spread out soil bags, pots, and seedlings without crowding your work area.

The sink doesn’t need to be elaborate. A shallow basin about 6-8 inches deep works perfectly for rinsing hands, cleaning tools, and watering plants. Many DIYers retrofit an old farmhouse sink or stainless steel basin, then connect it to a garden hose with a simple valve system. Some models include a drainage hole that empties onto surrounding plants or into a bucket for reuse during our drier months.

Position your cedar table under a pergola or large umbrella to extend the wood’s lifespan and create a shaded workspace during peak summer heat. The combination of durability and functionality makes this station ideal for gardeners who pot plants weekly and want their workspace to last years.

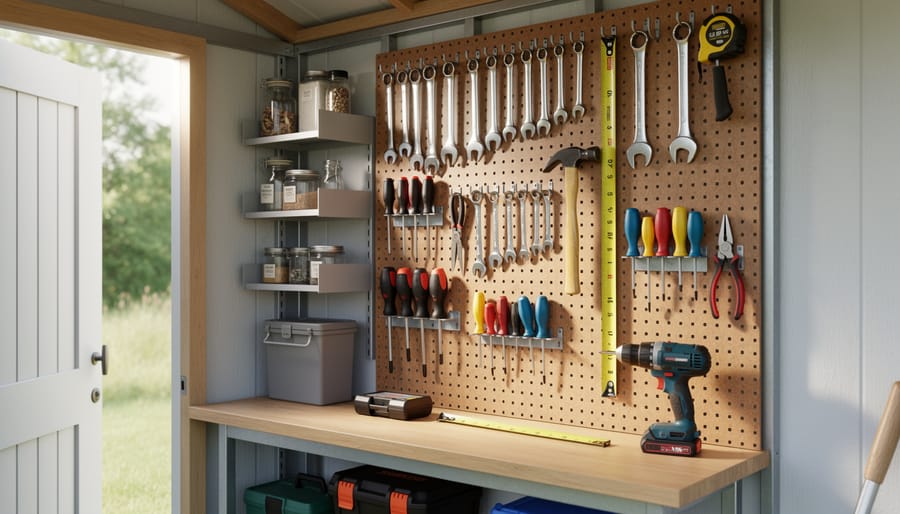
5. Vertical Pegboard and Shelf Combo

Vertical pegboard with hanging gardening tools and shelves above a potting work surface
Vertical pegboard storage keeps frequently used tools within reach and maximizes space in a compact shed or garage corner.

A vertical pegboard and shelf combo turns any awkward corner or narrow wall into a surprisingly efficient potting station. Mount a large pegboard panel (painted or sealed to protect against moisture) at a comfortable height above a basic work surface, this could be a simple butcher block counter, a wall-mounted fold-down shelf, or even a sturdy plank supported by brackets. The pegboard holds all your small hand tools, gloves, twine, plant markers, and scissors right at eye level where you can grab them without rummaging through drawers.

Install two or three floating shelves above the pegboard to store seed packets, soil amendments, fertilizers, and spare pots. This setup keeps your most-used supplies visible and within arm’s reach while freeing up the work surface below for actual potting tasks. It’s particularly clever in garage or shed corners where floor space is tight but wall space goes unused.

Tip: In Austin’s humid summers, coat your pegboard with water-resistant sealant and store potting soil in sealed plastic bins rather than open bags to prevent moisture absorption and pest issues.

This vertical station pairs beautifully with vertical gardening projects since you’re already thinking upward, many gardeners use the same wall system to hold propagation trays or hanging plant labels. The entire setup costs roughly $60-$100 in materials if you DIY it, and it adapts easily as your gardening needs change by simply rearranging hooks and shelves.

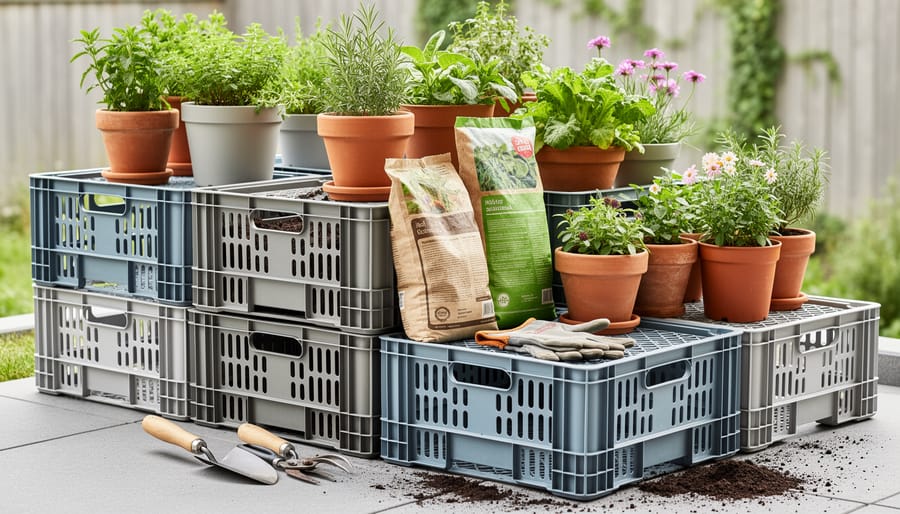
6. Stackable Crate System for Renters

Stackable wooden crates arranged as a temporary potting station
Stackable crates create a temporary, budget-friendly potting setup that’s easy to move and reconfigure.

Renters and frequent movers need gardening solutions that won’t leave holes in walls or require permanent installations. A stackable crate system delivers a fully functional potting station you can set up in minutes and take with you when you leave.

Start with four to six wooden or plastic crates from thrift stores, hardware shops, or even curbside finds. Stack two crates on their sides as the base, creating open-front storage cubbies for soil bags, pots, and watering cans. Place a sturdy piece of plywood or a butcher block across the top to form your work surface at a comfortable height, usually around 36 inches works well for most people.

Add another layer of crates above the work surface if you want overhead storage for hand tools, seed packets, or small containers. The open design keeps everything visible and within reach, eliminating the drawer-digging that slows down potting sessions.

This setup costs under fifty dollars if you source crates secondhand, requires zero tools or assembly skills, and breaks down in under five minutes when it’s time to move. You can adjust the configuration as your needs change, swap crates for different sizes, or even spray paint them to match your balcony aesthetic. It’s the ultimate commitment-free potting solution for Austin’s renter-heavy neighborhoods.

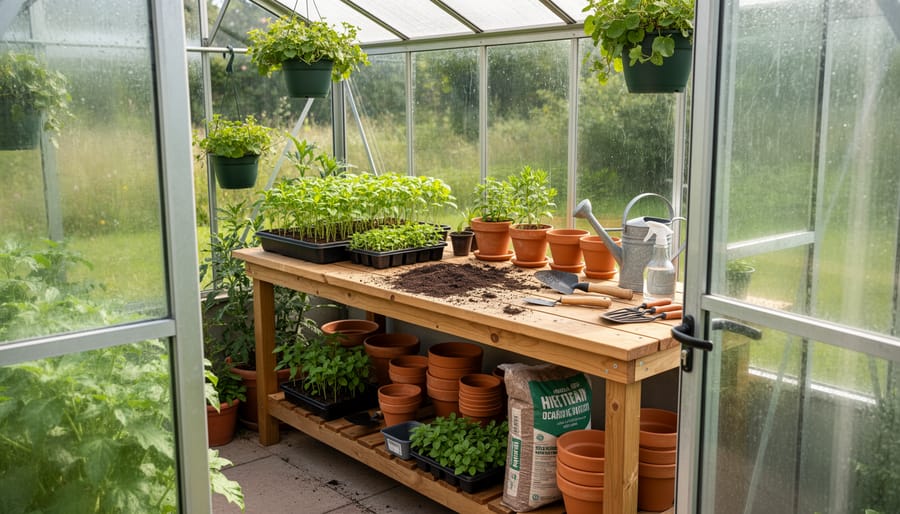
7. Corner Greenhouse Potting Nook

Seedlings on a narrow shelf inside a corner greenhouse potting nook
A dedicated potting nook inside a small greenhouse helps contain mess and protect seedlings while they get started.

A corner greenhouse or enclosed patio transforms into an incredibly efficient potting workspace when you dedicate just a small slice of it to this purpose. The built-in humidity control and protection from Austin’s intense afternoon sun make these spots ideal for seedling work and delicate transplanting tasks.

Start with a narrow shelf at comfortable working height, 18 to 24 inches deep is plenty for most potting tasks without eating up valuable growing space. Mount it securely across the corner at waist height, creating a triangular work surface that feels surprisingly roomy. Below, add moisture-resistant plastic bins or metal shelving to store soil, perlite, and vermiculite where occasional spills won’t create a mess.

Overhead LED grow lights serve double duty here: they illuminate your potting work and provide supplemental light for freshly potted seedlings sitting on the shelf. Position lights 12 to 18 inches above the work surface for comfortable visibility without glare.

Because greenhouses trap moisture, choose materials that won’t warp or rust. Sealed wood, plastic laminate, or powder-coated metal all hold up well. Keep a small hand broom and dustpan hanging nearby to sweep up soil quickly, this prevents tracking mess into the rest of your greenhouse and keeps things tidy for your Austin gardening zone seedlings.

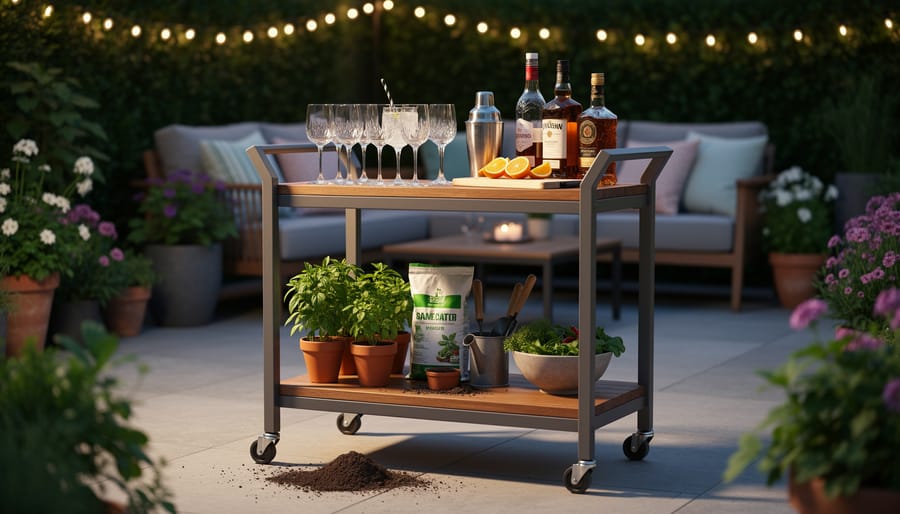
8. Dual-Purpose Outdoor Bar Cart Station

Outdoor bar cart repurposed as a potting station with pots and soil underneath
A stylish outdoor bar cart can double as a potting station, ready for plants by day and drinks by night.

A sleek metal or wooden bar cart transforms into the ultimate multitasker for Austin gardeners who love to entertain. The top tier serves as your active potting surface, just lay down a plastic mat or tray to catch soil spills during transplanting sessions. The middle and lower shelves hold terra cotta pots, bagged soil, and your most-used hand tools. When you’re planning indoor veggies timing or prepping seedlings, everything you need rolls right to your workspace.

What makes this station brilliant for Austin’s outdoor lifestyle is its quick-change personality. On Friday afternoon, swap out the potting supplies for glasses, ice, and bottles. The cart wheels smoothly from your gardening corner to the patio dining area, looking stylish rather than utilitarian. After your gathering, it transitions back to garden duty in minutes.

Choose a cart with weather-resistant finishes, powder-coated metal or sealed wood stands up to our intense sun and humidity. Models with a handlebar make maneuvering easy, and raised edges on shelves prevent pots from sliding off. For under $150, you get functional garden storage that doesn’t scream “shed” when guests arrive.

Setting Up Your Potting Station: Quick Tips

Once you’ve chosen your potting station style, smart setup makes all the difference. Start by positioning your station where you’ll actually use it, east-facing spots work great in Austin since they catch morning sun without the brutal afternoon heat, and remember your zone affects sun needs for seedlings versus mature plants. If your station sits outdoors year-round, seal wooden surfaces with exterior-grade varnish and invest in a waterproof cover for those surprise summer storms.

Organize tools by frequency of use, hang trowels and pruners within arm’s reach on hooks or pegboard, while seasonal items can live in drawers or lower shelves. Store potting soil and amendments in sealed bins rather than leaving bags open; Austin’s humidity swings between bone-dry and surprisingly muggy, and you don’t want clumpy soil when you’re ready to pot. Clean your work surface after each session to prevent soil buildup and pests, and occasionally check for wasp nests if your station’s under an overhang.

Common Questions About Potting Stations

How much space do I really need for a potting station?

You can create a functional potting station in as little as two square feet with a fold-down or wall-mounted design. The key is vertical organization and keeping only essential tools within reach.

What materials hold up best in Austin’s heat?

Cedar, treated pine, and powder-coated metal work well in our intense sun and humidity. Avoid untreated wood and cheap plastics that warp or crack after a season outdoors.

How do I keep pests out of my potting station?

Store soil and amendments in sealed containers with tight lids, clean up spills immediately, and avoid leaving damp organic matter sitting out overnight. A quick wipe-down after each use prevents most pest problems.

Will a potting station work if I mostly do vertical gardening?

Absolutely, vertical gardens need regular repotting and maintenance just like traditional beds. A compact station at the base of your vertical setup makes it easier to choose plants by zone and refresh containers without hauling supplies across your space.

These questions come up constantly among Austin gardeners setting up their first workspace. The answers reflect real-world experience: you don’t need a sprawling shed, just smart use of whatever space you have. Weatherproofing matters here because our summer sun is relentless, and keeping things tidy prevents the fire ants and roaches that love damp potting mix.

Having an organized potting station transforms your gardening routine from chaotic to streamlined, saving time and protecting your plants during crucial transplanting moments. Whether you choose a fold-down wall mount for your balcony or a repurposed dresser for your patio, starting with one setup that matches your available space makes all the difference.

Professional potting services demonstrate how efficient workspaces improve plant care outcomes, and you can apply these same principles at home on any budget. Ready to enhance your urban garden beyond the potting bench? Explore our vertical gardening guides and Austin-specific growing tips to make the most of every square foot in your outdoor space.

25 Container Gardening Ideas to Transform Your Austin Space in 2026

25 Container Gardening Ideas to Transform Your Austin Space in 2026

Container gardening transforms any outdoor space into a productive growing area, whether you’re working with a balcony, patio, fire escape, or sunny windowsill. The beauty of containers is their flexibility: you control the soil quality, move plants to follow the sun or escape Austin’s punishing afternoon heat, and experiment with combinations impossible in traditional beds. From edible gardens that produce fresh herbs and vegetables year-round to vertical installations that maximize square footage, container gardening solves the urban gardener’s biggest challenges: limited space, poor native soil, and the need for portability.

Austin’s climate makes container gardening especially rewarding. Our long growing season means you can harvest tomatoes well into November and start cool-season greens by September. Containers also let you sidestep our notorious caliche and clay soils, giving heat-loving peppers and citrus the drainage they demand. The catch? Containers dry out faster than ground beds, particularly during triple-digit summers, so choosing the right size pot and understanding watering needs becomes crucial.

This guide breaks down 25 container ideas across edibles, vertical solutions, ornamentals, and specialty projects. Each category addresses different goals, from feeding your family to creating privacy screens or adding seasonal color. You’ll find practical details on container size, plant selection for Central Texas conditions, and maintenance tips that keep your garden thriving without constant intervention.

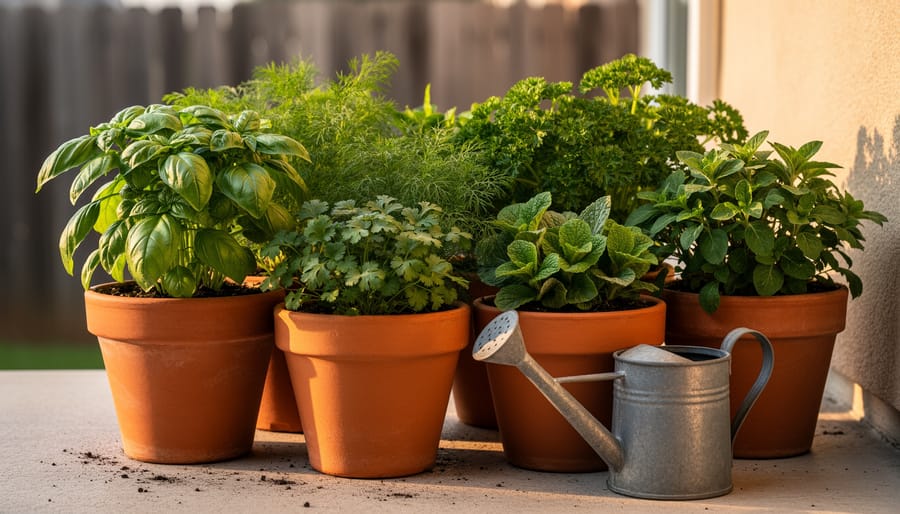
Close-up view of basil, parsley, and cilantro growing in multiple containers on a patio with a watering can nearby.
A well-planned container herb setup shows how easily you can grow usable plants in limited urban space.

What Makes a Great Container Garden

Before diving into specific ideas, let’s talk about what separates a thriving container garden from a disappointing one. The 25 ideas in this guide weren’t chosen at random, each meets specific criteria that matter for Austin’s unique growing conditions and urban spaces.

Container choice matters more than you might think. Your pot needs drainage holes (non-negotiable), but it also needs enough volume for roots to develop properly. A 5-gallon container is the minimum for most vegetables and larger ornamentals, while herbs and succulents can work in smaller spaces. Material affects performance too, terracotta breathes beautifully but dries out fast in our heat, while plastic and glazed ceramic retain moisture longer.

Austin’s climate shaped every recommendation here. We deal with intense summer sun, sporadic rainfall, and a growing season that stretches nearly year-round. The best container ideas either embrace heat-loving plants that thrive in those conditions or provide strategies for protecting more delicate species. Sun exposure drives plant selection: a south-facing balcony in July is a completely different environment than a covered porch.

Here’s what made each idea worth including:

  • Proper drainage system or self-watering capability for Austin’s erratic rainfall patterns
  • Heat tolerance appropriate for USDA Zone 8b/9a conditions
  • Container size matching the plant’s mature root system
  • Space efficiency for apartments, patios, and small urban yards
  • Realistic maintenance requirements for busy schedules

Plant compatibility matters when you’re combining multiple species in one container. The ideas group plants with similar water needs, sun requirements, and growth rates. A sprawling tomato plant and a compact basil can share space, but aggressive spreaders will crowd out slower growers.

Finally, every idea balances ambition with practicality. You’ll find options for beginners starting with three herbs and experienced gardeners ready to tackle vertical systems or specialty crops.

25 Container Gardening Ideas for Your Space

Edible Container Gardens

1. Classic Herb Trio

Start your edible container journey with the easiest win: a single pot holding basil, parsley, and cilantro. These workhorses thrive together in a 12-inch container with excellent drainage. Place them where they’ll get morning sun and afternoon shade, crucial during Austin’s brutal June through August stretch. Basil bolts fast in full Texas sun, so partial shade extends your harvest. If you’re new to growing your own seasonings, check out herb gardening basics for detailed cultivation techniques. Water daily during summer heat, and pinch back stems regularly to keep plants bushy rather than leggy.

2. Salad Bowl Garden

A wide, shallow container (at least 18 inches across, 8 inches deep) becomes your personal salad bar. Mix quick-growing lettuce varieties, Buttercrunch, Red Sails, and Oakleaf, with arugula and spinach for continuous harvests. In Austin, plant this one in March or late September to avoid the heat that turns greens bitter and sends them bolting. Harvest outer leaves as you need them, and the plants keep producing for weeks. Add a layer of mulch on top of the soil to keep roots cooler and moisture more consistent.

3. Tomato Tower

A single determinate tomato variety like Patio or Bush Early Girl fits beautifully in a 5-gallon container, but you’ll need sturdy support. Choose a pot at least 14 inches deep with a cage or stake already in place before planting. Austin tomatoes produce best when planted in March for a spring harvest, our summer heat above 95 degrees stops fruit set cold. Water deeply every other day once fruiting starts, and feed with a balanced fertilizer every two weeks. One plant provides enough tomatoes for fresh eating all season.

4. Pepper Collection

Group three different pepper plants, a sweet bell, a jalapeño, and a shishito, in individual 5-gallon containers positioned together. Peppers actually handle Austin heat better than tomatoes, producing right through summer if you keep them consistently watered. They need full sun and excellent drainage. Start with transplants in April, and you’ll harvest from July through the first frost. The varied heat levels give you options for every meal, from breakfast scrambles to evening stir-fries.

5. Strawberry Planter

Those terracotta pots with side pockets work perfectly for everbearing strawberry varieties. Plant one crown per pocket, ensuring the crown sits just at soil level, bury it and the plant rots, leave it exposed and it dries out. In Austin, strawberries thrive as a winter crop; plant them in October for spring harvests. They need six hours of sun and consistent moisture but not soggy soil. Pinch off runners to direct energy into fruit production rather than new plants.

6. Dwarf Citrus Trees

A Meyer lemon or improved Meyer lime lives happily for years in a 15-gallon container on your patio. These compact trees handle containers better than full-size varieties while still producing real fruit. They need full sun, monthly feeding during the growing season, and protection when temperatures drop below 28 degrees (rare in Austin but it happens). Wheel them near a south-facing wall on those occasional freezing nights, or throw a blanket over the canopy.

7. Culinary Asian Greens

Bok choy, mizuna, and tatsoi grow fast in a rectangular planter box, ready to harvest in 30 days. These cool-season greens tolerate light frost, making them perfect for Austin’s mild winters. Plant them in October or February in a container at least 8 inches deep. They prefer afternoon shade even in cool weather. Cut the entire plant at soil level when it’s 6 inches tall for baby greens, or let them mature for full heads.

8. Container Root Vegetables

Carrots, radishes, and beets all work in deep containers, go at least 12 inches for carrots, 6 inches for radishes. Choose short carrot varieties like Thumbelina or Paris Market rather than long types that need more depth. Austin’s cool seasons (October through March) suit root crops perfectly. Thin seedlings aggressively to give each plant room to develop, and keep soil consistently moist for the sweetest flavor and best texture.

Vertical and Space-Saving Solutions

When you’re working with a compact Austin patio or balcony, thinking vertically transforms your growing potential. These six ideas stack, climb, and hang to multiply your planting space without claiming more square footage.

Idea 9: Tiered Planter Systems
Three or four-tier stackable planters create mini growing zones at different heights. Put sun-loving basil and cherry tomatoes on top, heat-tolerant peppers in the middle, and shade-appreciating parsley at the bottom. The graduated design makes watering easier and gives each plant its spotlight. Look for systems with built-in saucers to catch runoff on your balcony floor.

Idea 10: Wall-Mounted Pocket Planters
Fabric or rigid pocket systems turn any vertical surface into a garden wall. Mount them on a sunny fence section and fill with trailing succulents, compact herbs like thyme and oregano, or small ornamental grasses. Each pocket needs drainage holes punched if they don’t come pre-made, and fabric versions dry out faster in Austin’s heat, so check them daily during summer.

Idea 11: Trellis Containers for Vining Plants
Pair a large container with a sturdy trellis or obelisk for climbing beans, cucumbers, or morning glories. The vertical growth habit gives you pounds of produce from a single pot. Choose containers at least 18 inches deep and position them where vines won’t block afternoon sun from other plants. Sugar snap peas thrive here in Austin’s cooler months.

Idea 12: Stacked Herb Towers
Purpose-built herb towers with multiple planting pockets spiraling up a central column pack serious flavor into minimal footprint. Plant your most-used herbs (cilantro, basil, mint) in easy-reach pockets and experiment with less common varieties like lemon balm or Cuban oregano higher up. Rotate the tower weekly so all sides get equal sun exposure.

Idea 13: Hanging Basket Combinations
Suspend mixed plantings at varying heights to create floating garden layers. Combine upright plants in the center with trailing varieties that cascade over the edges, try upright zinnias with trailing verbena, or cherry tomatoes with trailing rosemary. Use swivel hooks so you can rotate baskets for even growth, and remember that hanging containers dry out twice as fast as ground-level ones.

Idea 14: Ladder Garden Display
An old wooden ladder or purpose-built plant stand creates instant vertical real estate for multiple containers. Arrange pots on each rung by size and sun needs, with largest containers on lower rungs for stability. This setup works beautifully for displaying seasonal color rotations or organizing an entire kitchen herb collection where everything stays visible and accessible.

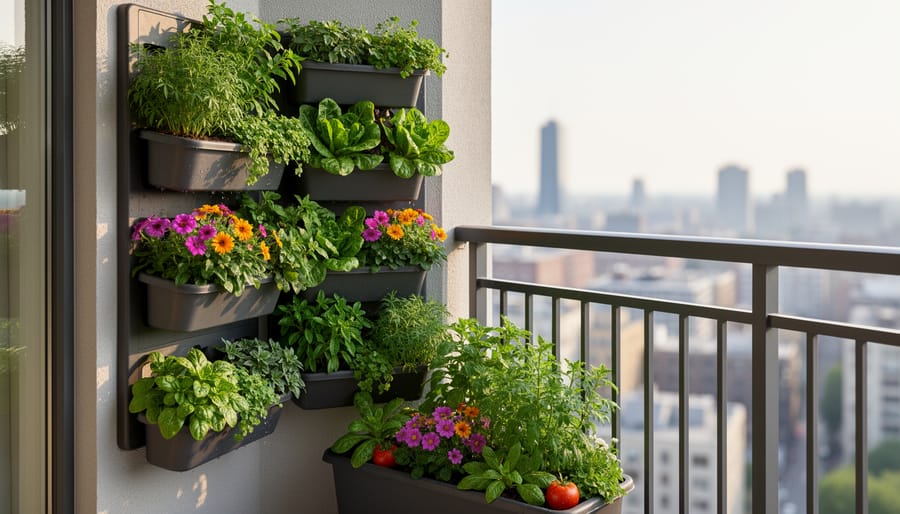
Vertical stacked and wall-mounted planters with cascading greens and flowers in warm golden-hour light.
Vertical container gardening makes the most of limited space by turning walls and corners into productive plant zones.

Ornamental and Pollinator-Friendly Options

15. Native Texas Wildflower Mix

Transform a large shallow container into a miniature meadow with native bluebonnets, Indian paintbrush, and black-eyed Susans. Use a container at least 18 inches wide and 12 inches deep with excellent drainage. Plant seeds in fall for spring blooms, or buy transplants in late winter. These hardy natives thrive in Austin’s heat and require minimal water once established.

16. Butterfly Garden Container

Create a pollinator paradise with nectar-rich plants like purple coneflower, lantana, and zinnias paired with host plants such as milkweed for monarch caterpillars. Choose a container 16 inches or larger and position it in full sun. Plant in clusters rather than single specimens to attract more butterflies. Add a flat stone as a basking spot.

17. Succulent Arrangement

Combine drought-tolerant beauties like echeveria, sedum, and agave in a wide, shallow container with multiple drainage holes. Succulents handle Austin’s intense summer sun and need watering only every two to three weeks. Layer gravel at the bottom and use cactus-specific potting mix. Perfect for hot patios where other plants struggle.

18. Seasonal Color Rotation

Keep your entrance or patio vibrant year-round by swapping out annuals each season. Plant pansies and snapdragons for winter color, petunias and geraniums for spring, heat-tolerant vinca and pentas for summer, and chrysanthemums for fall. Use the same decorative containers but refresh the plantings quarterly. This approach gives you continuous blooms without committing to perennials.

19. Fragrant Evening Garden

Design a container for your outdoor living area with night-blooming jasmine, moonflower vines, and white nicotiana that release intense fragrance after sunset. Add a small trellis for the vining plants and position the container near seating areas. These plants also attract night-pollinating moths, adding movement and life to evening gatherings.

20. Hummingbird Haven

Fill a tall container with red salvia, coral honeysuckle on a small trellis, and cigar plant to create an irresistible feeding station. Hummingbirds favor tubular flowers in red, orange, and pink. Position the container where you can watch from inside, ideally near a window. Plant densely and deadhead regularly to keep blooms coming through our long growing season.

Butterfly resting on bright wildflowers in a container garden with soft morning light.
Flowering containers can invite butterflies and other pollinators while adding color to your outdoor space.

Creative and Specialty Container Ideas

21. Self-Watering Container System

Perfect for Austin’s busy professionals or frequent travelers. Self-watering planters feature a built-in reservoir that delivers moisture to roots through capillary action, keeping plants hydrated for days without attention. Look for containers with water-level indicators and fill spouts. Plant drought-tolerant herbs like rosemary and oregano, or leafy greens that appreciate consistent moisture. These systems work especially well during Austin’s intense summer heat when twice-daily watering becomes necessary for standard containers. Start with a single self-watering planter to test the system before investing in multiple units.

22. Shade-Loving Container for Covered Porches

Transform that shaded porch or north-facing balcony into a lush retreat. Combine coleus for vibrant foliage, impatiens for pops of color, and trailing vinca vine to soften container edges. Add caladiums with their striking heart-shaped leaves for drama. Use a large container at least 16 inches wide to accommodate multiple plants and retain moisture longer in Austin’s dry air. This combination thrives in dappled light and actually prefers protection from afternoon sun. Water regularly but check soil first since shaded containers dry out more slowly than those in full sun.

23. Drought-Tolerant Texas Tough Planter

Embrace native resilience with a container designed to handle whatever Texas weather throws at it. Mix Texas sage, blackfoot daisy, and trailing lantana in a shallow, wide bowl. These Austin natives tolerate heat, require minimal water once established, and bloom prolifically. Use a terracotta or unglazed ceramic container that allows roots to breathe. Add a layer of gravel mulch on top to reduce evaporation and give a clean desert aesthetic. Water deeply but infrequently, letting soil dry completely between waterings.

24. Kid-Friendly Sensory Garden

Get children excited about gardening with plants they can touch, smell, and taste. Combine soft lamb’s ear leaves, fragrant chocolate mint, cherry tomatoes at kid height, and colorful marigolds. Choose a sturdy container placed at child-accessible height. Let kids decorate the pot with outdoor paint before planting. This hands-on garden teaches responsibility while engaging multiple senses. Avoid plants with thorns or toxic properties, and supervise taste-testing to ensure only edible parts get sampled.

25. Windowsill Micro-Garden

Maximize limited space with a compact indoor or outdoor windowsill setup. Use narrow rectangular containers or a series of small pots for microgreens, sprouting herbs, or dwarf varieties. East or west-facing windows work best in Austin to avoid scorching afternoon sun. Grow basil, chives, or cilantro for cooking, or try fast-growing arugula microgreens ready to harvest in two weeks. Rotate containers regularly for even growth and keep soil consistently moist but not waterlogged in the confined space.

Pepper plant growing in a decorative self-watering container with dark, moist soil visible at the surface.
Self-watering containers help maintain consistent moisture, especially valuable during Austin’s hot stretches.

Getting Started with Your Container Garden

Ready to turn those container gardening ideas into reality? Whether you’re a container gardening beginners or expanding your collection, success starts with the right foundation and consistent care tailored to Austin’s unique climate.

Start by choosing containers with drainage holes, non-negotiable in our climate. Clay pots breathe well but dry out faster; plastic or resin retains moisture longer, which helps during July and August. Go larger than you think you need: a 14-inch pot beats a 10-inch for most vegetables and ornamentals, giving roots room and buffering against rapid temperature swings.

For soil, skip garden dirt entirely. Use a quality potting mix designed for containers, it drains properly while holding enough moisture. Texas heat is brutal, so consider mixing in compost or coconut coir to improve water retention. Remember that nutrients leach with watering especially in our summer downpours, so plan to fertilize every two to three weeks during the growing season with a balanced liquid fertilizer diluted to half strength.

Tip: During Austin’s peak summer months (June through September), check container moisture daily, sometimes twice a day for small pots in full sun.

Water deeply until it drains from the bottom, then let the top inch dry before watering again. Morning watering works best, giving plants a reservoir before afternoon heat hits. Mulch the soil surface with bark chips or stones to slow evaporation.

Understanding your Austin gardening zone (8b or 9a, depending on your neighborhood) helps you time plantings and protect containers during our occasional winter freezes. When frost threatens, move pots to a covered porch or wrap them overnight.

Struggling? Yellow leaves often mean overwatering or poor drainage. Wilting despite moist soil suggests root problems, time to repot. Leggy growth means insufficient light; relocate or choose shade-tolerant plants. The key is observation: check your containers regularly, adjust watering as weather shifts, and don’t be afraid to keep your plants alive through trial and error. Every gardener learns by doing.

Common Container Gardening Questions

When is the best time to start container gardening in Austin?

You can start most container gardens in March or early April after the last frost risk passes. For heat-sensitive greens and cool-season crops, September through October offers ideal planting conditions, and you can grow vegetables indoors during the coldest months.

Which container materials work best in Austin’s heat?

Ceramic and thick resin containers insulate roots better than thin plastic or metal, which can overheat in full sun. Terracotta breathes well but dries out quickly, so plan for more frequent watering during summer months.

How do I keep container plants alive during 100-degree days?

Move containers to areas with afternoon shade, group them together to create humidity, and water in early morning or evening. Add a two-inch mulch layer on top of the soil to reduce evaporation and keep roots cooler.

When should I protect containers from frost?

Austin typically sees frost between late November and mid-February. Move tender plants indoors or against a south-facing wall, and cover with frost cloth when temperatures drop below 35 degrees.

What’s the easiest way to manage pests in container gardens?

Check plants weekly for aphids, spider mites, and whiteflies. Spray affected plants with a strong water stream or use insecticidal soap early in the morning before temperatures climb.

Where can I find container gardening supplies in Austin?

Local nurseries like The Great Outdoors, Shoal Creek Nursery, and Barton Springs Nursery carry quality containers, potting mix, and plants suited to our climate. Natural Gardener on Old Bee Caves Road specializes in organic options and offers expert advice for Central Texas growing conditions.

These questions cover the practical concerns Austin gardeners face when starting container gardens. The answers provide specific, actionable guidance without overwhelming detail, helping you troubleshoot common issues before they become problems. Local resources make it easier to source the right materials and get advice tailored to our unique climate challenges.

Container gardening opens up a world of possibilities for every Austin resident, whether you’re working with a tiny balcony or a spacious patio. These 25 ideas prove that limited space doesn’t mean limited potential, you can grow fresh herbs, colorful flowers, productive vegetables, and even small fruit trees in containers. Start with one or two ideas that excite you most, then expand as you gain confidence. Don’t be afraid to mix and match concepts or adjust them to your specific conditions. Your local resources, including nurseries and gardening communities throughout Austin, offer supplies, advice, and inspiration when you need it. The beauty of container gardening lies not just in what you grow, but in the daily connection to plants, the satisfaction of harvesting your own food, and the creative expression of transforming any space into a thriving garden.

Herb Gardening For Beginners: Start Your Austin Kitchen Garden This Week

Herb Gardening For Beginners: Start Your Austin Kitchen Garden This Week

Starting an herb garden requires nothing more than a sunny spot, decent soil, and a handful of beginner-friendly plants like basil, mint, and rosemary. You can grow a thriving collection in containers on a balcony, a vertical wall planter, or even a sunny windowsill. Most herbs are remarkably forgiving, need minimal space, and deliver fresh flavor within weeks of planting.

If you’ve hesitated because you think gardening requires a yard or special skills, you’re not alone. Austin’s urban gardeners have proven that anyone can cultivate fresh herbs in tight quarters. The key is choosing the right plants for your space and understanding a few basic principles about water, light, and drainage.

Container gardening solves most beginner challenges. You control the soil quality, move plants to follow the sun, and avoid the complications of Texas clay. A 10-inch pot is enough for most herbs, and vertical solutions like wall-mounted planters or tiered shelves multiply your growing area without claiming precious floor space.

The herbs you start with matter. Basil thrives in Austin’s heat and grows fast enough to keep new gardeners motivated. Mint is nearly indestructible but needs its own container because it spreads aggressively. Rosemary tolerates drought and adds structure to small gardens. These three give you versatility in the kitchen and build confidence before you expand to more temperamental varieties.

Summer 2026 brings intense heat, but herbs actually prefer warm weather as long as you water consistently. Start now, and you’ll be harvesting fresh oregano, cilantro, and thyme by late July.

Why Herbs Are the Perfect Starting Point

Herbs give you gardening success fast, which is exactly what you need when you’re starting out. While vegetables demand weeks of care before you see results, most herbs grow noticeably within days. Basil shoots up almost overnight in Austin’s heat, and you can snip usable leaves from your cilantro in just two to three weeks. That quick feedback loop keeps you motivated instead of wondering if you’re doing something wrong.

These plants also forgive your learning curve. Forget to water your tomatoes for a day in July and you’ll lose them, but most herbs bounce back from minor neglect. Overwater your rosemary once and it’ll sulk but usually recover. This resilience matters tremendously when you’re still figuring out what “moist but not waterlogged” actually feels like.

Space constraints won’t hold you back either. A single 6-inch pot on your apartment balcony can support a thriving basil plant that produces more than you’ll use. Three containers stacked vertically on a wall planter give you a complete kitchen herb collection without sacrificing your limited patio square footage. You don’t need a yard or even a big balcony to grow genuinely useful amounts of fresh herbs.

The immediate payoff keeps you engaged. Snip fresh basil for tonight’s pasta, grab mint for your iced tea, or harvest cilantro for taco Tuesday. You’re using what you grow within weeks of planting, which makes the whole endeavor feel practical rather than theoretical. That connection between planting, tending, harvesting, and eating builds real confidence. You’ll quickly realize that you actually can keep something alive and thriving, which naturally leads to trying more ambitious plants later.

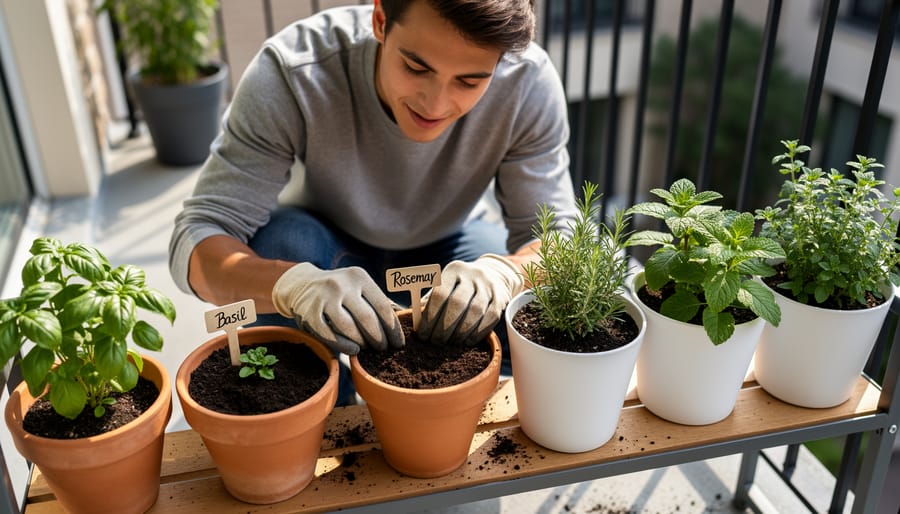
Beginner gardener placing herb seedlings into terracotta pots on a sunny balcony
A new gardener is getting started with a simple container setup for fresh herbs right at home.

Best Beginner Herbs for Austin’s Climate

Heat-Loving Heroes

Austin’s scorching summers create perfect conditions for basil, rosemary, and oregano. These three herbs thrive in heat that would stress other plants, making them your most reliable choices from June through September.

Basil loves full sun and actually produces more flavorful leaves in hot weather. Plant it after the last frost (typically mid-March in Austin) and harvest frequently to encourage bushy growth. Genovese and Thai basil varieties handle our heat exceptionally well.

Rosemary is nearly indestructible once established. This Mediterranean native tolerates drought, poor soil, and blazing sun without complaint. Plant it in a spot with good drainage and resist the urge to overwater, rosemary prefers to dry out between waterings.

Oregano thrives in Austin’s alkaline soil and hot, dry conditions. Greek oregano offers the most intense flavor and spreads readily in containers. Let it dry out completely between waterings, and harvest regularly to keep plants compact and productive. All three herbs actually develop stronger flavors when slightly stressed by heat, which means Austin’s climate naturally enhances your harvest.

Cool-Season Champions

Austin’s cooler months, roughly October through March, are prime time for herbs that struggle in summer heat. Cilantro tops this list and grows fast in fall and winter, giving you fresh leaves in just a few weeks. Plant it every three to four weeks for a steady supply, since it bolts quickly once temperatures climb above 75°F. Parsley thrives in the same window and tolerates light frosts, making it reliable through winter. Both prefer morning sun and afternoon shade during warmer stretches.

Chives and dill also excel in Austin’s mild season. Chives stay compact in containers and come back year after year if you protect them during the occasional hard freeze. Dill grows tall and feathery, perfect for pickling or adding to salads, but needs a deeper pot to accommodate its taproot. Start these cool-season herbs in late September or early October, and you’ll harvest fresh greens all winter while your heat-loving basil takes a break.

Setting Up Your First Herb Garden

Container and Vertical Options for Small Spaces

You don’t need a backyard to grow a thriving herb collection. Austin’s apartments and small patios are perfect for vertical and container setups that maximize every square inch you have.

Start with individual pots sized to each herb’s root system. Basil, cilantro, and parsley do well in 6 to 8-inch containers, while rosemary and oregano need 10 to 12-inch pots to spread out. Terra cotta breathes better in Austin’s heat, but plastic retains moisture longer between waterings. Pick what fits your schedule.

Vertical wall planters transform bare balcony walls into productive gardens. Pocket planters with felt pockets or modular grid systems work beautifully for shallow-rooted herbs like thyme and chives. Mount them where they’ll get at least six hours of sun, and you’ll harvest fresh herbs without sacrificing floor space.

Tiered plant stands give you three levels of growing area in the footprint of a single pot. Place taller herbs like rosemary on the bottom tier where they won’t shade smaller plants, and arrange basil and cilantro up top where you can reach them easily. These setups look sharp on patios and make watering a breeze since you can see every plant at once.

For more container gardening tips beyond herbs, you’ll find plenty of Austin-specific guidance that applies to balcony growing. The key is starting with just a few containers this week and adding more as you get comfortable with the rhythm of watering and care.

Basil, rosemary, and oregano growing in a tiered vertical planter in bright sunlight
Heat-friendly herbs fill a vertical container arrangement, showing how beginners can grow multiple varieties in limited space.

Soil and Drainage Basics

Good potting mix makes the difference between thriving herbs and sad, wilted ones. Skip garden soil, it’s too heavy for containers and compacts quickly. Look for bags labeled “potting mix” or “container mix” at any Austin garden center. These blends are lighter, hold moisture without getting soggy, and let roots breathe.

Drainage matters more than most beginners realize. Herbs hate sitting in water, which causes root rot faster than anything else. Every container needs drainage holes in the bottom, no exceptions. If you fall in love with a pot without holes, use it as a decorative outer sleeve for a plastic nursery pot that drains properly.

Here’s a simple test: water your potted herb and watch. If water pools on top instead of soaking in, or if it doesn’t drain out the bottom within a few seconds, you’ve got a problem. Add perlite to improve drainage, or start over with fresh mix. During Austin’s blazing summers, well-draining soil actually helps because you can water more frequently without risking soggy roots.

Daily Care Made Simple

Caring for herbs takes minutes a day once you understand their basic needs. The secret to keep plants alive is consistency, not complexity.

Water your herbs when the top inch of soil feels dry to the touch. Stick your finger in the soil before watering. During Austin’s brutal summer months (June through September), container herbs often need daily watering, especially on balconies and patios where heat radiates off concrete. In cooler months, you might water only twice weekly. Always water at the soil level rather than overhead to prevent fungal issues that thrive in our humidity.

Austin’s intense sun means location matters. Most herbs need 6-8 hours of sunlight, but afternoon shade during peak summer helps prevent stress. If your basil leaves look pale or your cilantro bolts immediately, they’re getting too much heat. Move containers to spots with morning sun and afternoon protection, or use shade cloth during July and August heat waves.

Feed your herbs lightly every 4-6 weeks with a balanced liquid fertilizer diluted to half strength. Container herbs need more frequent feeding than ground-planted ones since nutrients wash out with watering. Skip fertilizing in winter when growth naturally slows, even in our mild Austin gardening zone.

Harvest regularly, even if you don’t need the herbs immediately. Pinching off the top leaves and stems encourages bushier growth and prevents flowering, which makes most herbs taste bitter. Take no more than one-third of the plant at once.

Watch for sudden cold snaps in winter. When temperatures drop below 32°F (rare but possible in December and January), bring containers indoors overnight or cover them with frost cloth. Most culinary herbs handle brief cold, but basil dies at the first freeze. Your rosemary and oregano will bounce back; your basil won’t.

Watering jug pouring water into potted mint and cilantro soil in a container garden
Gentle watering helps container herbs stay healthy, especially during Austin’s hot stretches.

Common Beginner Mistakes (And How to Avoid Them)

Most new herb gardeners don’t fail because they lack a green thumb. They struggle because they’re too careful or too hands-off. Here’s what trips up beginners and how to fix it.

Overwatering kills more herbs than drought. Your instinct might tell you to water daily, but most herbs prefer their soil to dry out between waterings. Stick your finger an inch into the soil. If it’s damp, wait another day. Basil and mint like consistent moisture, but rosemary and oregano actually thrive on neglect. In Austin’s summer heat, containers dry faster, so check daily but don’t automatically water.

Wrong light placement stunts growth. Most herbs need six hours of direct sun, but in Austin’s brutal summer, afternoon shade prevents scorching. If your herbs look leggy and pale, they’re reaching for more light. Move them to a brighter spot. Conversely, wilting leaves in full afternoon sun mean they need shade during peak heat.

Not harvesting enough makes plants weak. This surprises beginners: the more you trim, the bushier your herbs grow. Harvest from the top, cutting just above a leaf node. If you’re waiting for your basil to “get bigger” before picking, you’re doing it backward. Regular trimming prevents flowering and keeps plants productive. Aim to use your herbs at least twice weekly.

Crowding plants invites problems. That cute three-herb combo pot at the nursery? It’s temporary. Give each herb its own container or space them 8-10 inches apart. Crowded plants compete for nutrients and airflow, making them susceptible to pests and disease. When you embrace organic gardening practices, proper spacing becomes even more important for preventing issues without chemicals.

These mistakes are fixable. Notice what your plants tell you and adjust.

Local Resources and Learning Opportunities

Learning alongside other beginners makes herb gardening less intimidating and way more fun. Austin’s gardening community offers plenty of hands-on opportunities to build your skills and connect with fellow urban gardeners who get the challenges of small-space growing.

Seed to Supper
An edible gardening program coming up June 16 at Thistle Cottage that covers everything from soil basics to harvesting. Sign up at https://mcplib.libnet.info/event/16043355 or call 270-338-4760 to reserve your spot.
Thyme to Grow: A Guide to Herb Gardening
This hands-on program happens Saturday, August 23 at LancasterHistory, 230 N. President Ave., Lancaster. Tickets are $10 for adults, $5 for children, and free for Friends of the Tanger Arboretum and American Horticultural Society Reciprocal Admission Program Members.
Local Extension Offices
Travis County AgriLife Extension offers free advice on growing herbs in Austin’s specific climate and can answer questions about pest problems, watering schedules, and variety selection. They’re an invaluable resource when you run into issues your online research can’t solve.

Beyond formal programs, Austin’s community gardens often welcome beginners who want to observe experienced gardeners at work. You’ll pick up practical tricks watching someone stake a sprawling basil plant or divide overgrown mint that no tutorial quite captures the same way.

You don’t need a sprawling garden or years of experience to grow fresh herbs. Start this week with just two or three containers, some potting mix, and a sunny spot on your balcony or windowsill. Pick heat-loving basil and rosemary if it’s summer, or cilantro and parsley when cooler months arrive. Austin’s climate makes herb gardening surprisingly forgiving once you understand your seasons.

Mistakes will happen. You’ll overwater something, forget to harvest, or watch a plant struggle in the wrong spot. That’s how you learn what works in your specific space. The local gardening community is welcoming and eager to share tips, whether you connect through neighborhood plant swaps or programs designed for beginners.

The hardest part is simply starting. Grab those first containers, plant your herbs, and give yourself permission to experiment. Within weeks, you’ll be snipping fresh leaves for dinner and planning which herbs to add next. Your kitchen garden begins now, not when conditions are perfect.

Container Gardening for Beginners: Start Your Austin Patio Garden This Week

Container Gardening for Beginners: Start Your Austin Patio Garden This Week

Container gardening transforms tiny Austin patios, balconies, and doorsteps into productive green spaces without needing a traditional yard. You’ll grow fresh herbs, vegetables, and flowers in pots that fit your available space, whether that’s a sunny apartment balcony or a shaded corner of your deck.

Start with just three to five containers in different sizes. A 14-inch pot works perfectly for tomatoes or peppers, while 6-inch pots handle herbs like basil and cilantro. Grab quality potting mix (never garden soil, which compacts in containers), and you’re already halfway there.

Austin’s intense summer heat actually makes container gardening easier in some ways. You can move pots to shadier spots during our brutal July and August afternoons, something impossible with in-ground beds. Choose heat-loving plants like cherry tomatoes, jalapeños, and Mexican bush sage for summer success, or switch to lettuce and kale when fall arrives.

The real advantage? Containers let you garden vertically when ground space runs out. Stack smaller pots on plant stands, hang baskets from hooks, or arrange tiered shelving to multiply your growing area. This vertical approach turns even the smallest balcony into a surprisingly productive garden.

Watering becomes your main task since containers dry out faster than ground soil, especially in our Texas heat. Check daily by sticking your finger an inch deep. If it feels dry, water thoroughly until it drains from the bottom. That’s the entire learning curve for most beginners.

Why Container Gardening Works Perfectly for Austin Beginners

Austin’s unique combination of rocky limestone soil, intense summer heat, and predominantly urban housing makes container gardening the smartest entry point for beginners. If you’ve ever tried digging into the caliche-heavy ground around here, you know exactly why containers skip that headache entirely, you control the soil from day one.

For apartment dwellers and renters (which describes much of central Austin), containers offer genuine gardening without landlord restrictions or permanent installations. You can start on a balcony, patio, or even a sunny front step, then take everything with you when you move. That mobility matters in a city where the average renter stays two years.

Austin’s climate poses real challenges: triple-digit summers, unpredictable spring freezes, and drought cycles. Containers actually help beginners manage these extremes better than in-ground gardens. You can move pots into shade during July’s worst heat, bring tender plants indoors when a late freeze threatens, and water strategically without fighting compacted soil that sheds moisture.

The learning curve flattens considerably, too. With containers, you’re managing a controlled environment, one pot, one plant, clear results. When something goes wrong, you’re troubleshooting a five-gallon container, not a whole garden bed. Success builds confidence fast.

Limited space stops being a limitation. A 4×6 balcony can hold a dozen productive containers. Vertical arrangements (we’ll cover those later) multiply your growing area without expanding your footprint, perfect for Austin’s space-starved neighborhoods like East Austin or South Congress.

Bottom line: containers eliminate the barriers that stop most Austin beginners before they start. No land required, no soil amendments, no expensive tools, just pots, plants, and a spot that gets some sun.

Assorted herb and tomato containers on an Austin patio with a watering can and gardening gloves nearby.
A thriving mix of herbs and patio vegetables shows how simple container gardening can look on a small space.

What You Actually Need to Get Started

Choosing the Right Containers

The container itself matters more than most beginners realize. Size is your first decision: herbs need at least 6-8 inches of depth, leafy greens 8-10 inches, and tomatoes or peppers 12-18 inches. A container that’s too shallow forces roots to crowd, which means constant watering and stunted growth.

Drainage holes are critical without them, water pools at the bottom and roots rot within days. If you find a container you love without holes, drill them yourself or use it as an outer decorative pot with a draining liner inside.

Material affects how often you’ll water. Terra cotta looks classic but dries out fast in Austin’s heat, sometimes needing daily watering. Plastic and resin hold moisture longer and work better for busy beginners. Fabric grow bags breathe well and prevent root circling, though they’re less stable on windy balconies.

Start with containers at least 10-12 inches wide. Bigger pots hold more soil, which buffers against drying out and temperature swings, both helpful when you’re learning to read your plants’ needs.

Pots and potting mix set up on a balcony floor with a container showing drainage holes and a tray underneath.
A clear view of containers, potting mix, and proper drainage highlights the practical basics that make container gardening succeed.

The Soil Mix That Makes Everything Easier

Garden soil seems like the obvious choice, but it’s actually the worst thing you can put in a container. Regular dirt compacts when watered repeatedly, choking out air pockets your plant roots desperately need. Within weeks, you’ll have a dense, waterlogged brick that kills even the toughest plants.

Potting media for containers is specifically engineered to stay loose and fluffy. It’s lighter, drains excess water quickly, yet holds enough moisture so you’re not watering three times a day in Austin’s brutal summer heat. The mix typically contains peat moss or coir, perlite or vermiculite for drainage, and sometimes a bit of compost.

When you’re shopping at Austin garden centers, look for bags labeled “potting mix” or “container mix.” Avoid anything that says “garden soil” or “topsoil.” A quality mix feels light when you pick up the bag and springs back when you squeeze it. Brands like FoxFarm Ocean Forest or Miracle-Gro Potting Mix work well for beginners, but local nurseries often carry their own blends formulated for Central Texas conditions. Expect to pay around $12-$18 for a bag that fills several containers.

Best Plants for Your First Container Garden in Austin

Herbs That Practically Grow Themselves

Basil thrives in containers with minimal fuss, just give it six hours of sun and consistent moisture. Mint grows so aggressively you’ll actually want it confined to a pot; it tolerates partial shade and forgives occasional neglect. Rosemary handles Austin’s heat like a champ and needs surprisingly little water once established, making it perfect for forgetful beginners. Cilantro prefers cooler months (plant it in fall or early spring), but during those windows it practically explodes in containers. Parsley fills in gaps beautifully and keeps producing if you harvest outer leaves first. Start with these five, and you’ll have fresh herbs for months without drama.

Easy Vegetables for Patio Containers

Cherry tomatoes top the beginner-friendly vegetable list because they produce abundantly in containers and forgive mistakes. Choose compact varieties like ‘Patio Princess’ or ‘Tiny Tim’ for five-gallon pots, and you’ll harvest fruit within 60 days even if you forget to water occasionally. Bell peppers and jalapeños handle Austin’s summer heat beautifully in containers and need less frequent watering than tomatoes, making them perfect for weekday warriors who can’t tend plants daily.

Lettuce and spinach work surprisingly well in shallow containers on shaded patios during Austin’s spring and fall months. Plant them in March or October, give them morning sun only, and you’ll cut fresh salad greens for weeks. Bush beans produce heavily in deep pots without staking, and radishes grow so fast in containers that kids love watching them, sprouting in just three days and ready to harvest in 25.

Low-Maintenance Flowers and Greens

For flowers, zinnias and purslane laugh at Austin’s summer heat and keep blooming without fuss. Zinnias come in bright colors and need only occasional deadheading to look their best. Purslane spreads cheerfully across container edges with tiny blooms in pink, yellow, or orange, and it actually prefers dry conditions between waterings.

Ornamental sweet potato vines add dramatic trailing foliage in chartreuse or deep purple without requiring any bloom care. Dusty miller offers silvery texture that complements other plants and tolerates both heat and neglect. For a pop of color with zero drama, lantana thrives in containers, attracts butterflies, and flowers reliably through Austin’s long summers. All of these handle full sun, forgive missed waterings, and keep your patio looking intentional with minimal effort from you.

Your First Planting: Step-by-Step

You’ve got your container, your potting mix, and your plant. Now comes the fun part, actually putting everything together. This isn’t complicated, and you can’t really mess it up as long as you follow a few basic steps.

Here’s exactly how to plant your first container:

  1. Check that your container has drainage holes in the bottom. If it doesn’t, drill a few or choose a different pot.
  2. Fill the container about two-thirds full with fresh potting mix. Don’t pack it down, leave it loose and fluffy.
  3. Remove your plant gently from its nursery pot by squeezing the sides and tipping it upside down into your hand.
  4. Loosen the roots slightly with your fingers if they’re circling tightly around the root ball. This helps them spread into the new soil.
  5. Place the plant in the center of your container so the top of the root ball sits about an inch below the rim.
  6. Fill in around the plant with more potting mix, gently pressing it down to eliminate air pockets but not compacting it hard.
  7. Water thoroughly until you see water draining from the bottom holes. This settles the soil and gives your plant a good drink.

That’s it. Your container garden is officially planted.

Give the soil surface a light press with your palm to make sure the plant feels stable. If it wobbles, add a bit more mix around the base. The soil will settle slightly over the next few days, which is normal.

After that first watering, place your container in its permanent spot, whether that’s a sunny patio corner or a shaded balcony ledge. Moving a heavy, wet container later is harder than you’d think, so choose wisely now.

For those following organic garden tips you can skip synthetic fertilizers and stick with compost-based potting mixes and organic feeds from the start. Your plants won’t know the difference, and you’ll build healthier soil over time.

The first few days after planting, check the soil moisture daily by sticking your finger an inch deep. You’re learning your plant’s rhythm, and that takes a week or two of paying attention.

Keeping Your Container Garden Alive and Thriving

Watering Without Overdoing It

The difference between thriving plants and dead ones often comes down to watering correctly. In Austin’s brutal summer heat, containers dry out faster than you’d expect, but dumping water on them daily drowns roots just as fast as neglect kills them.

The finger test beats any schedule. Push your finger two inches into the soil, if it feels dry at that depth, water until it runs from the drainage holes. If it’s still moist, wait. During Austin’s peak summer months, you’ll likely water daily or every other day, but spring and fall might need just twice weekly. Morning watering works best since midday evaporation wastes water and evening moisture invites pests.

Containers need deep, thorough watering rather than frequent light sprinkles. When you water, soak the entire root zone until excess drains out the bottom. This flushes salts and encourages roots to grow deep, which helps keep plants alive through Austin’s 100-degree afternoons. If water runs straight through without soaking in, your soil has become hydrophobic, set the pot in a tray of water for 20 minutes to rehydrate it properly.

Close-up of rosemary and pepper plants in sunlit containers with rich potting mix after watering.
Close-up sunlight and rich potting mix illustrate how container plants can thrive with the right watering routine and care.

Simple Feeding Schedule

Container plants eat through nutrients faster than in-ground gardens because every watering leaches minerals from the limited soil. Feed your plants every two weeks during the growing season with a balanced liquid fertilizer diluted to half the package strength. That’s it.

Start fertilizing about a month after planting, once your seedlings have settled in. In Austin’s intense summer heat, your containers dry out quickly and lose nutrients even faster, so consistency matters more than precision. Mix the fertilizer with water in your watering can rather than applying it separately, it saves time and reduces the risk of burning roots.

Stop feeding in late fall when growth naturally slows. Your plants will tell you if they’re hungry: pale leaves, slow growth, or fewer flowers mean it’s time to feed. If they’re thriving, stick with your schedule and don’t overfeed, more fertilizer doesn’t mean bigger plants, just wasted money and potentially damaged roots.

Finding the Right Sunlight Spot

Observe your patio or balcony at different times throughout the day to see where sunlight hits and for how long. Morning sun is gentler, while afternoon sun in Austin can be intense and hot. Full sun means six-plus hours of direct sunlight, partial sun is four to six hours, and shade is less than four. Most vegetables and herbs need full sun, but leafy greens and many flowers do fine with partial sun. If your space only gets morning light or filtered afternoon shade, choose shade-tolerant plants like lettuce, coleus, or begonias instead of fighting your conditions.

Vertical Container Solutions for Tight Spaces

When you’re working with a small balcony or patio, going vertical changes everything. You don’t need more floor space to grow more plants, you just need to think upward.

Stacking containers on tiered plant stands gives you three or four levels of growing space in the same footprint as one pot. These stands work beautifully for herbs and small vegetables, and you can find them at any Austin garden center for $20 to $40. Place taller plants on the bottom tier where they won’t shade shorter ones above.

Wall-mounted planters and hanging containers free up your floor entirely. Attach railing planters to balcony edges for herbs like basil and cilantro, or hang lightweight pots from hooks to grow trailing plants like cherry tomatoes. Just make sure your hanging containers have drainage saucers if they’re over walkways.

Trellises and vertical frames turn climbing plants into living walls. Pole beans, sugar snap peas, and even small cucumbers thrive when grown vertically in containers, and they’re perfect for the Austin gardening zone if you plant them in spring or fall. A simple bamboo trellis costs less than $10 and doubles your growing capacity.

Vertical gardening also improves air circulation around your plants, which helps prevent disease in Austin’s humid summers. Start with one vertical element this week, a tiered stand or a few hanging baskets, and you’ll immediately see how much more you can grow.

Local Resources and Free Learning Opportunities

Austin’s gardening community offers hands-on support that makes starting your container garden much easier. The Texas AgriLife Extension hosts free container gardening workshops throughout the year, and there’s one happening this month on Wednesday, June 17th from 3:00 to 5:00 PM at the Mel Lloyd Centre (167 Centre St, Entrance F). These sessions give you a chance to ask questions and see techniques demonstrated in person, which beats reading alone every time.

For supplies and advice, local spots like The Natural Gardener, Barton Springs Nursery, and Shoal Creek Nursery employ staff who actually garden in Austin’s climate. They can steer you toward plants that work here and away from expensive mistakes. Many community gardens around town, including Sunshine Community Gardens and Zilker Botanical Garden, welcome beginners at volunteer days where you’ll pick up practical skills alongside experienced gardeners.

If you get hooked on container growing, you might eventually want to grow indoors during our cooler months to keep harvesting year-round. The Austin Public Library system also offers free gardening workshops and maintains a solid collection of container gardening books you can check out before buying. Starting with these free and local resources means you’ll have real support as you figure out what works on your own patio.

You don’t need a huge backyard or years of experience to grow your own food and flowers. Container gardening for beginners really is as simple as choosing a few pots, adding quality soil, and starting with easy plants that forgive mistakes. This week, grab a container, pick up some basil or cherry tomatoes, and get your hands dirty. You’ll be surprised how quickly you see results.

If you want hands-on guidance as you start your container garden, Gardens Austin Designers offers personalized consultations and workshops designed specifically for Austin gardeners. Whether you need help choosing the right setup for your balcony or want to learn vertical gardening techniques that maximize your space, our team brings years of local expertise to help you succeed. We make container gardening approachable, fun, and perfectly suited to your unique outdoor space. Start small, start now, and watch your confidence grow along with your plants.